35$ Buy it now!
Compatibility
PrestaShop 1.7.x – 8.x
Video
https://youtu.be/20Kq5j-edeY
Download documentation
Custom product labels.pdf
Objective
Enhance your product images with custom labels and stickers, making them more appealing and informative to potential buyers. These labels can convey various information such as discounts, new arrivals, bestsellers, and more, ultimately attracting visitors and boosting your sales.
Benefits for Merchants
- Access an informative admin page that lists all created labels and allows you to quickly filter, disable, or delete them.
- Create an unlimited number of labels with unique settings.
- Utilize four conditions for displaying labels:
- Special Offer – for all discounted products
- New Products – for recently added items
- Best Sellers – showcasing top-selling products
- Manual Products – manually select specific products for labeling
- Disable the display of standard PrestaShop stickers.
- Configure settings separately for each language:
- Ability to disable label display for a specific language.
- Choose an icon type (no icon, select from standard options, upload your custom image, or use Font Awesome icons with over 700 choices).
- Add any desired text.
- Choose a label position (any corner or center).
- Customize label styles to align with your branding.
Benefits for Customers
- Enjoy an attractive product presentation with up-to-date labels indicating sales and more.
- Easily filter products using labels and stickers, particularly those with discounts.
- Experience a dynamic and personalized shopping environment.
Features
- Admins can design unique label styles and stickers, customizing their location, fonts, sizes, Font Awesome icons, and custom image uploads.
- Flexible language settings to cater to diverse customer bases.
Module Settings
General Settings:
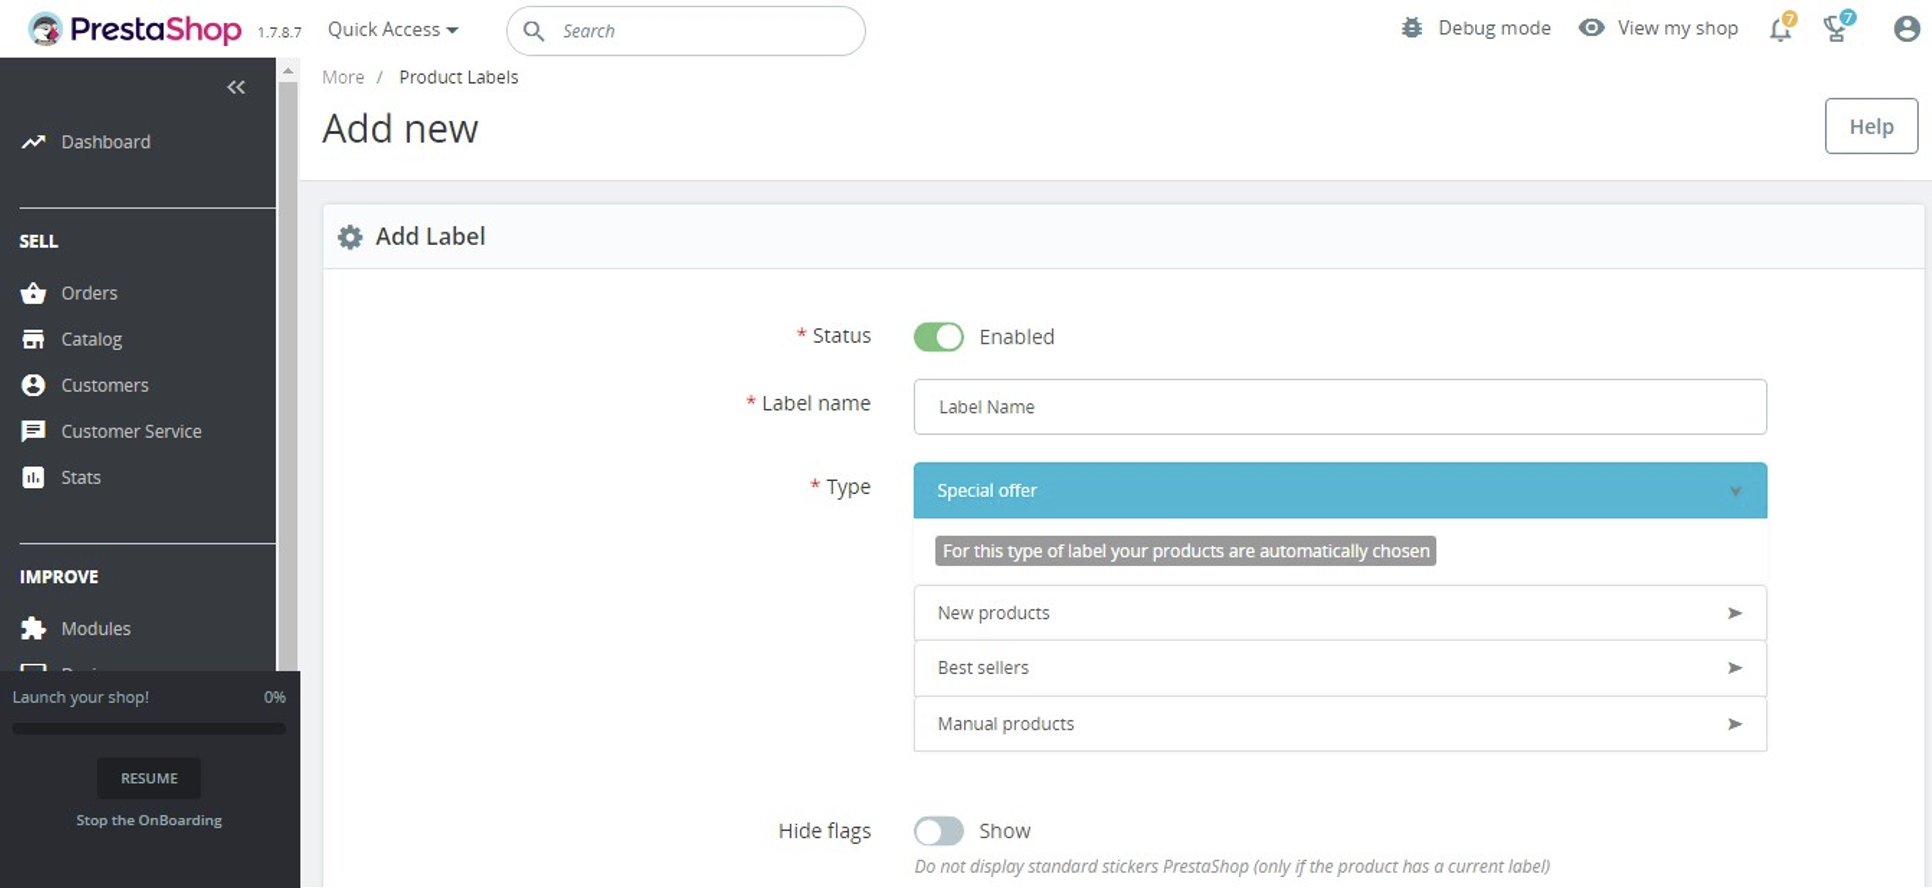
- Status – Indicates the label’s status; when disabled, it won’t be displayed, but all settings will be retained.
- Label Name – Assign a label name for internal identification within the admin panel.
- Type – Specify the conditions for displaying the label (explained below).
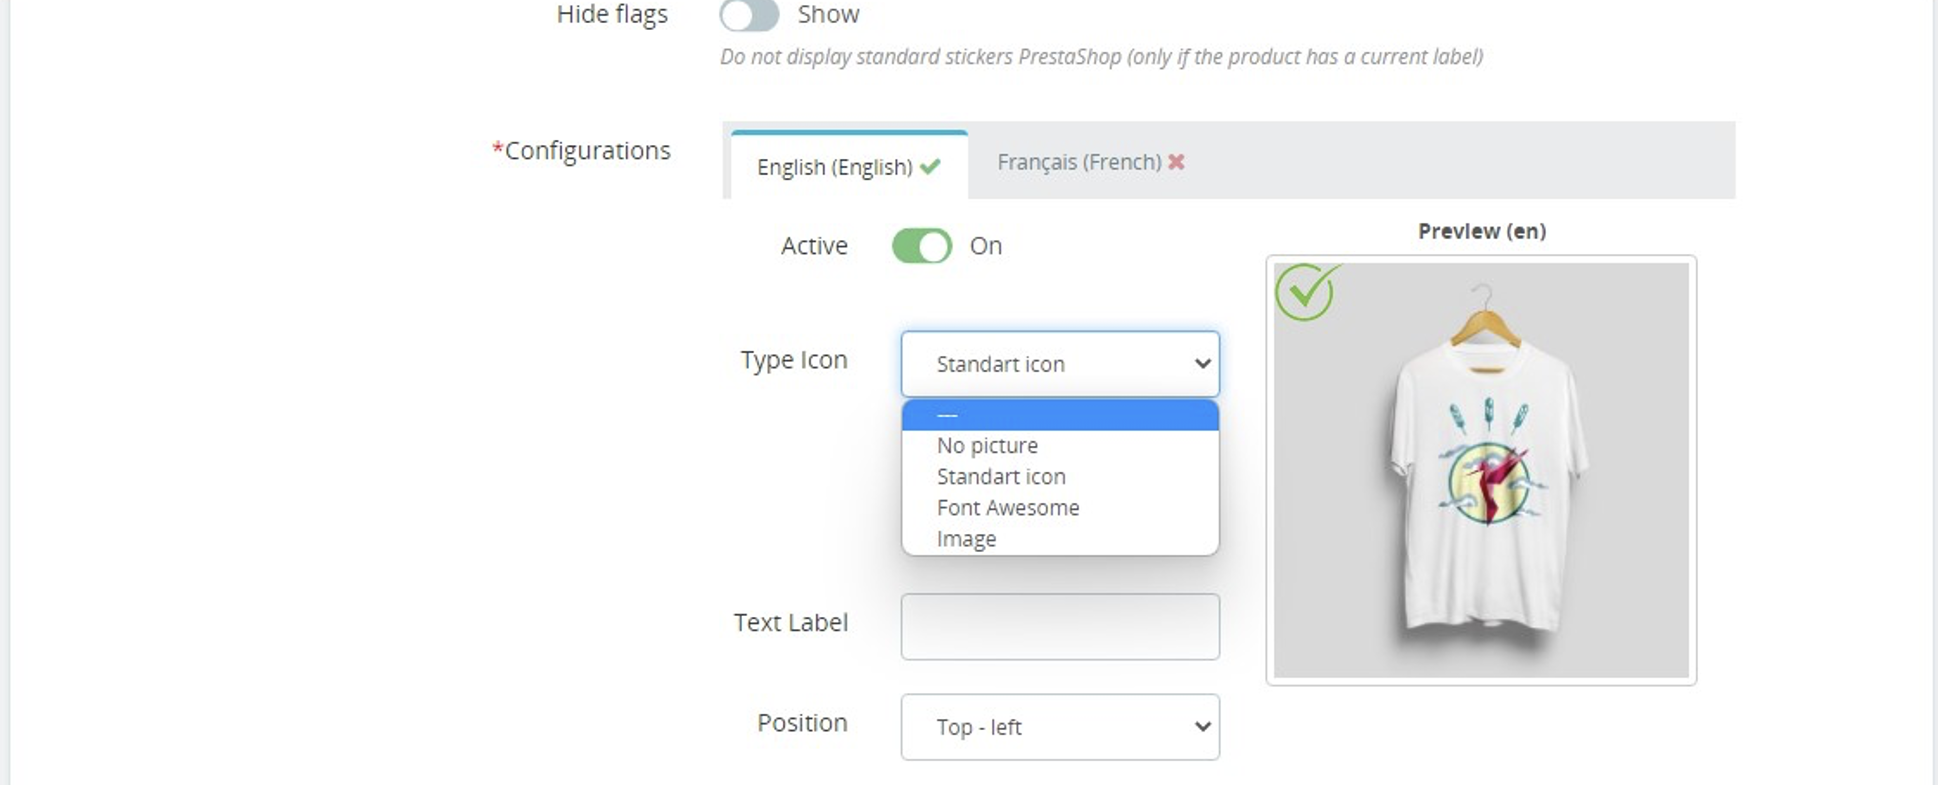
- Hide Flags – Choose whether to hide or show standard PrestaShop stickers (applies only when the current label is displayed on the product).
- Type “Special Offer” – No additional settings are required; products will be selected automatically.
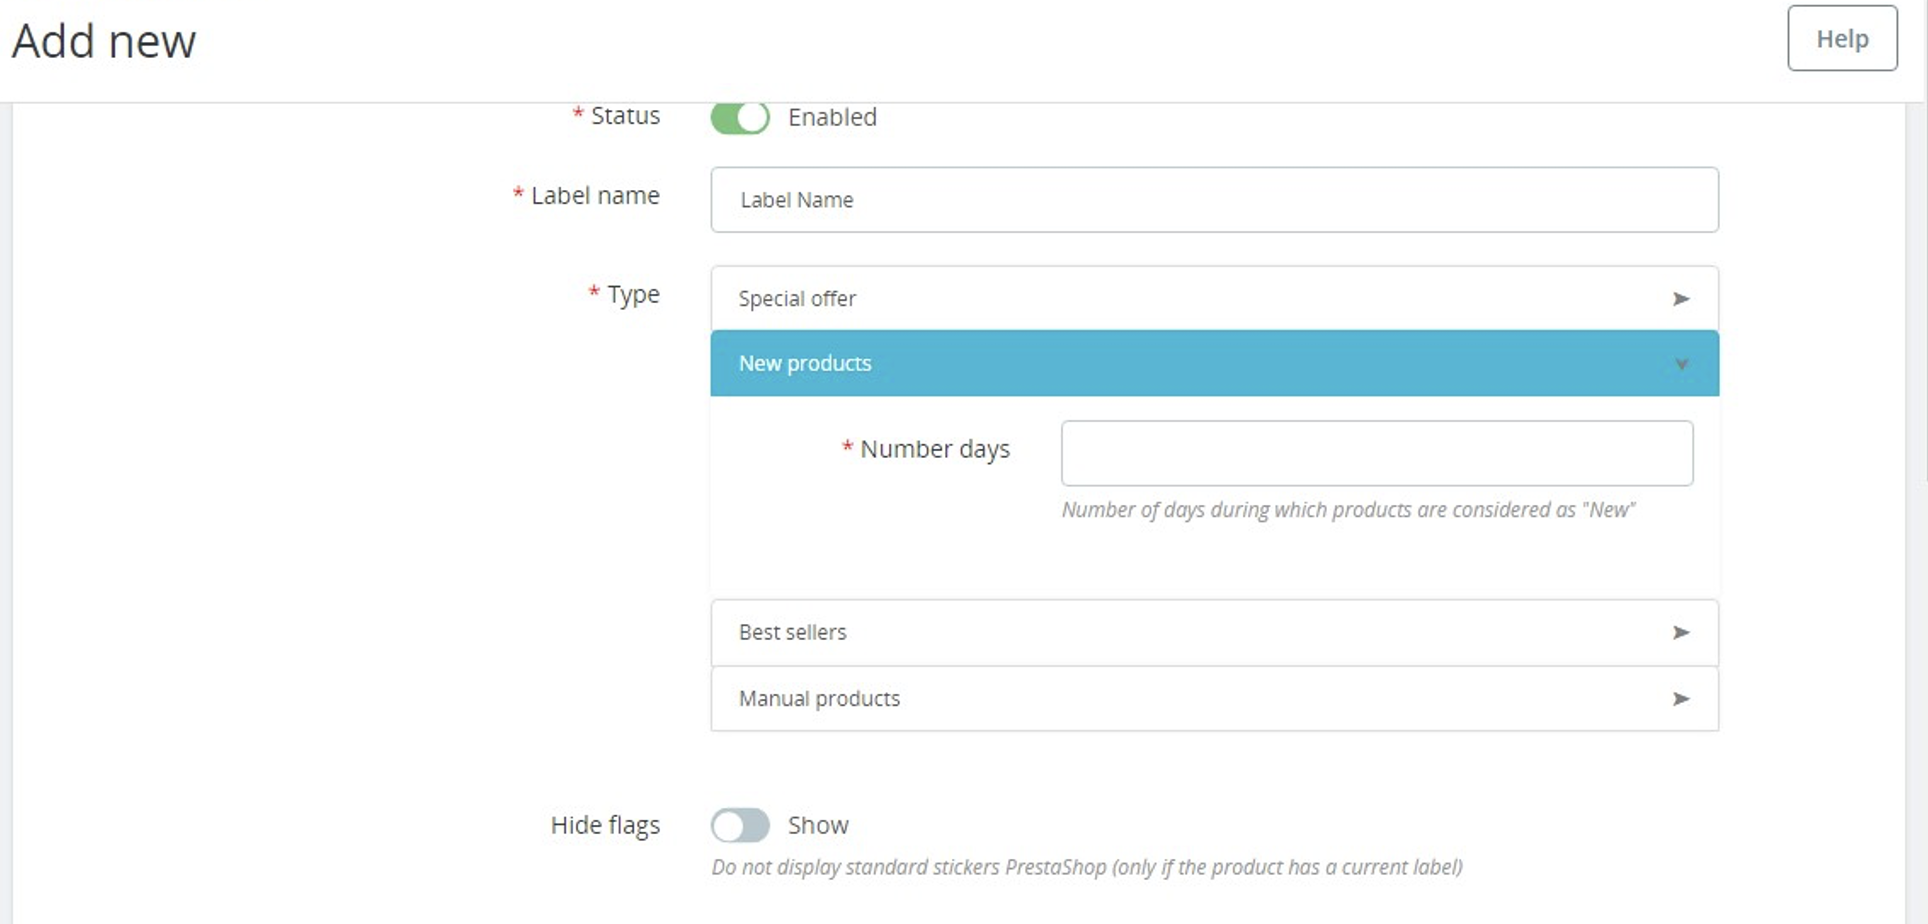
Type “New Products”:
Number of Days – Specify the number of days a product remains classified as new (calculated from the current day and minus the specified days).
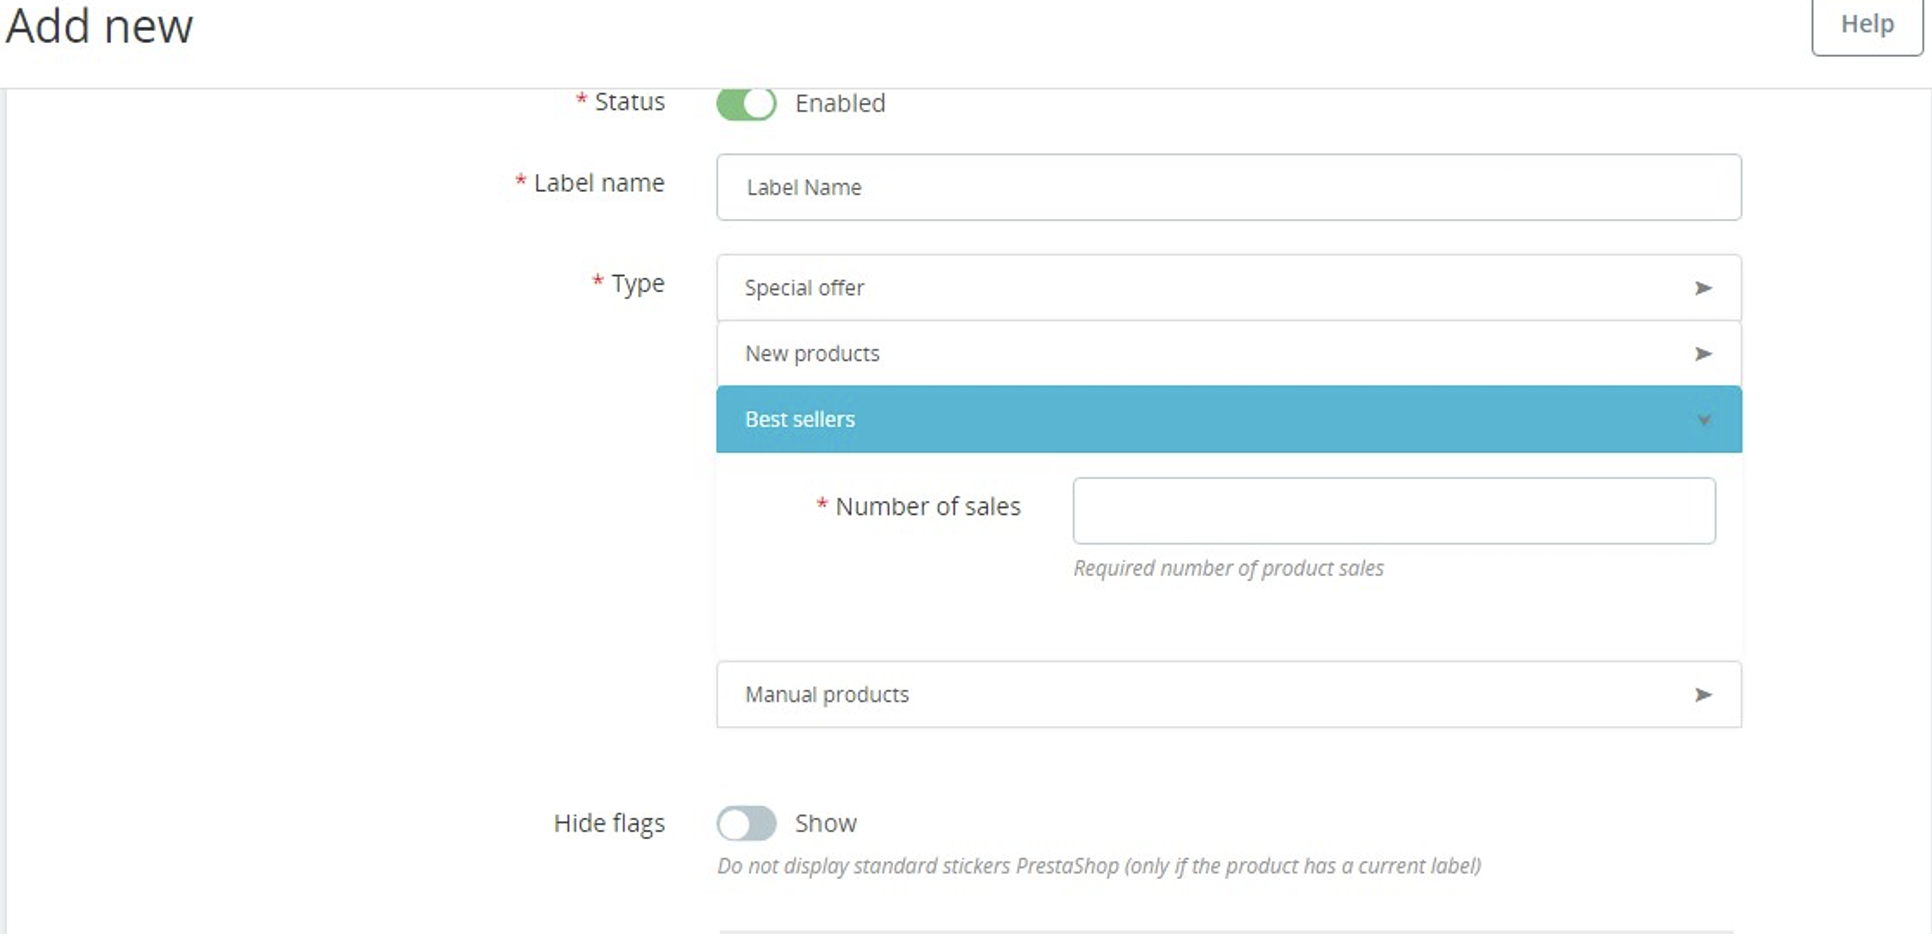
Type “Best Sellers”:
Number of Sales – Set the minimum product sales required to display the label (calculated for the entire period).
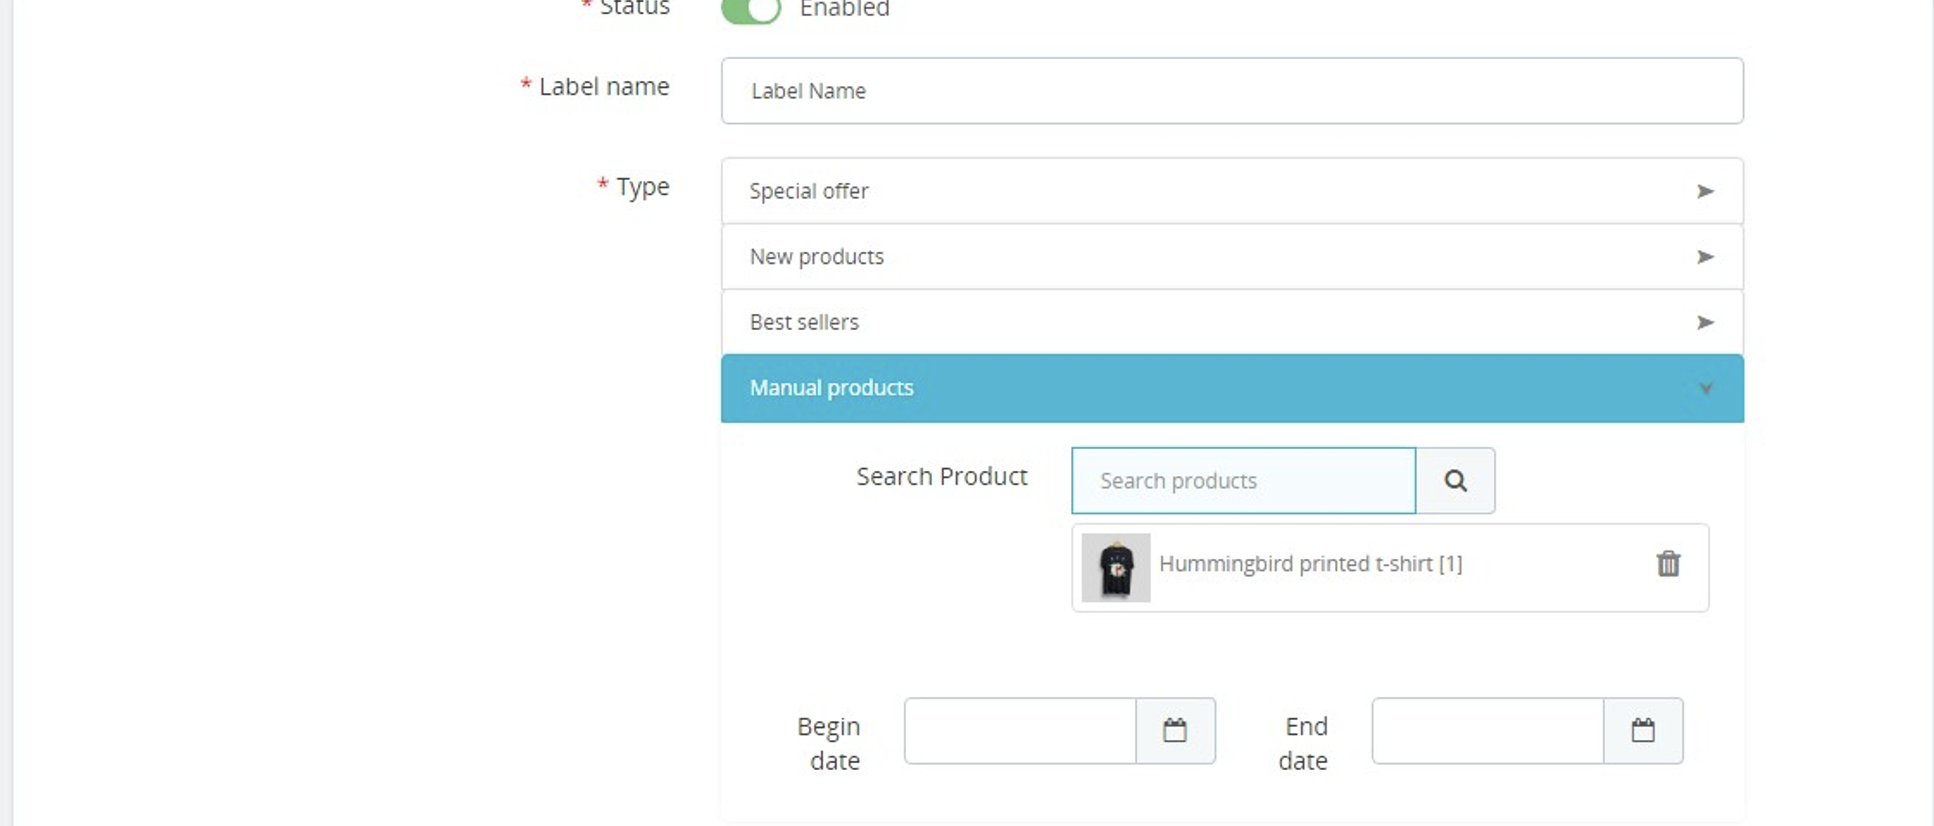
Type “Manual Products”:
Search for a Product – Utilize the dropdown list to search for a product by name, link, category, or manufacturer.
Start Date – Specify the date from which the label will be displayed (or leave as “0000-00-00” to disregard).
End Date – Determine the end date after which the label won’t be displayed (or leave as “0000-00-00” to disregard).
Appearance Settings:
Configurations – Choose the language for which the appearance will be configured.
Active – Enable or disable the label for the selected language.
Type Icon – Select the type of icon to display:
- No Picture – No icon
- Standard Icon – Choose from standard icons provided by the module
- Font Awesome – Select an icon from the Font Awesome library
- Image – Upload your image (supported formats: JPG, GIF, PNG)
Text Label – Enter your preferred text for the label.
Position – Choose where the label will be displayed on the photo:
- Top – Left – Upper left corner
- Top – Right – Upper right corner
- Bottom – Left – Lower left corner
- Bottom – Right – Lower right corner
- Center – At the center
Style Settings:
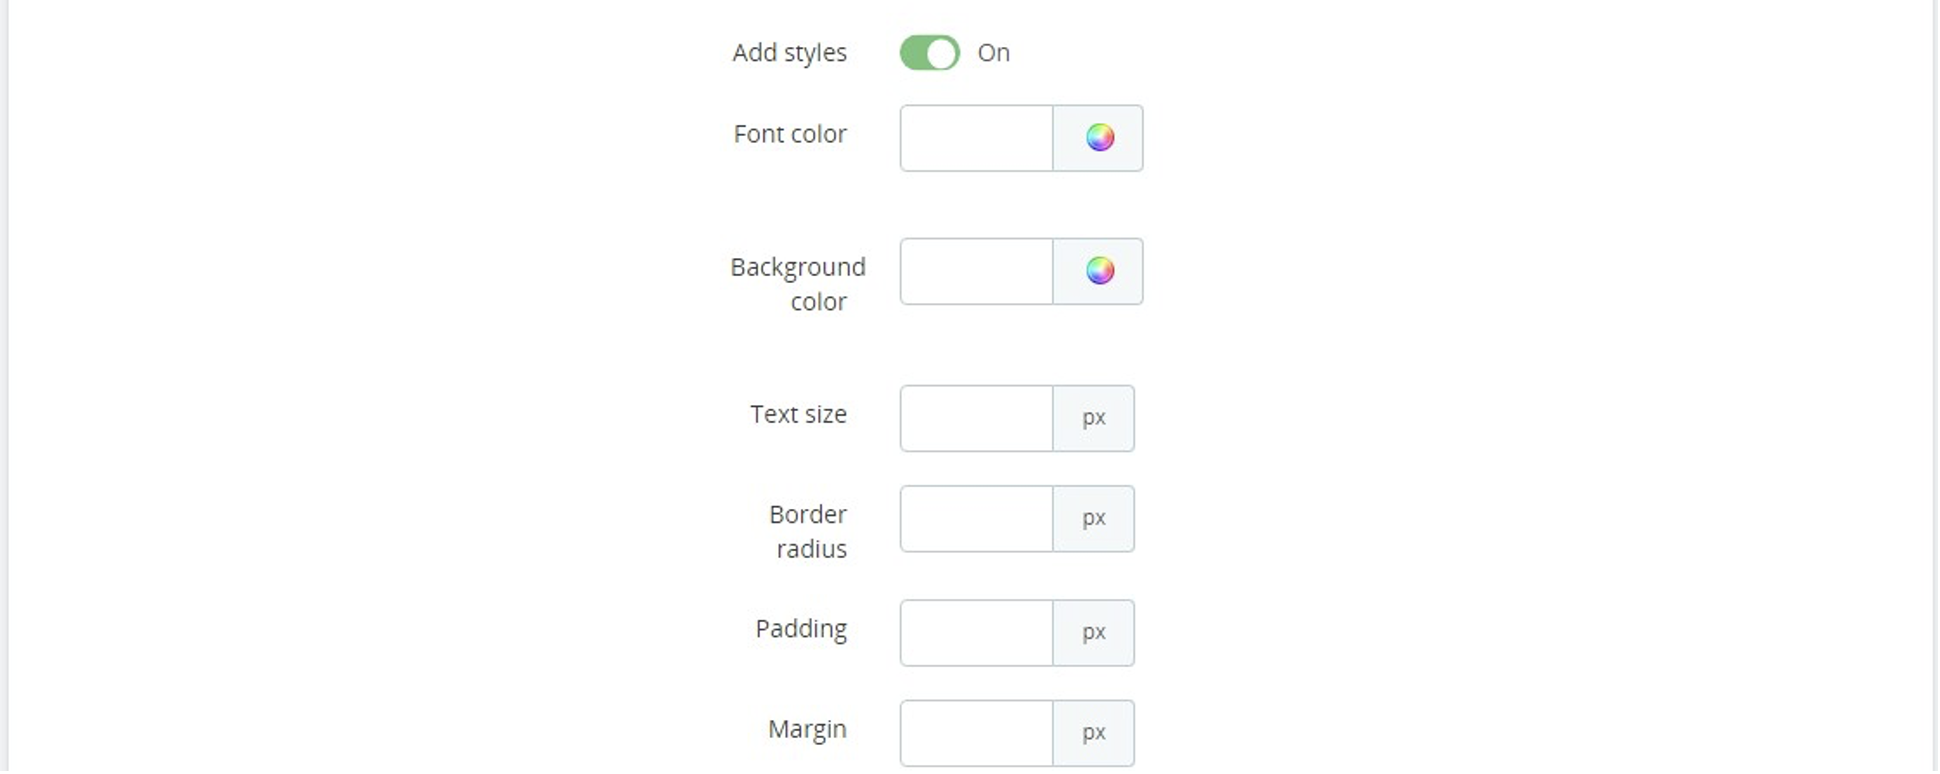
Add Style – Toggle to show or hide fields for customizing unique styles.
Font Color – Color for Font Awesome icons and text.
Background Color – Background color.
Text Size – Font size for Font Awesome icons and text (in pixels).
Border Radius – Corner radius of the block (in pixels).
Padding – Internal spacing between label content and its border (in pixels).
Margin – External distance from the labels to the product image borders (in pixels).
Installation:
- Upload the module through the Backoffice (Modules > Add New Module) or using an FTP client.
- Install it and access the configuration settings.
Video
Watch the video
35$ Buy it now!
