
35$ Buy it now!
Product Compatibility
Compatible with PrestaShop versions 1.7.6.5 – 8.x.
Download Documentation
Read the User Manual
Video:
https://youtu.be/a0KdLLlgs-o
Purpose
Google Passkeys offer a secure and convenient alternative to traditional passwords. Both users and administrators can log in using biometric sensors like fingerprints or facial recognition, PIN codes, or patterns, eliminating the need to remember and manage passwords.
Benefits for Merchants
- Enhanced security and reliability with Google Passkeys
- No dependency on Google accounts
- Convenient biometric sensor (e.g., fingerprint and facial recognition) or PIN code login
- Works across Android, iOS, Windows, and other devices with biometric sensors or PIN support
- Optimized site usability, enabling quick and easy customer logins
- Eradicates login and password retrieval issues for customers
- Administrators and store managers can easily access the admin panel
Benefits for Customers
- No more hassle of remembering login credentials
- Quick and straightforward account authorization process
Key Features
- Creation of Google Passkeys for both customers and administrators
- Authorization using Google Passkeys
- Biometric sensor (e.g., fingerprint and facial recognition) or PIN code login
- Admins and managers can use Passkeys for authorization
- Creating a Paykey by Users (Customers)
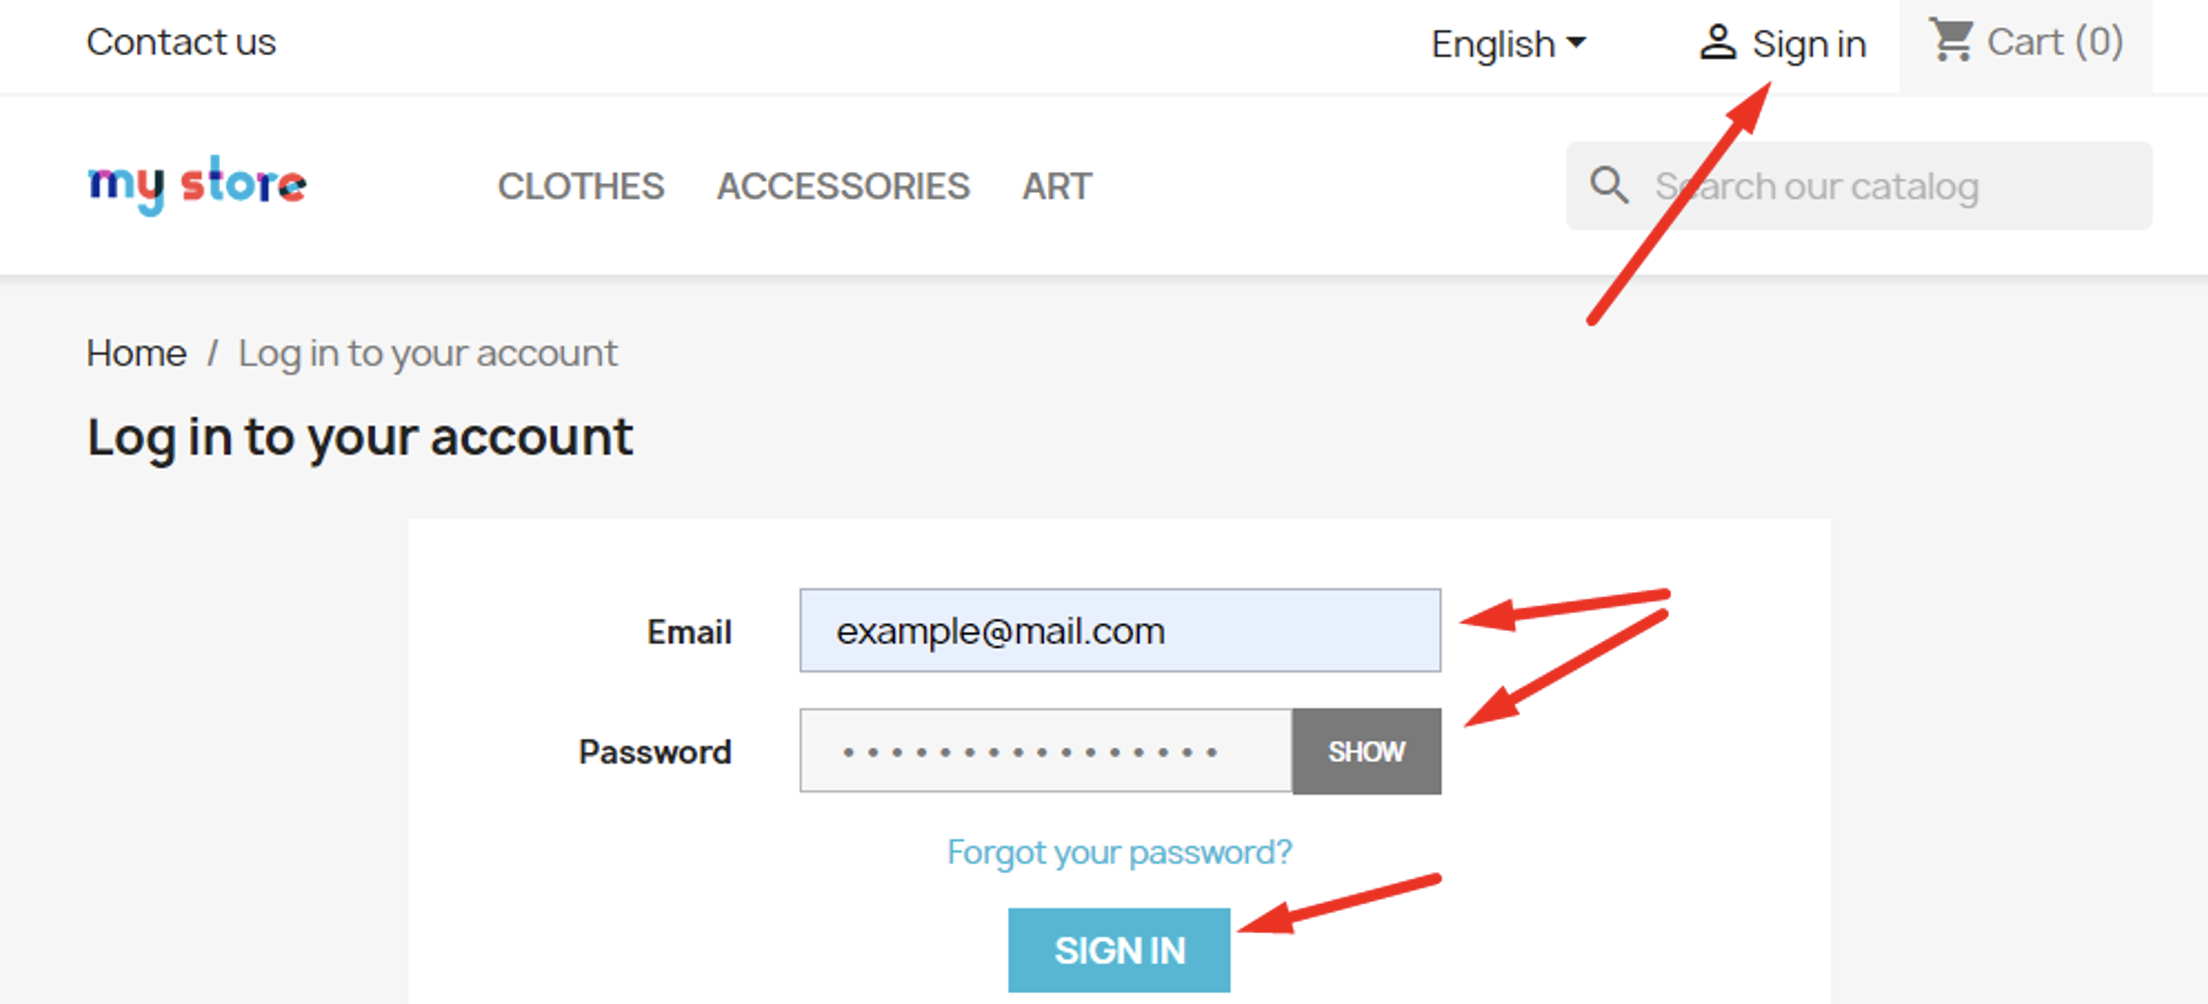
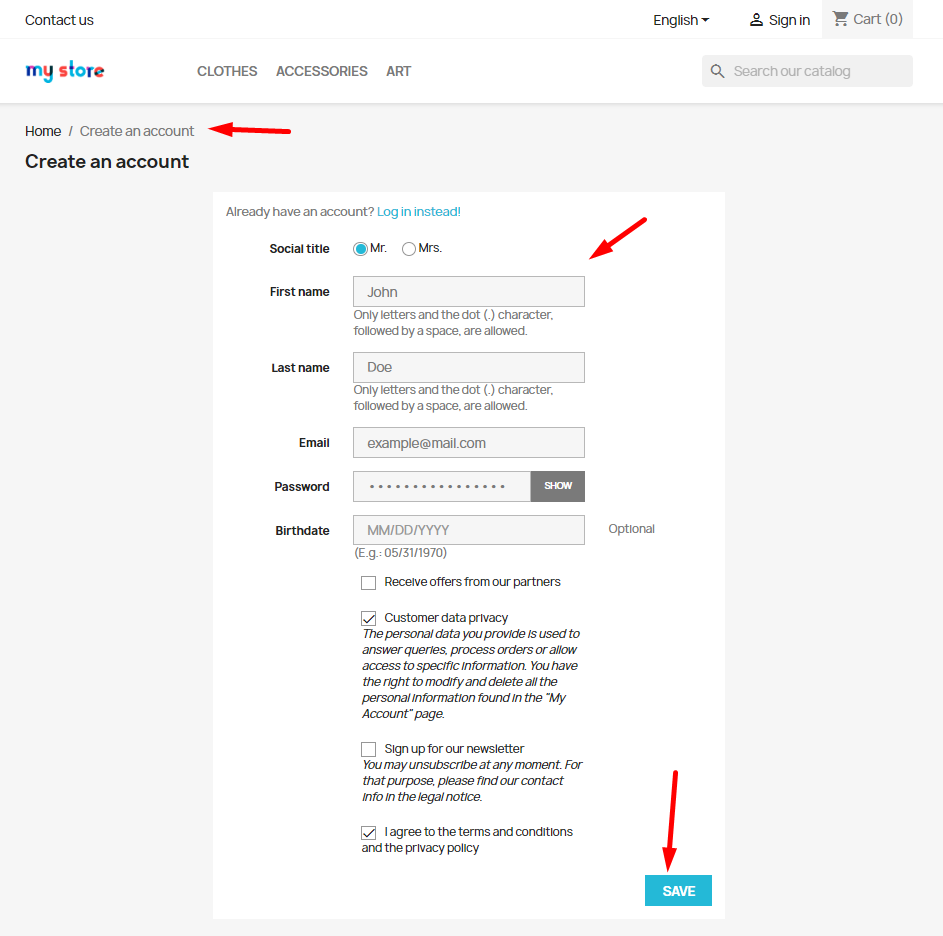
Begin by creating a new account or logging in with your existing credentials, entering your login and password.
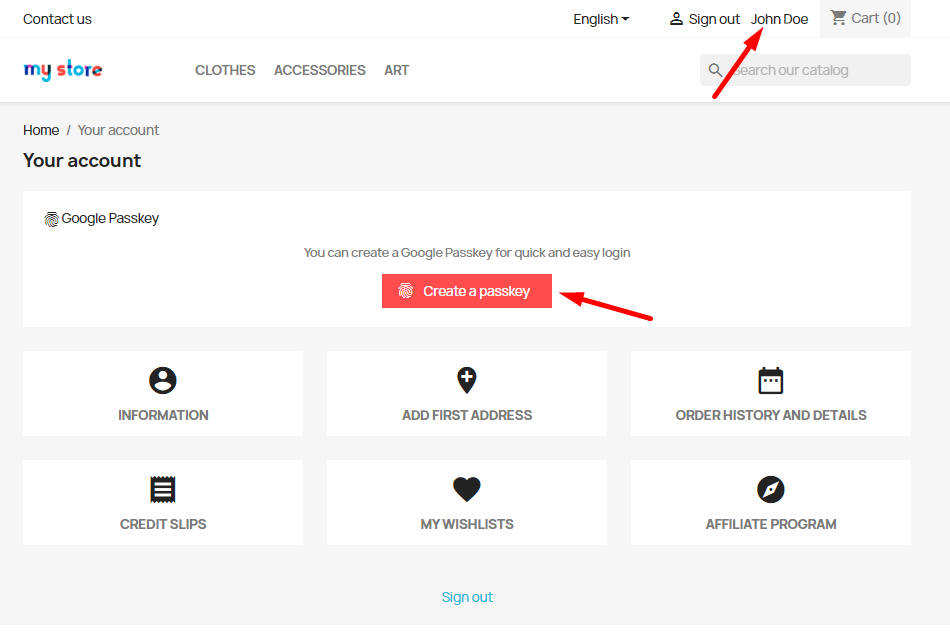
Navigate to your user account and click on the “Create a Passkey” button:
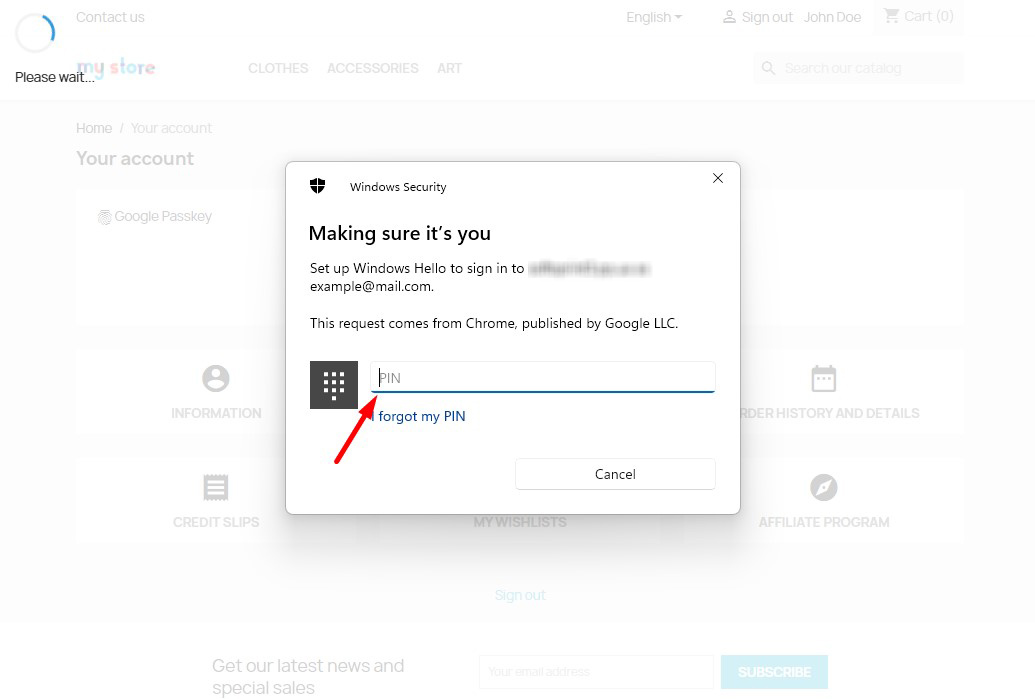
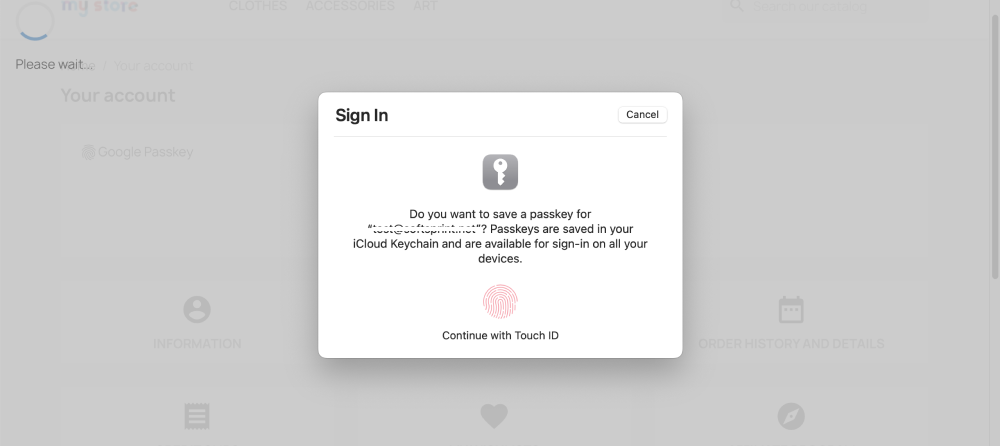
Use the configured authorization method on your device (e.g., Windows OS in the example below):
Once completed, the Passkey will be generated and displayed in the table below the button:
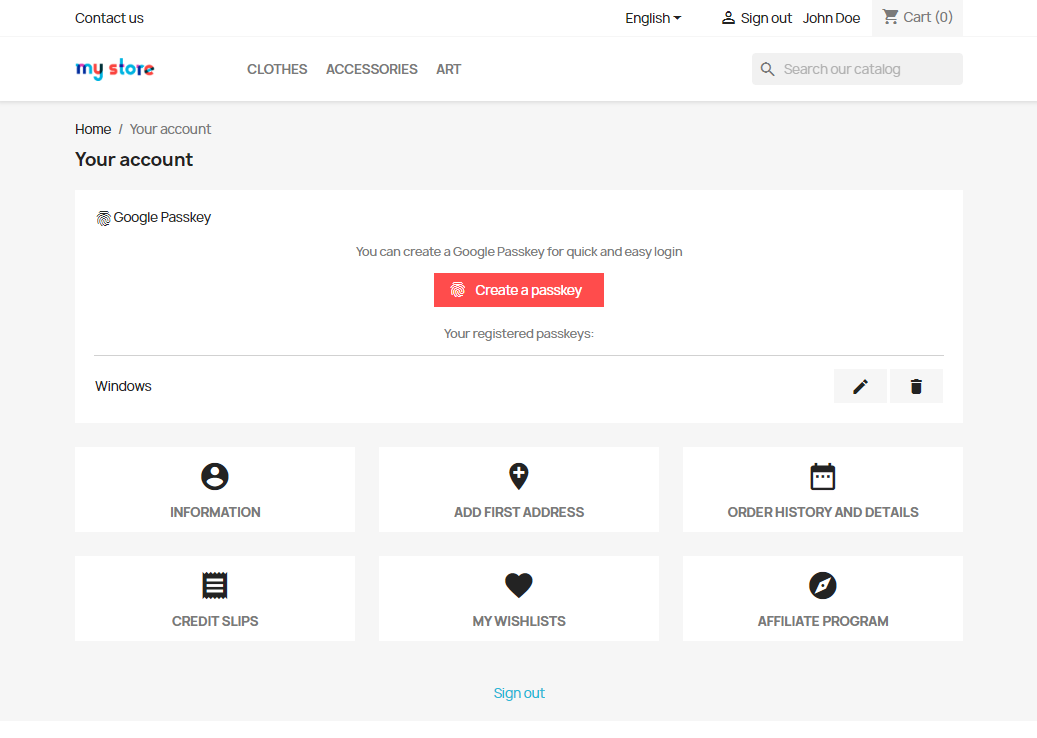
You can rename or delete a Passkey using the edit or delete buttons:

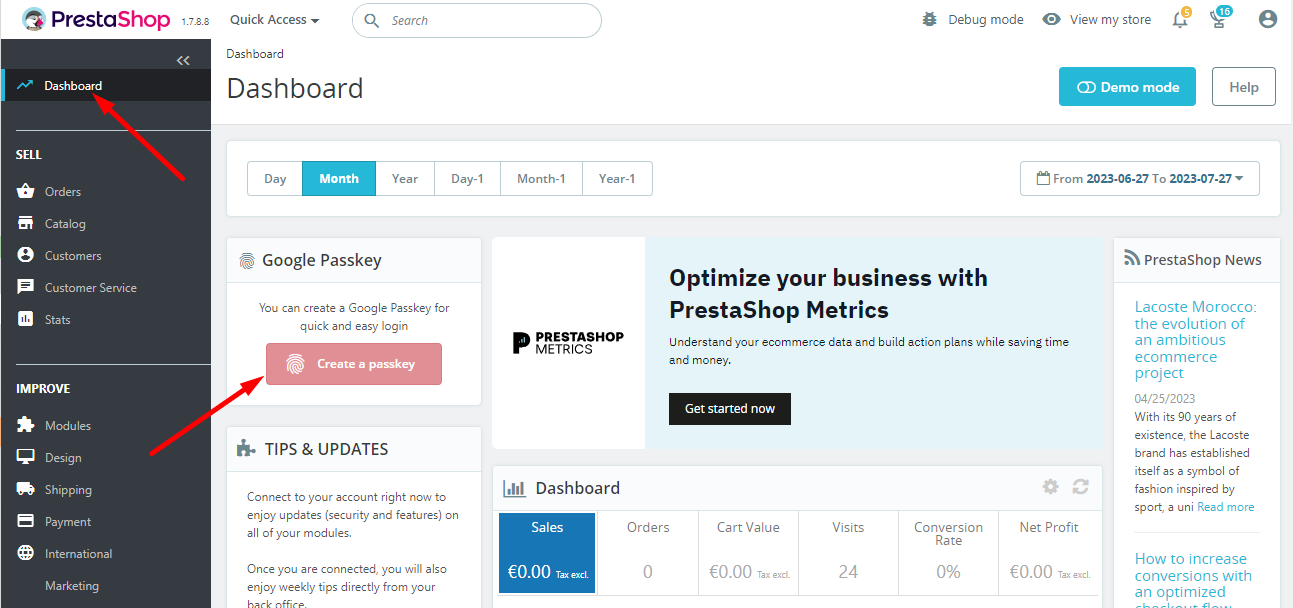
- Creating a Key for Administrators
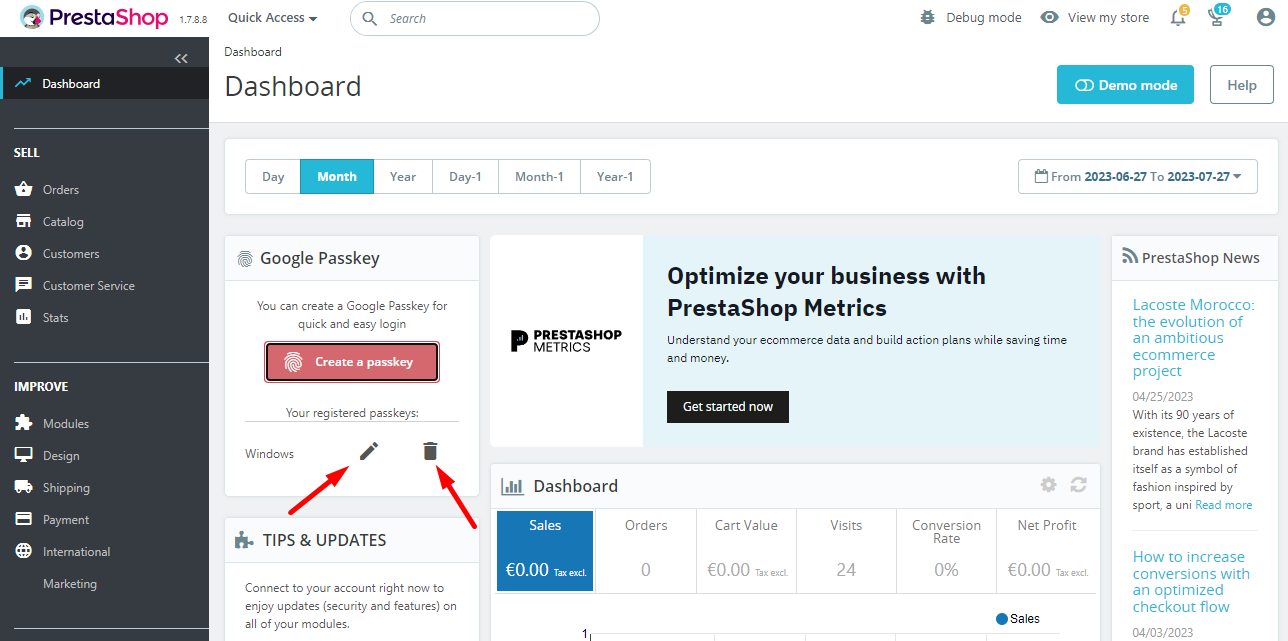
In the admin panel, go to the Dashboard page and click on the “Create a Passkey” button:
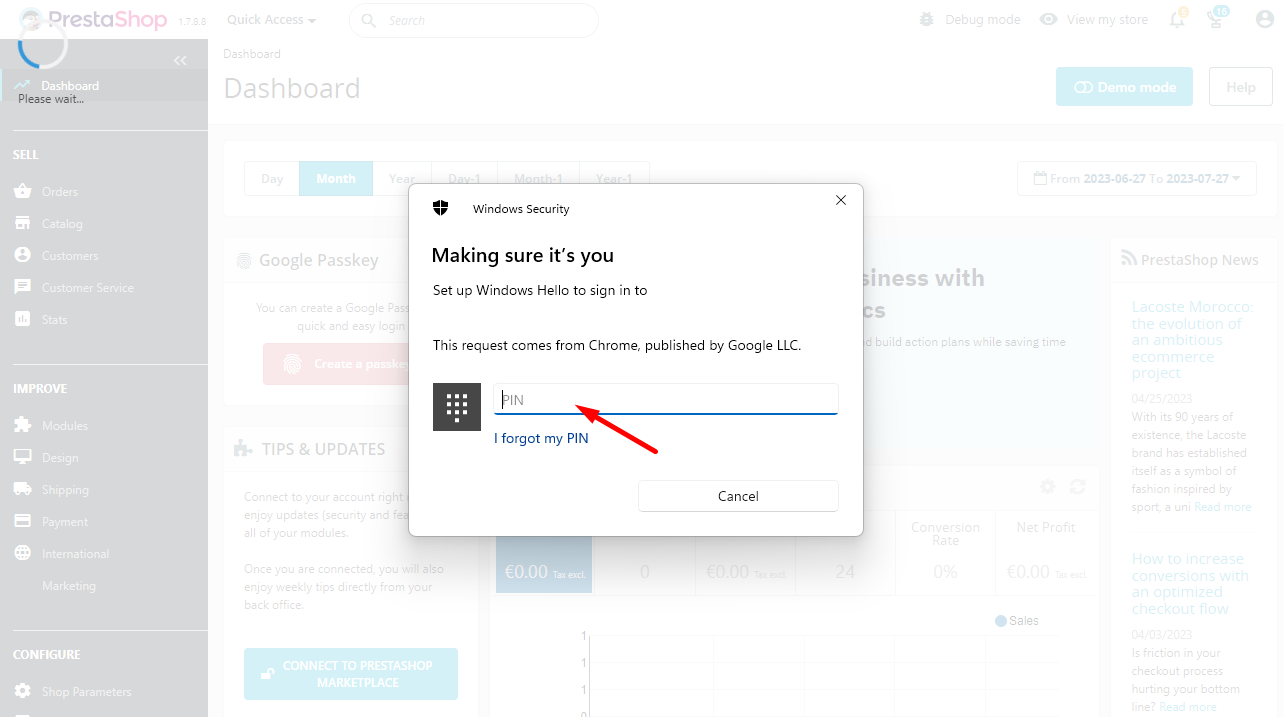
Use the configured authorization method on your device:
Once completed, the key will be generated and displayed in the table below the button:
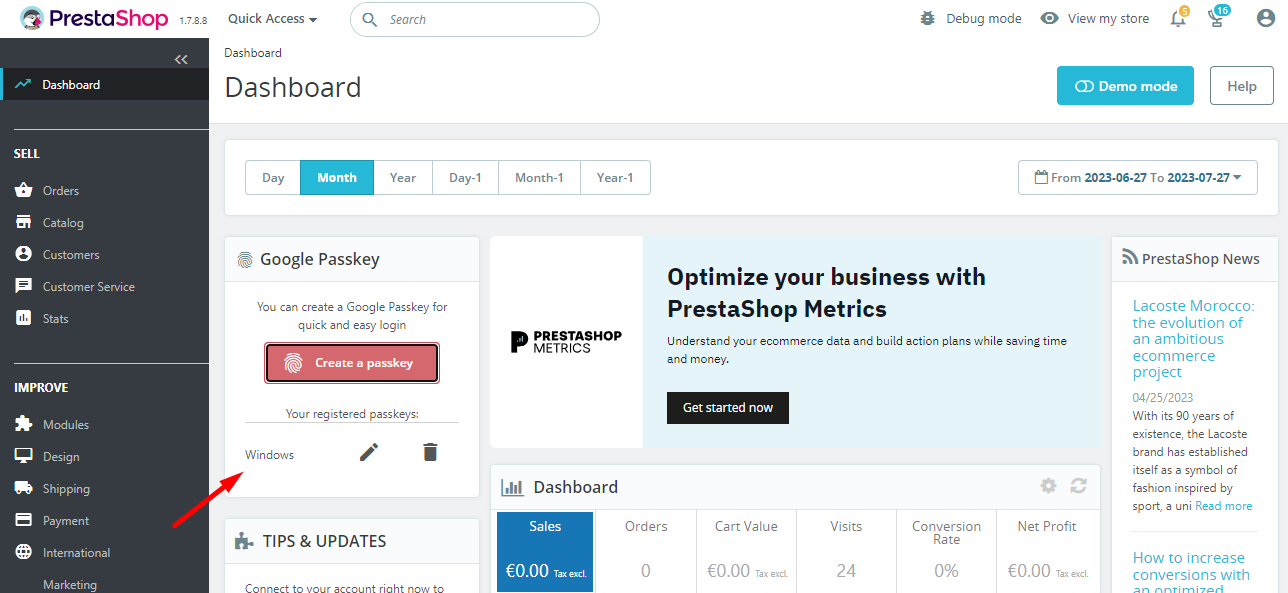
You can rename or delete a key using the edit or delete buttons:
- Authorization using Google Passkey
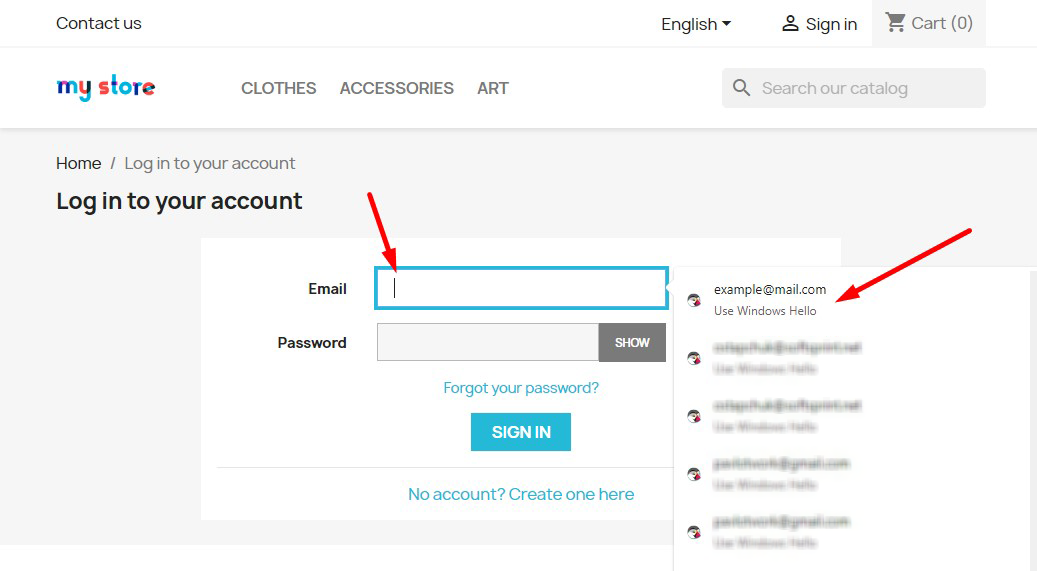
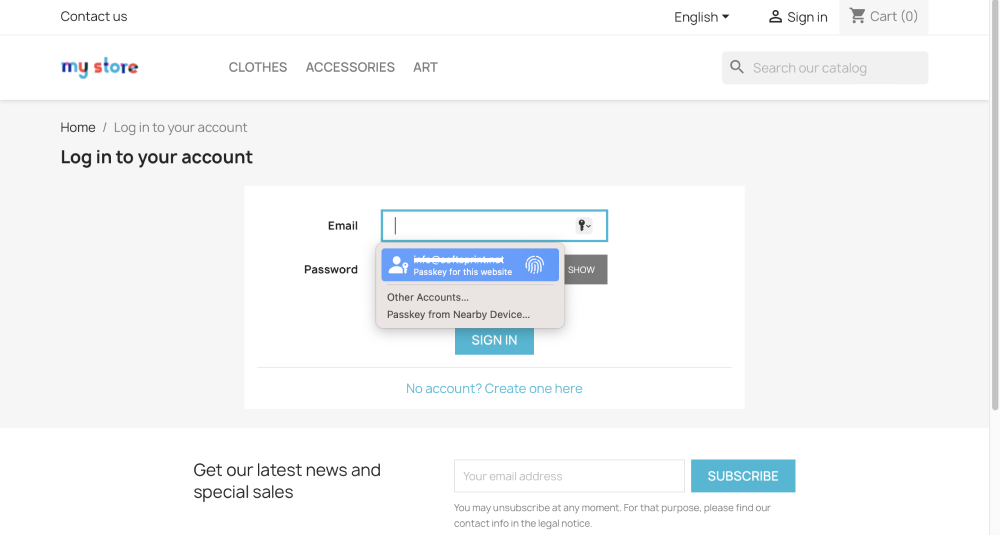
Go to the page with the authorization form and click on the Email input field. A list of saved options for authorization will appear, including Google Passkey – click on it:
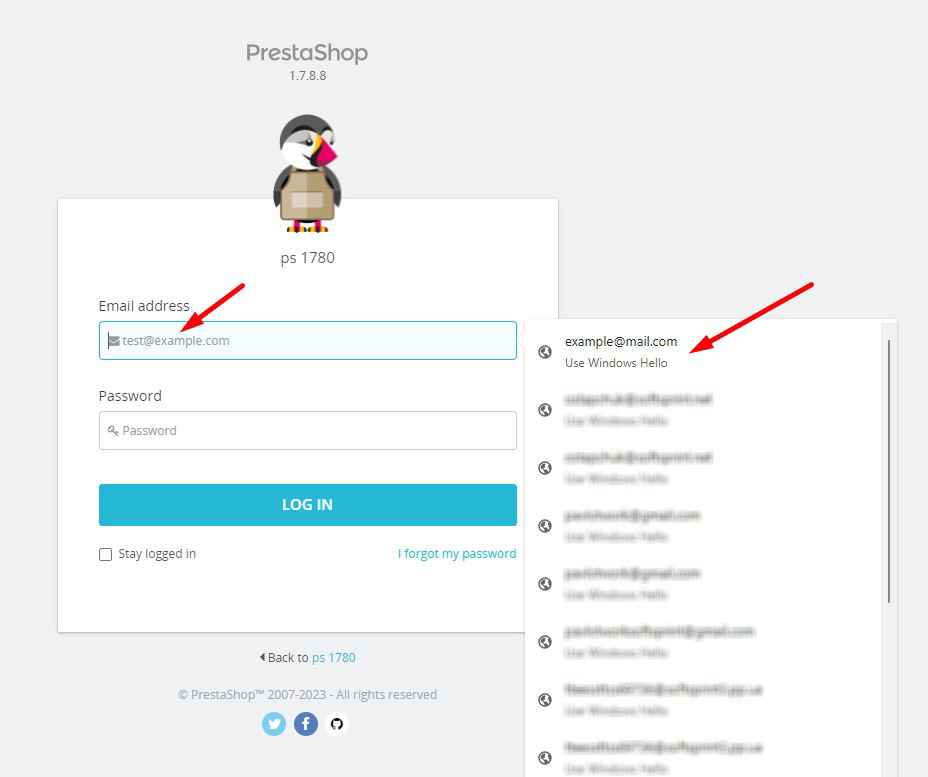
Use the authorization method configured on your device:
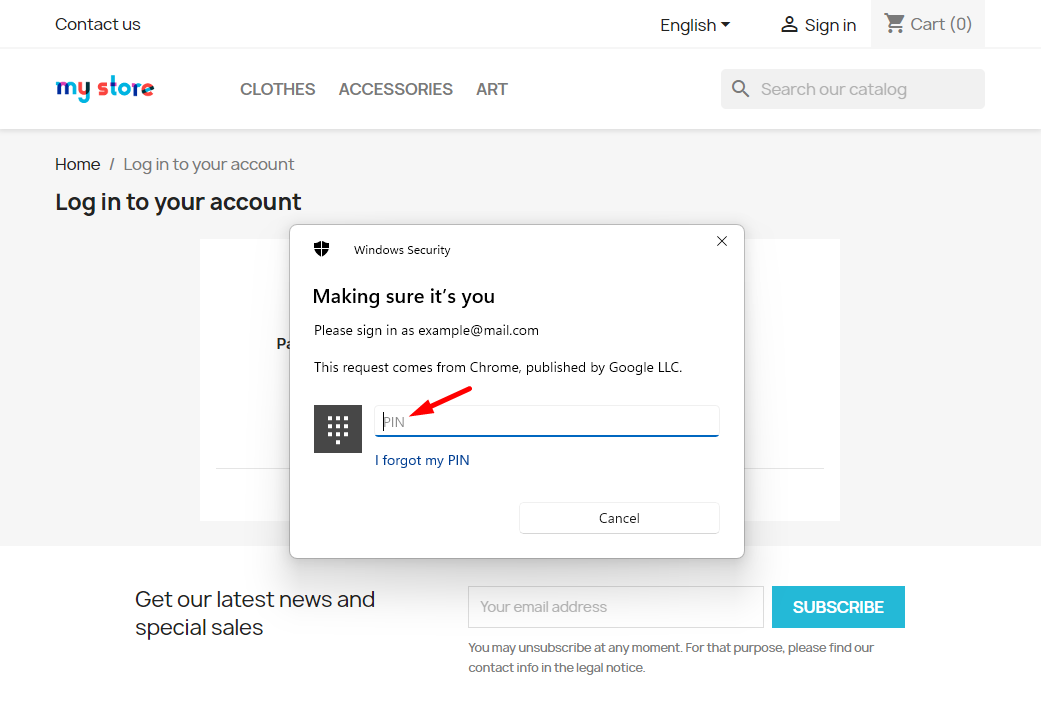
Wait for the operation to complete, and you will be successfully authorized and redirected to the target page!
MAC OS example:
Installation:
- Upload the module through the Backoffice (Modules > Add New Module)
- Click “Install” and configure the settings
Video:
https://youtu.be/a0KdLLlgs-o
35$ Buy it now!