35$ Buy it now!
Uniqueness
PrestaShop 1.7 – 8.x
Objective
Enables you to log in and authenticate in PrestaShop using your Instagram account. Additionally, you can link your Instagram account to your existing PrestaShop account.
Video:
https://youtu.be/NoNNsfZkct8
Download documentation
Social login via Instagram API.pdf
Advantages for Merchants
- streamlines users’ registration on your site;
- boosts the conversion of registrations on the site;
- popularizes and promotes your store on Instagram due to the simplicity of authorization;
- growth in user base due to the simplicity of registration;
- higher order conversion due to the swift creation of accounts on the site via Instagram.
Advantages for Customers
- eliminates the need to input personal data and passwords;
- swift order processing – no time wasted on new account creation;
- no need to remember login and password for the store account – Instagram authentication is both easy and secure;
- registration and authorization accomplished in two clicks.
Distinctive Features
- ability to create a new store account based on Instagram authentication;
- users can edit their profile anytime (add an email and other details);
- possibility to link Instagram authentication to any existing store account;
- users can unlink their Instagram from the store account.
Setting Up Instagram App by PrestaShop Store Admin
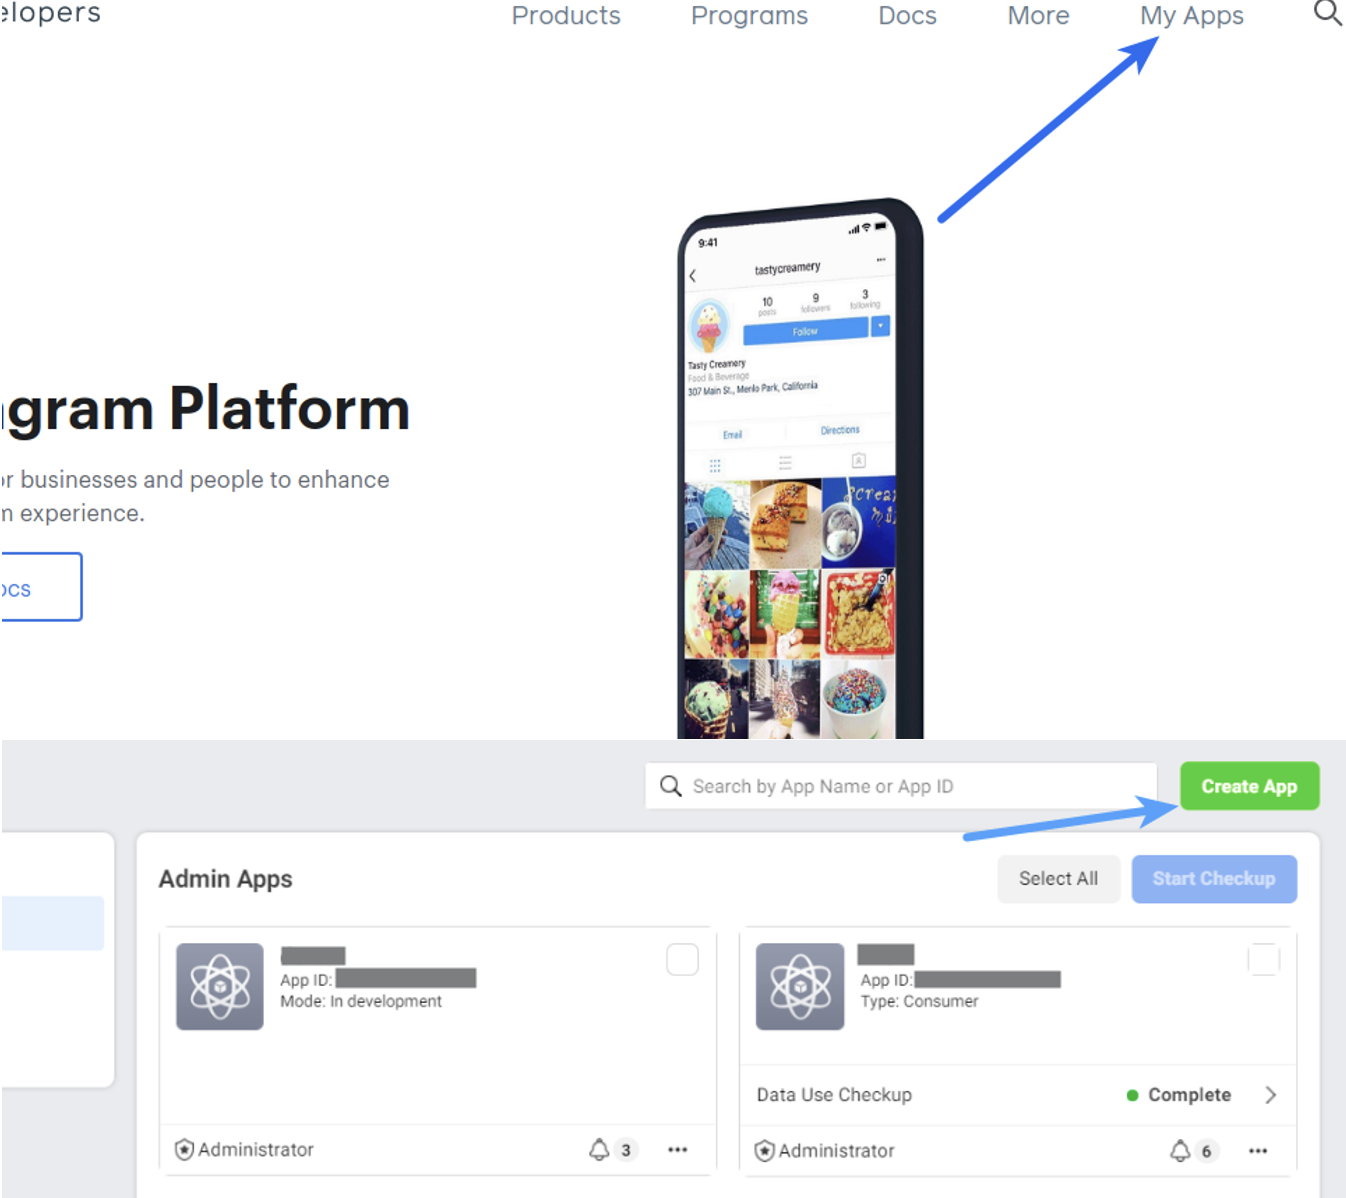
- Navigate to https://developers.facebook.com/products/instagram/, log in to your Facebook account if you are not already logged in. Click My Apps in the top-right corner.
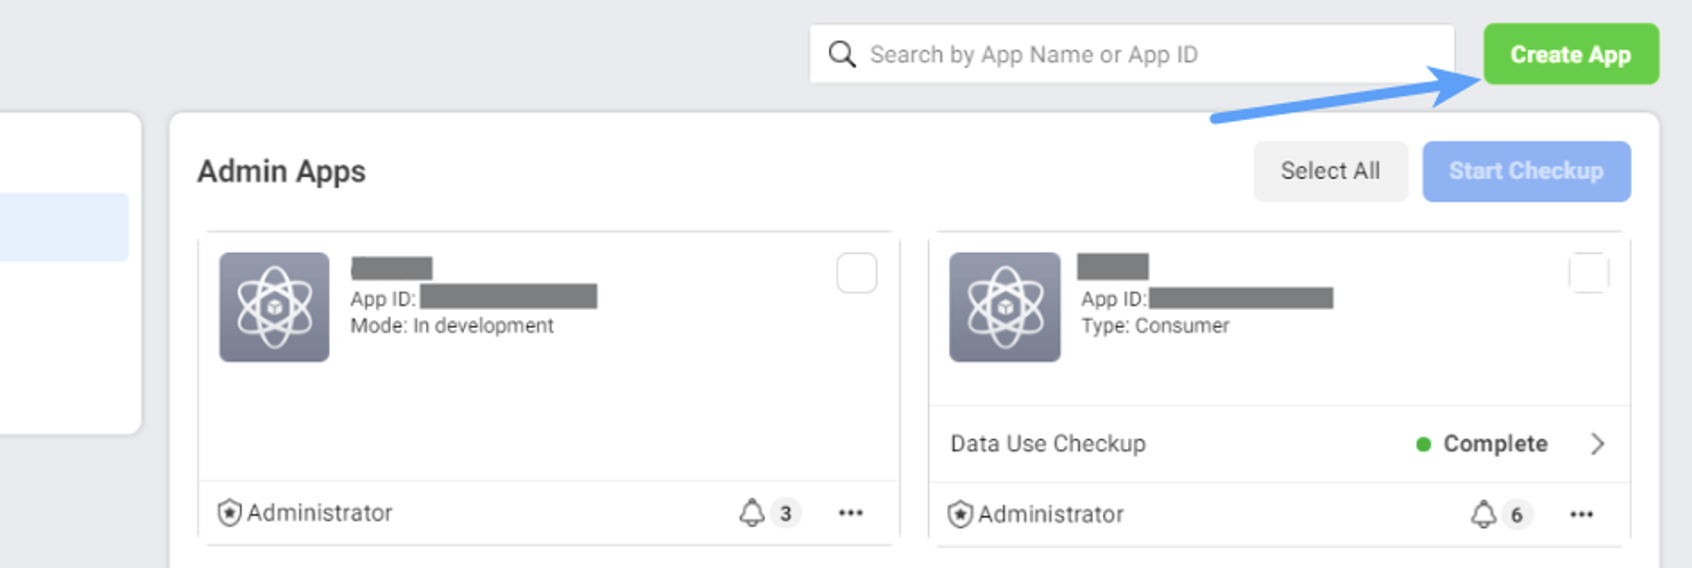
- Add a new app Create App
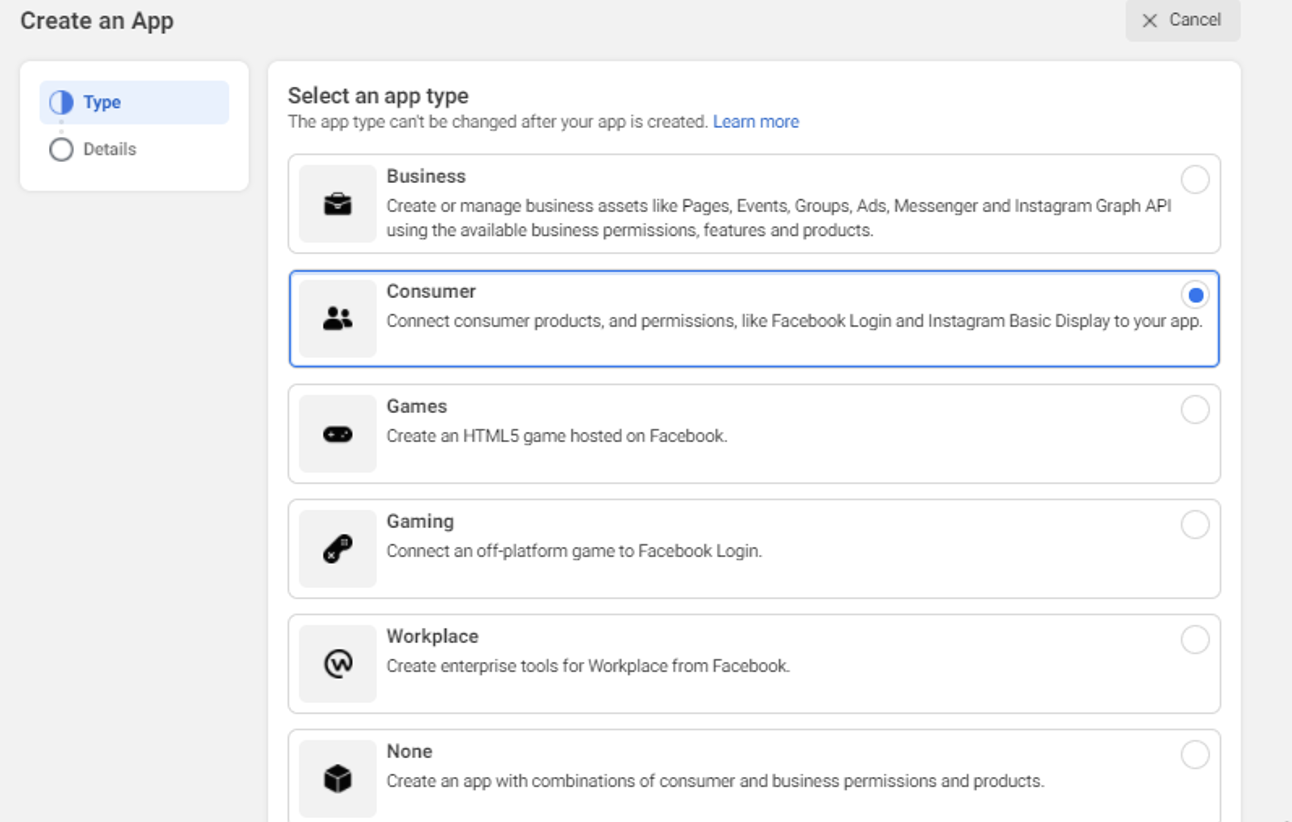
- Select Consumer and click Next
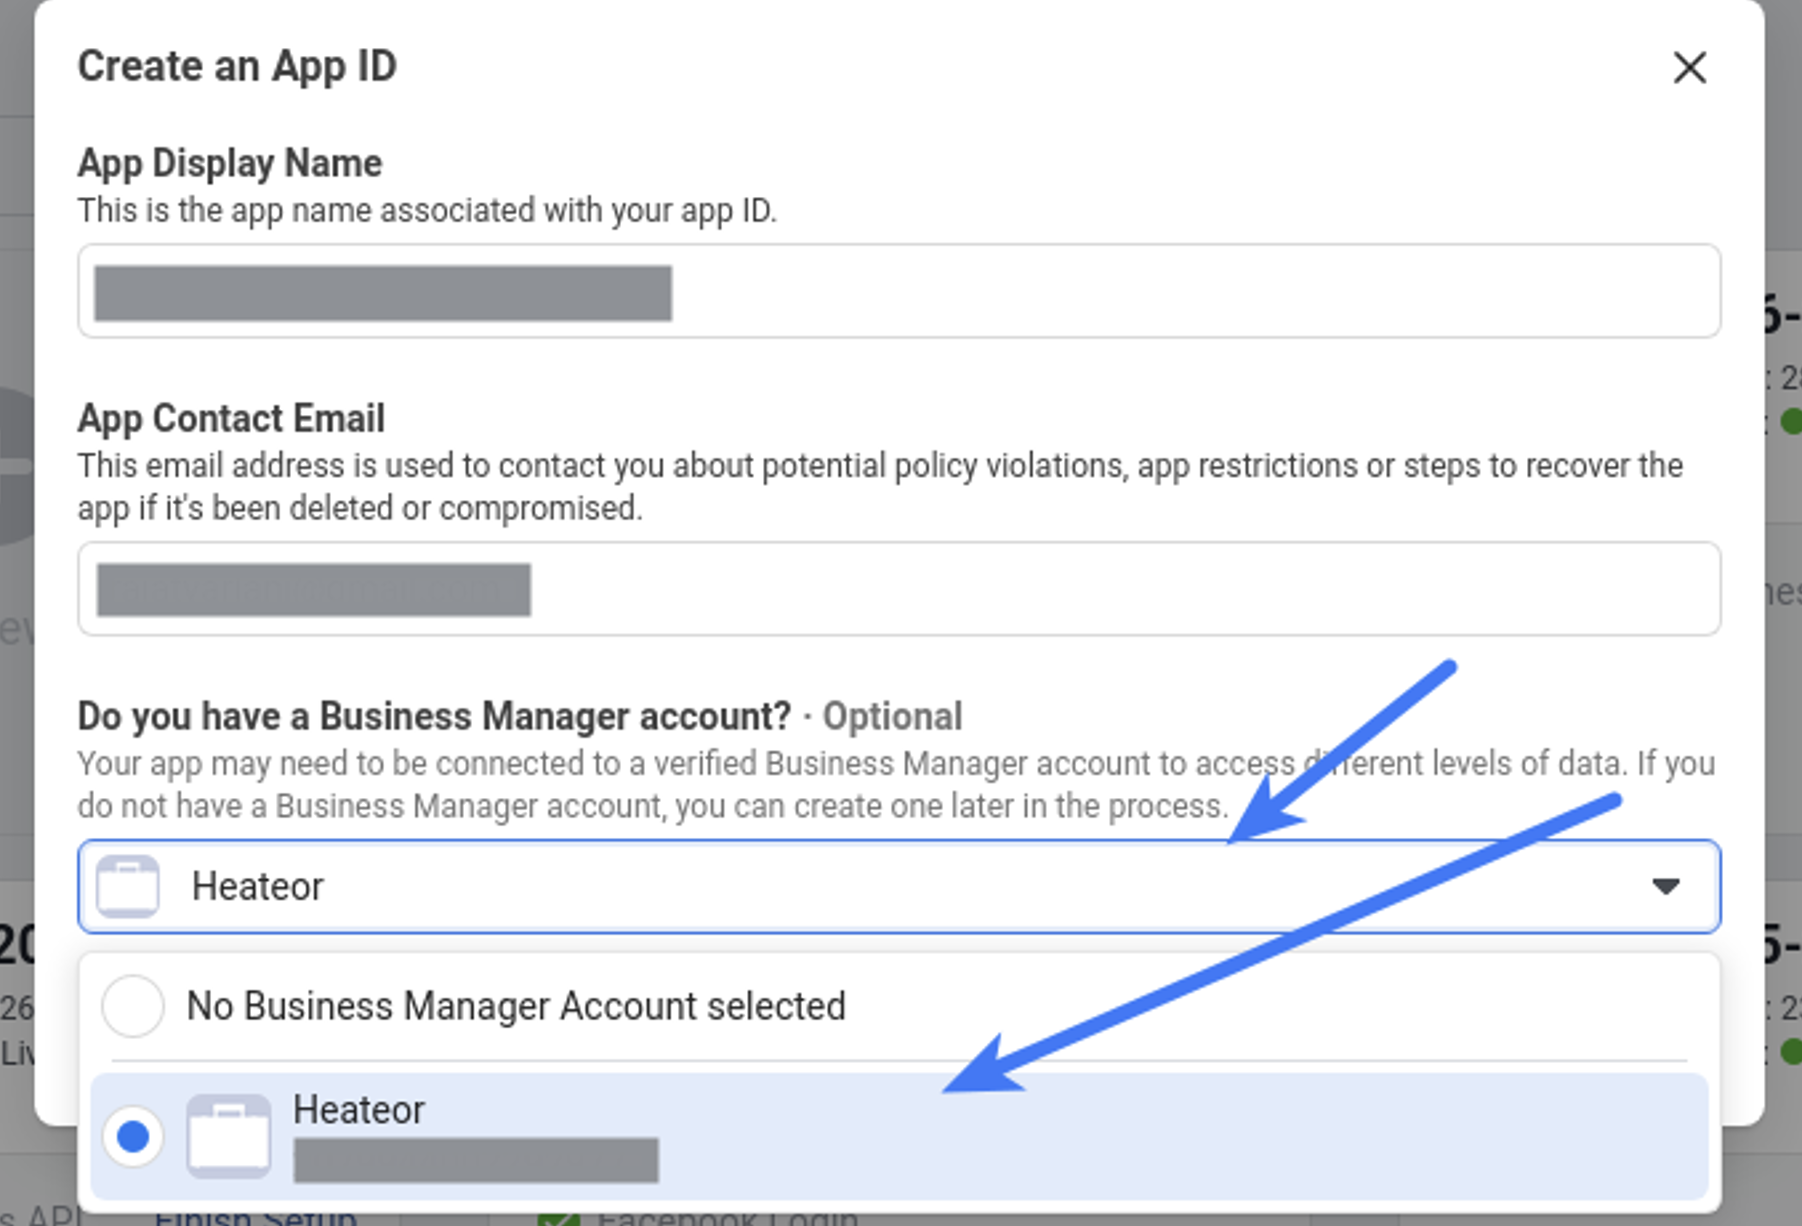
- Specify App Display Name for your app and App Contact Email. Select a Business Manager Account if you have one. Click Create App ID
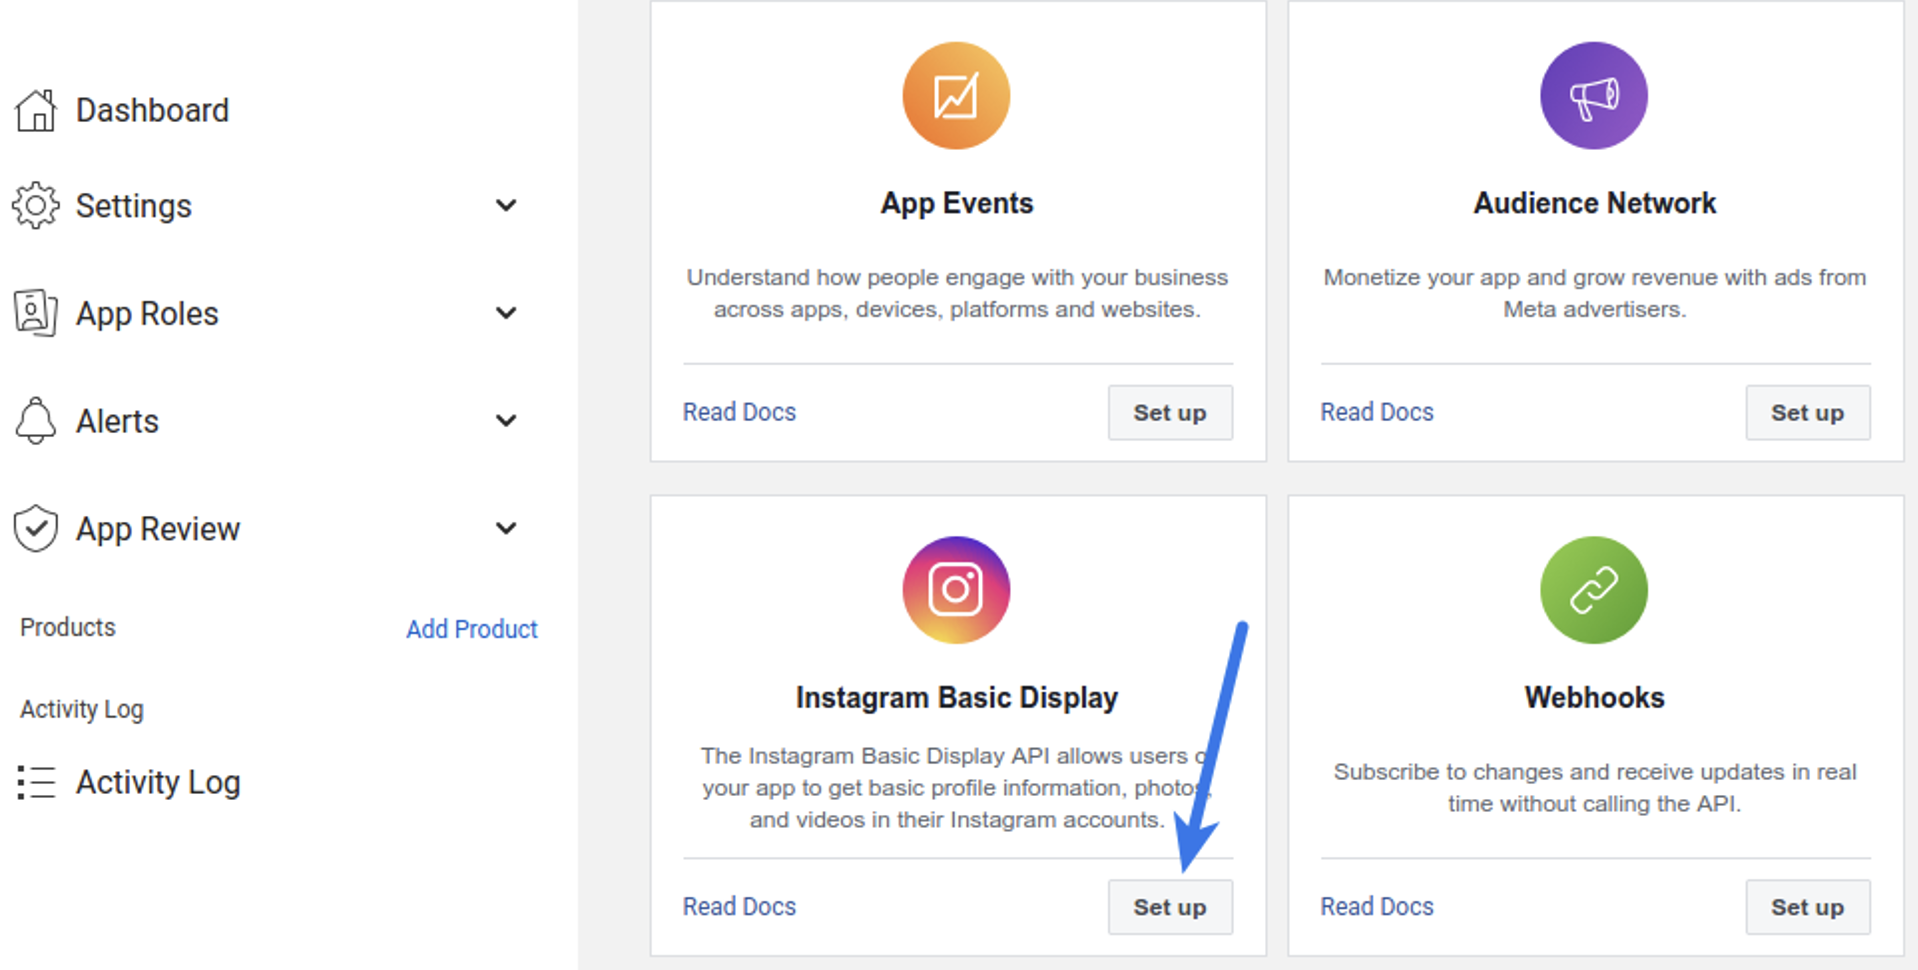
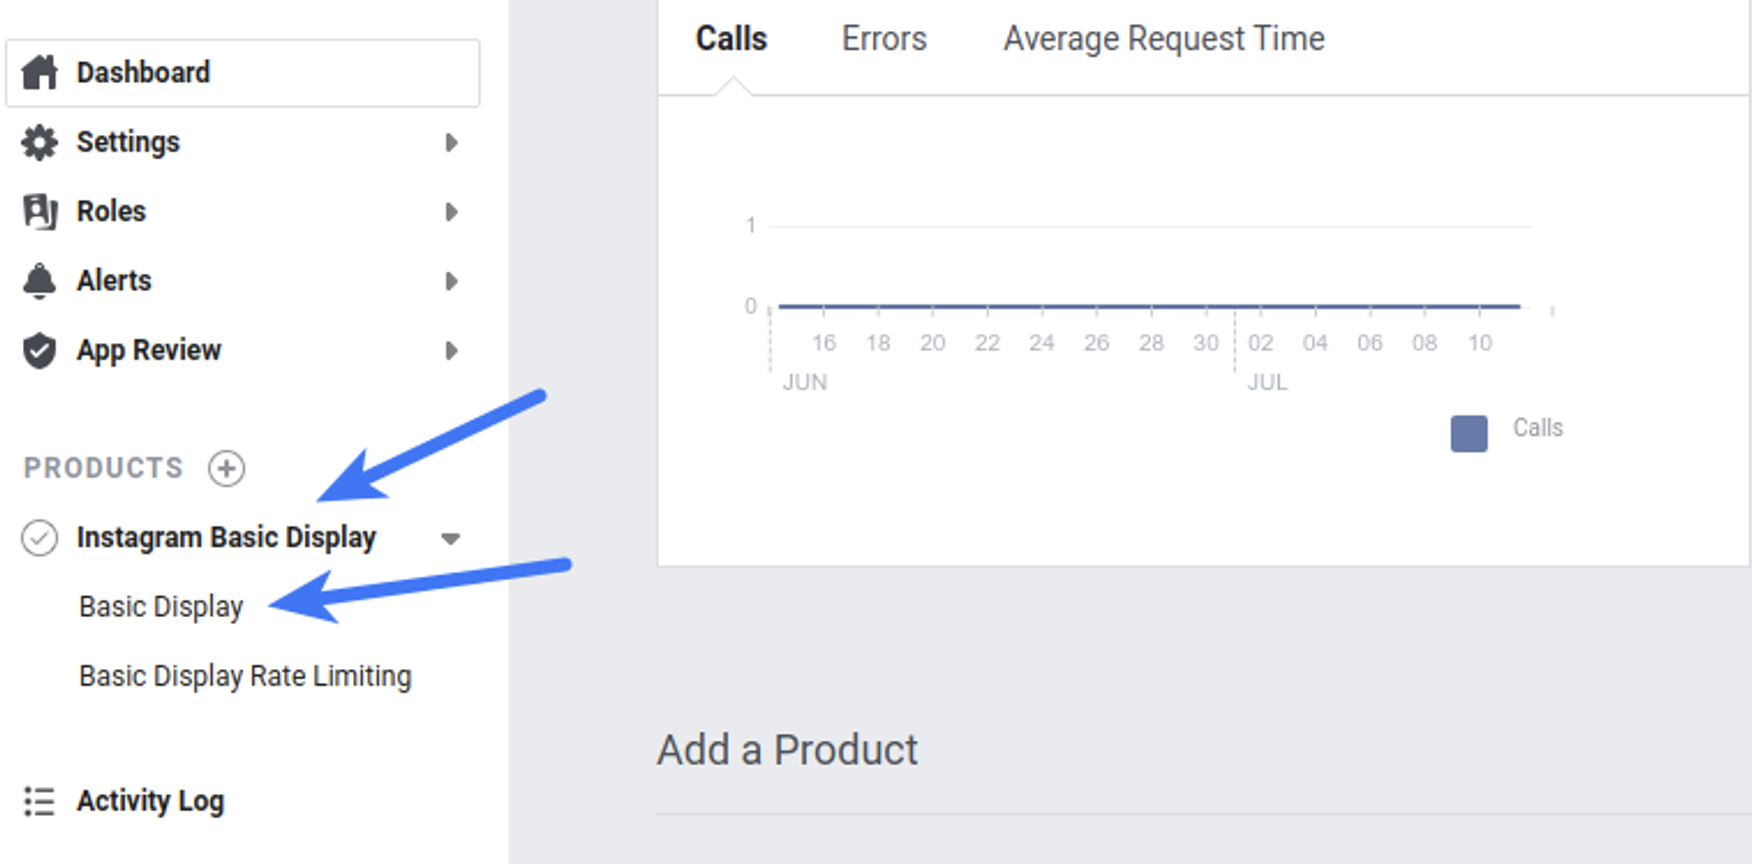
- Click Set Up in the Instagram Basic Display block
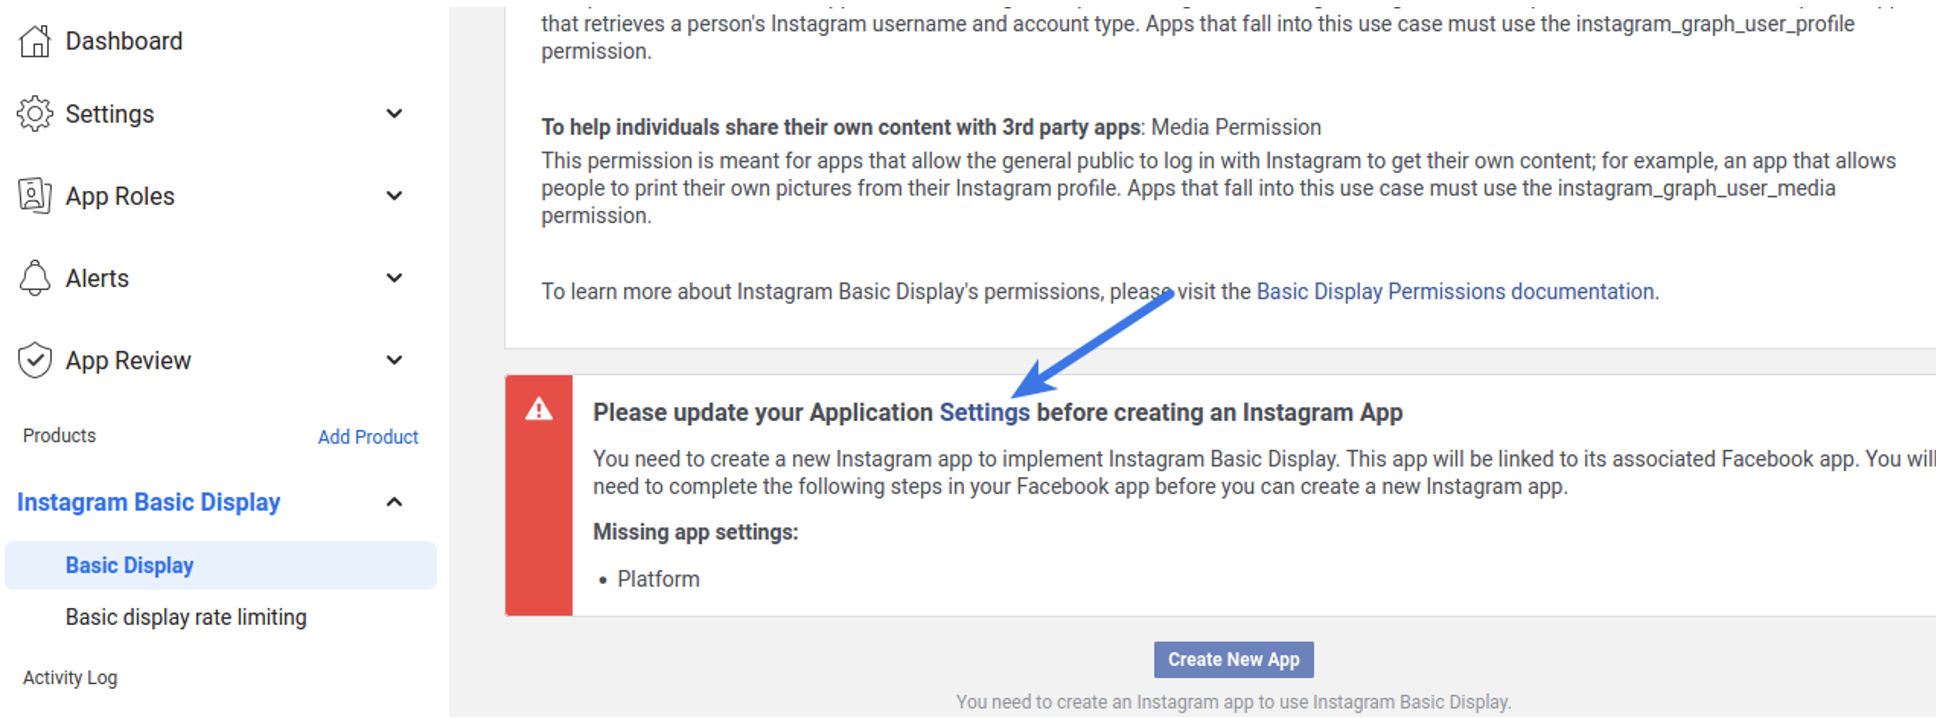
- Scroll down to the bottom of the page and click Settings
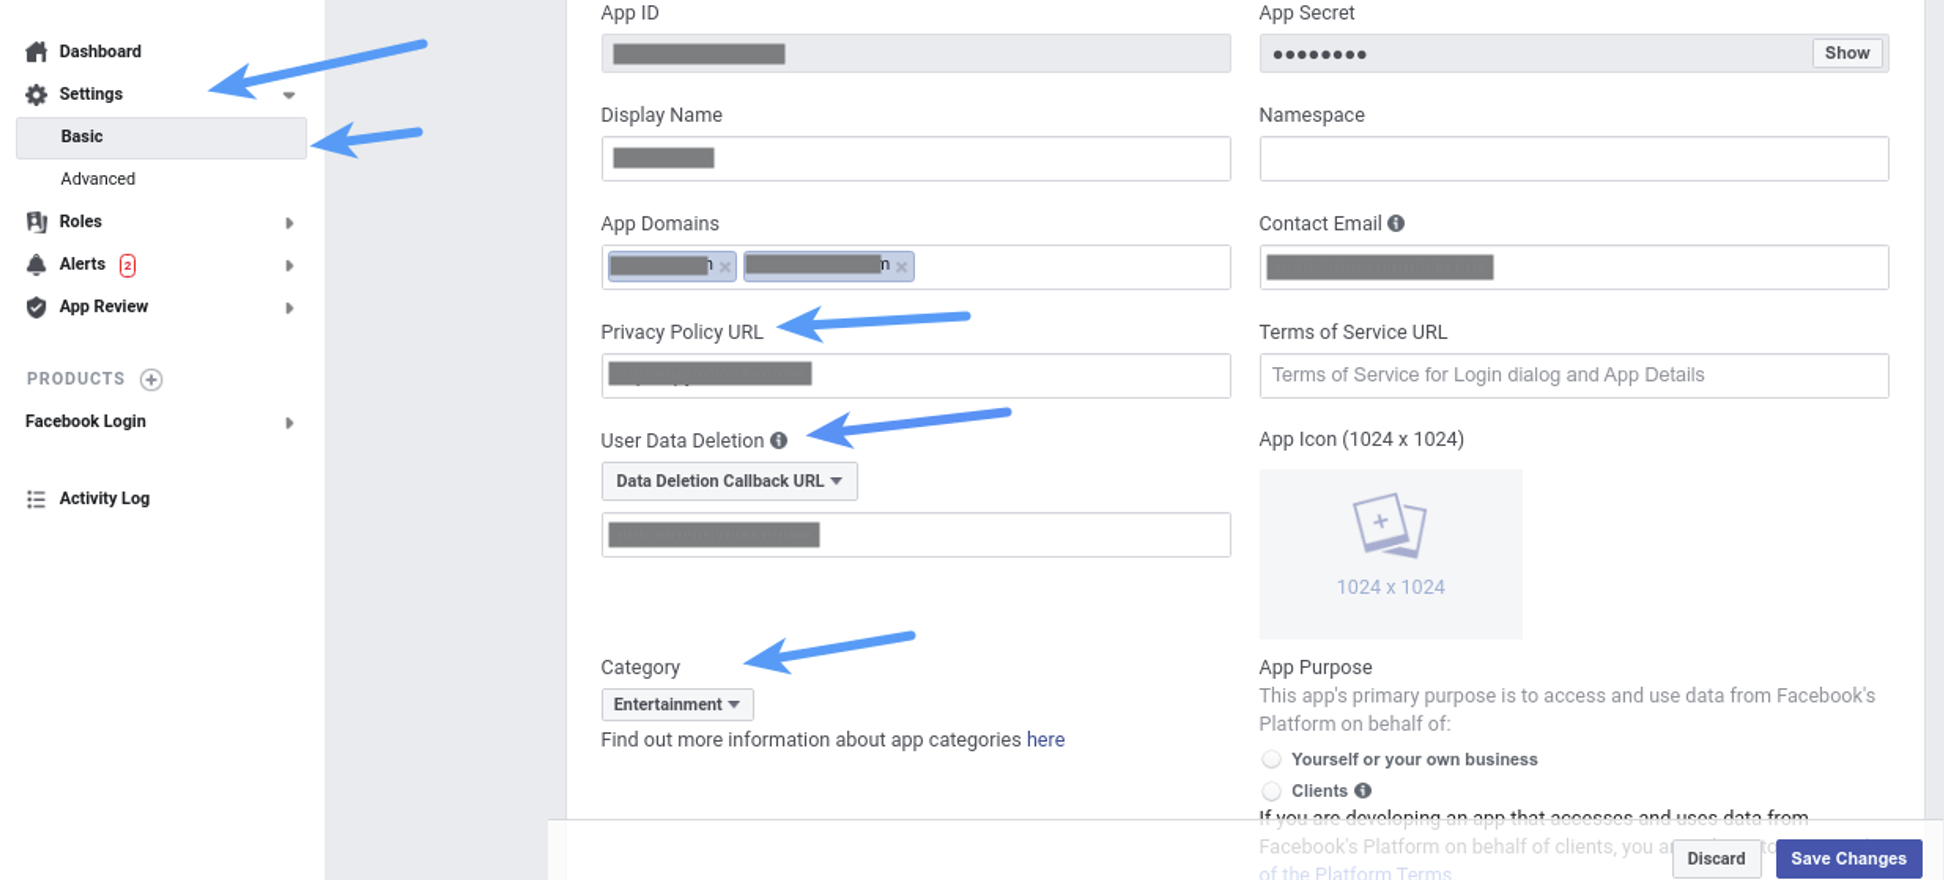
- Specify Privacy Policy URL of your website. Save the same URL in the text box in the Data Deletion Callback URL which is in the User Data Deletion Select the Category that your website belongs to
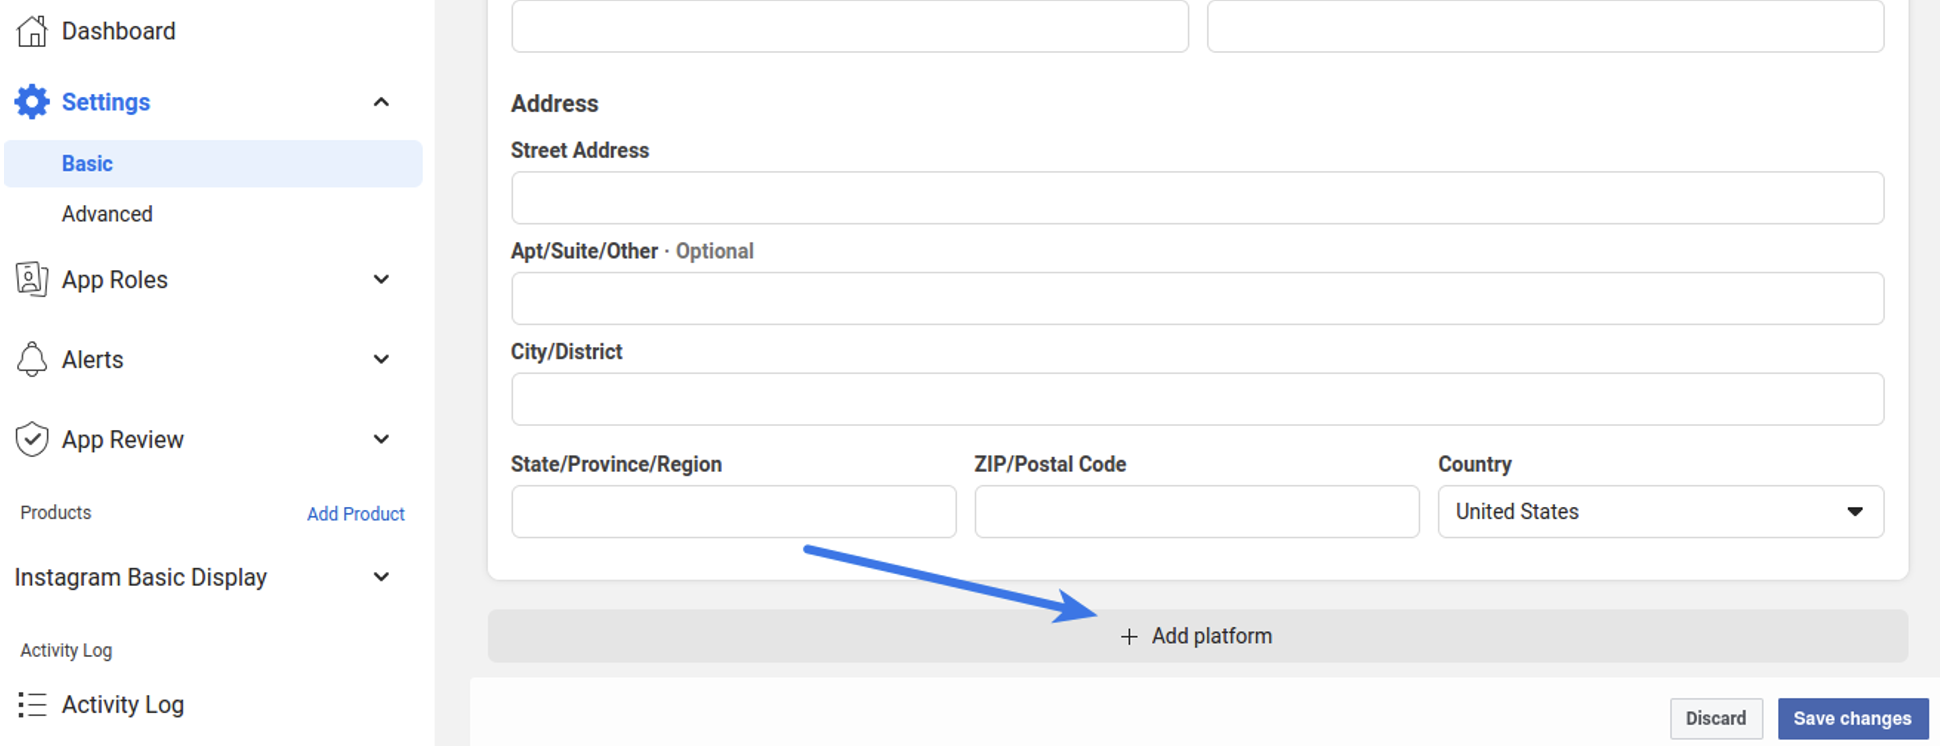
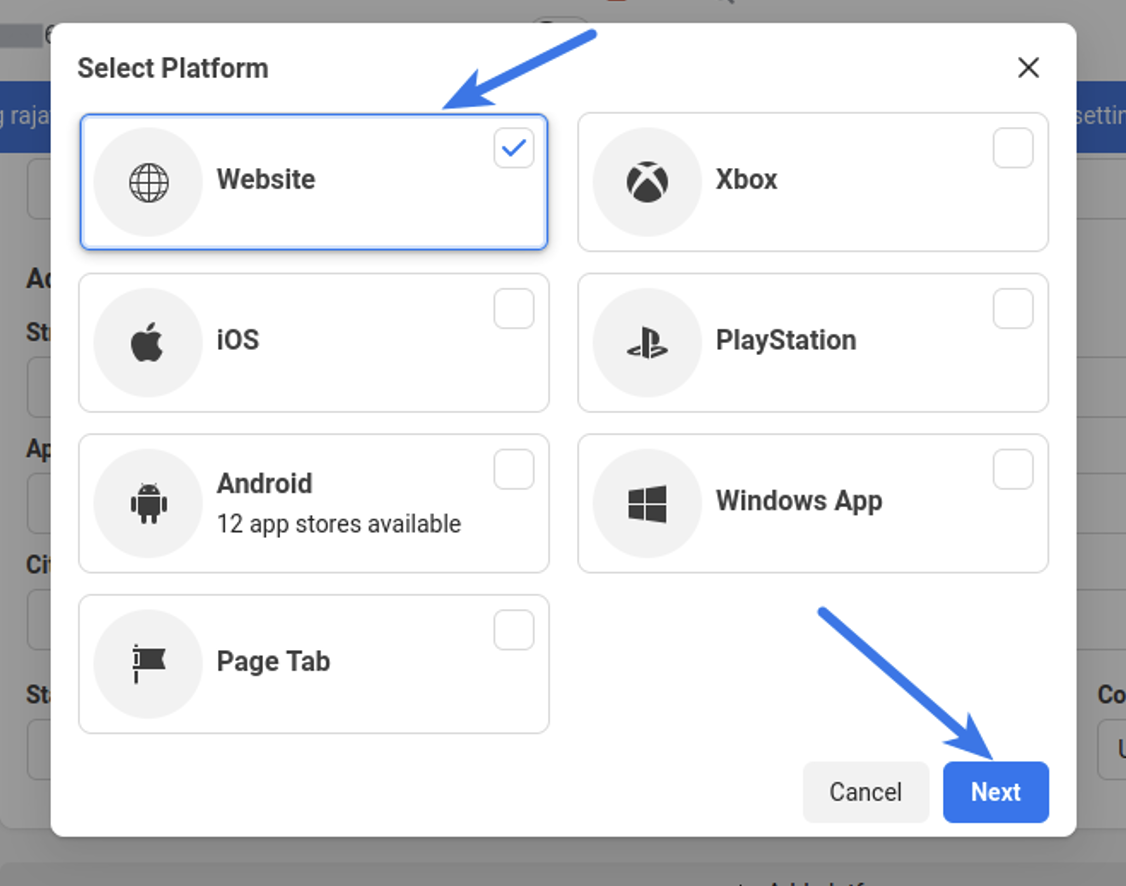
- Scroll down and click on Add Platform
- Select
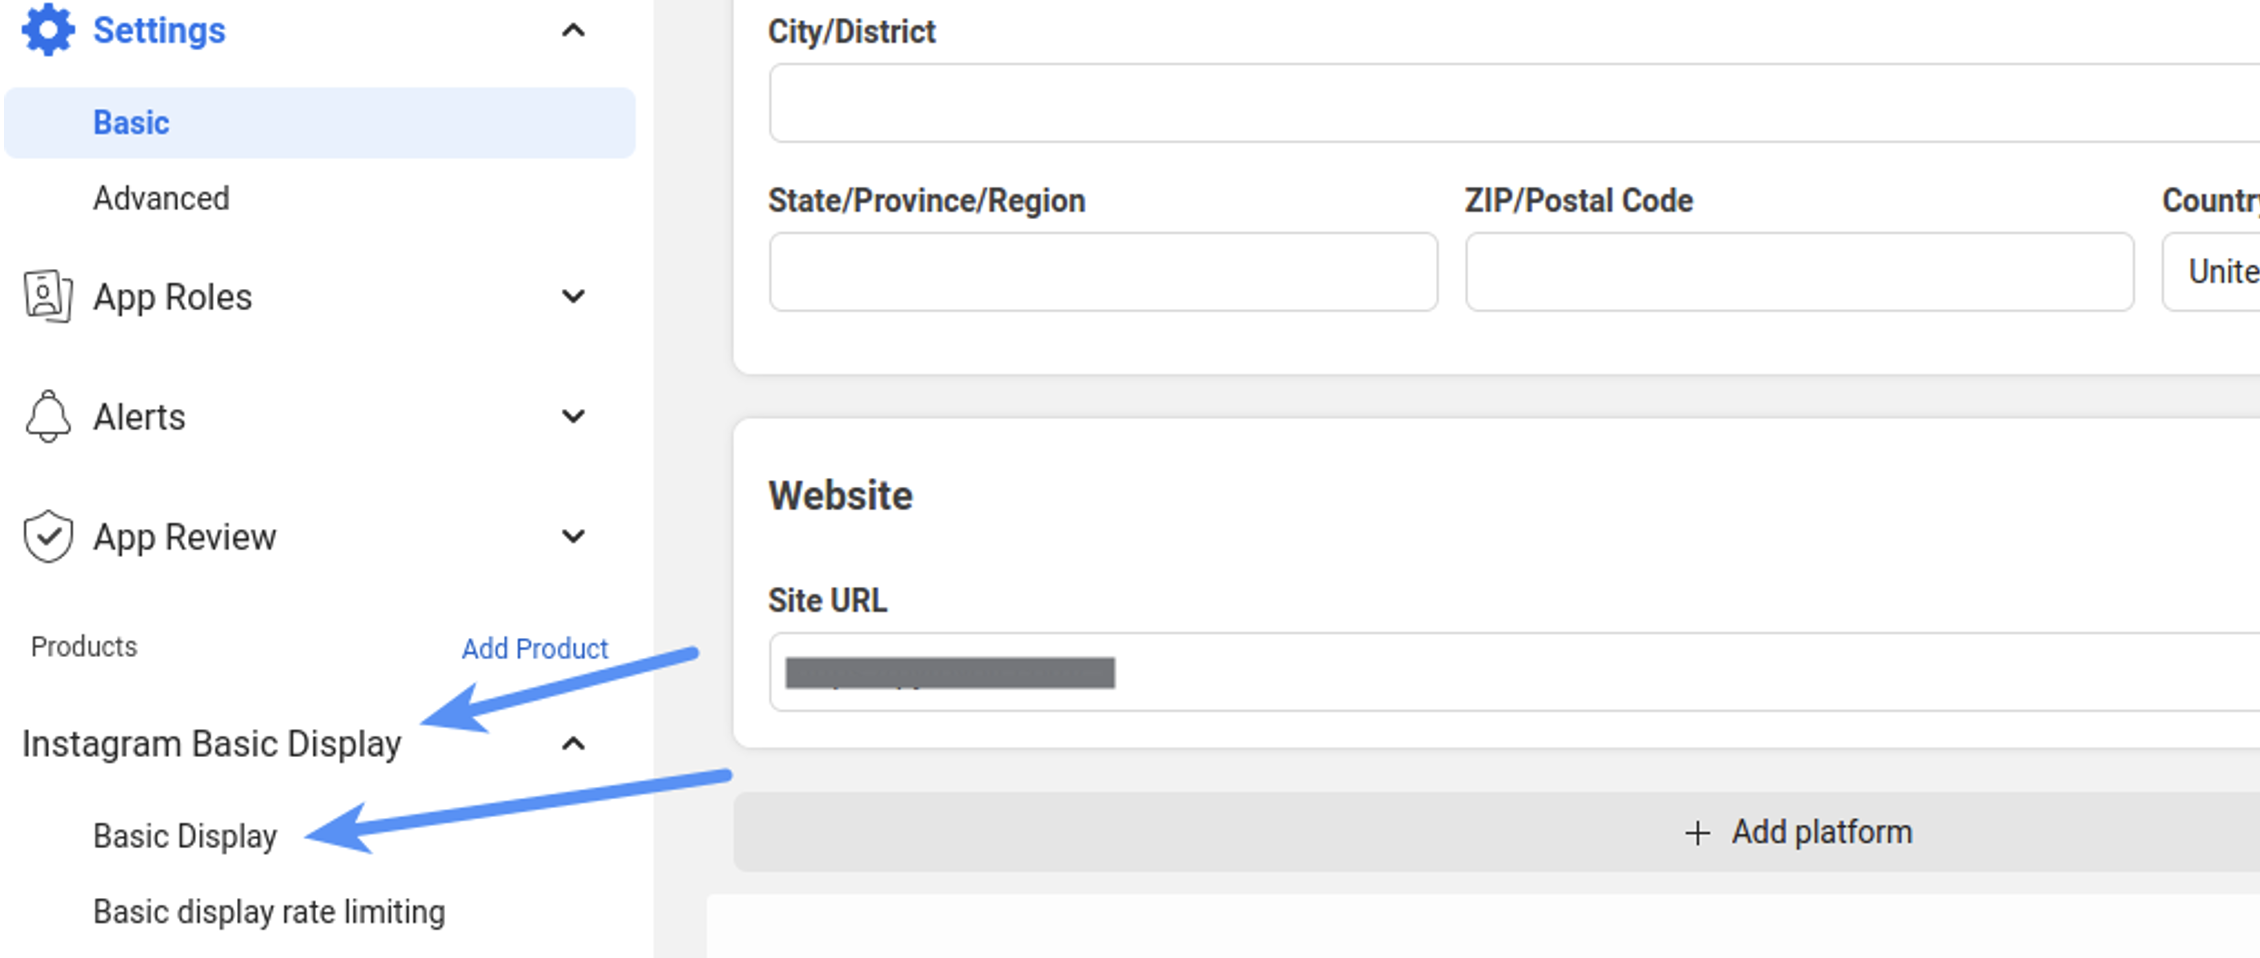
- Save the full URL (including https://) of the home page of your website in the Site URL Save changes.
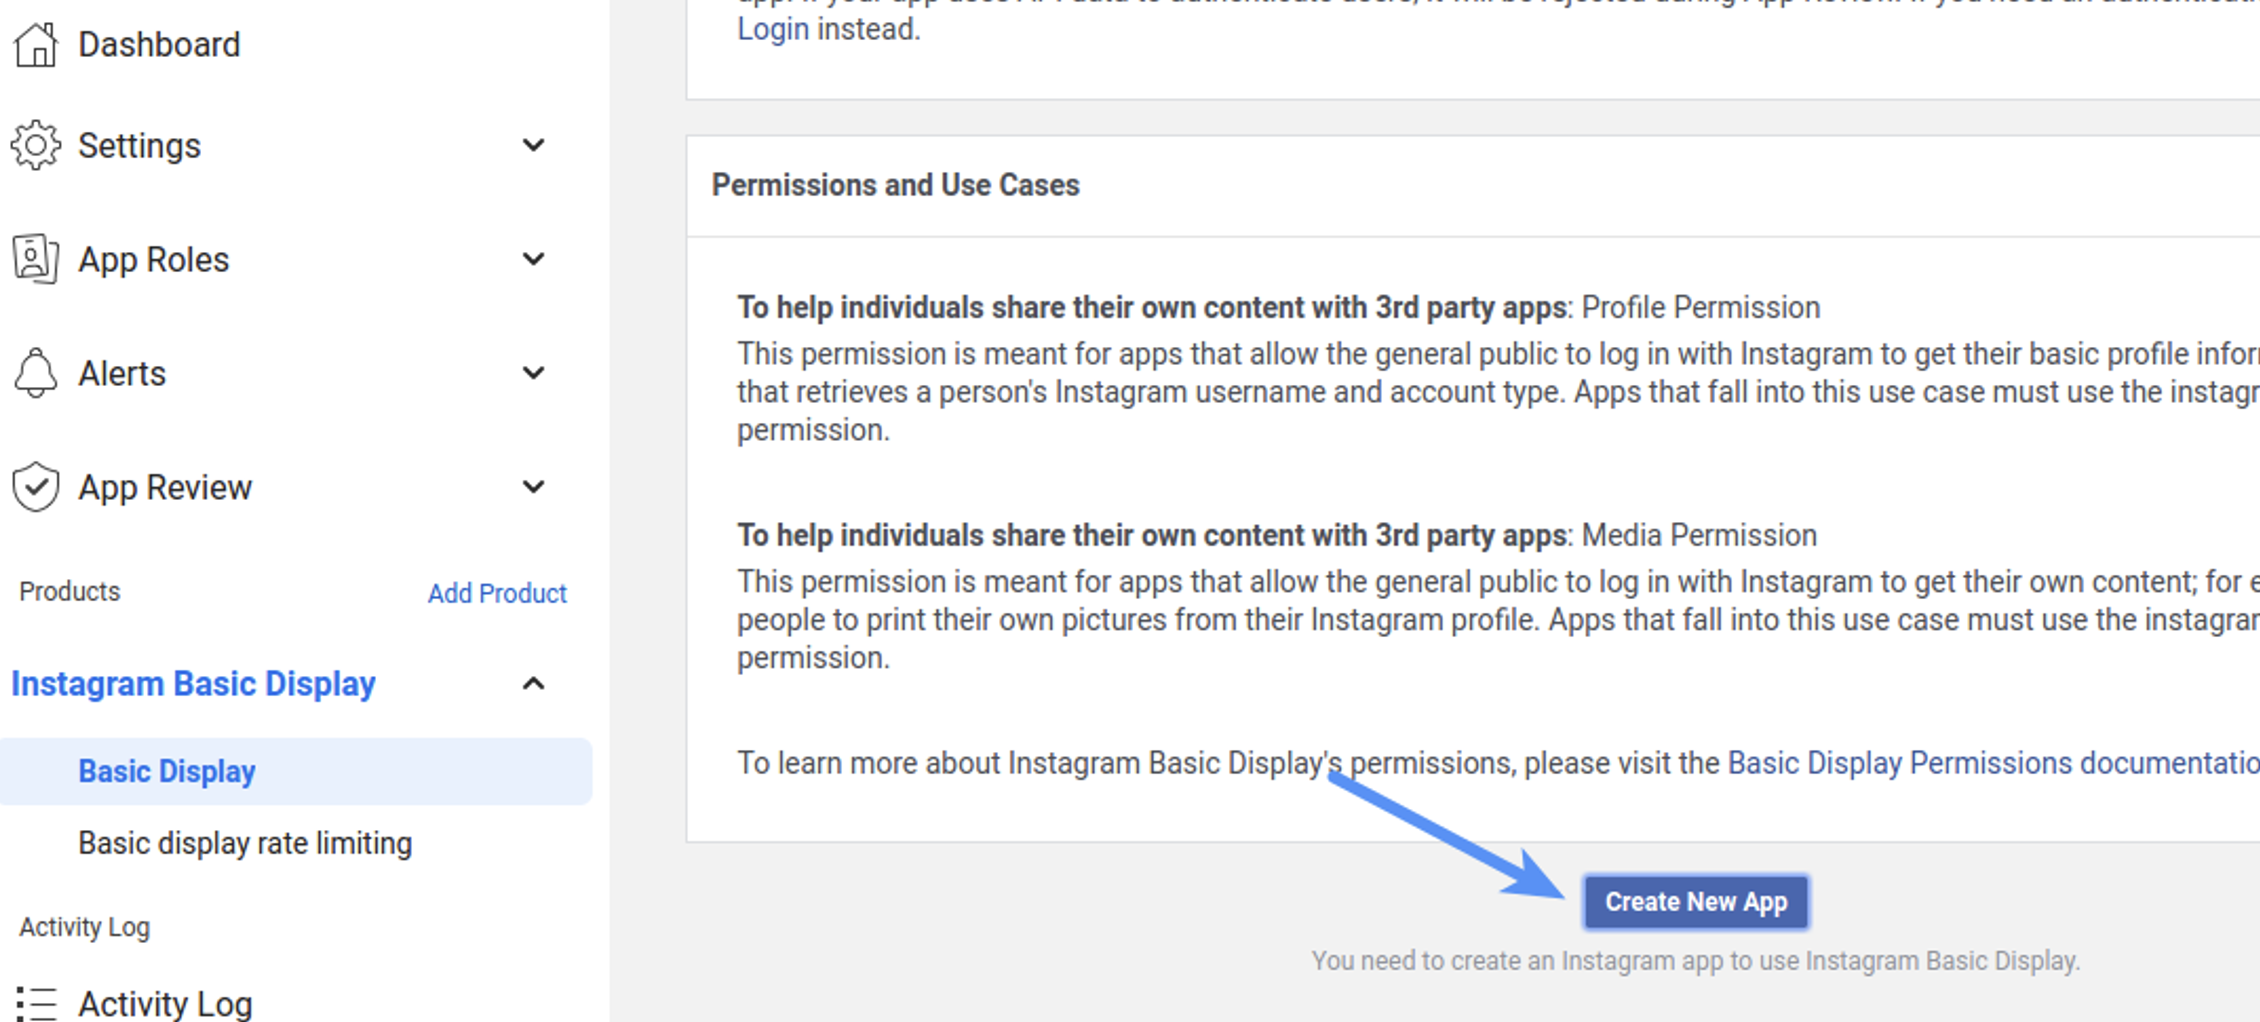
- Navigate to the Instagram Basic Display > Basic Display section from the menu on the left
- Scroll down to the bottom and click Create New App button
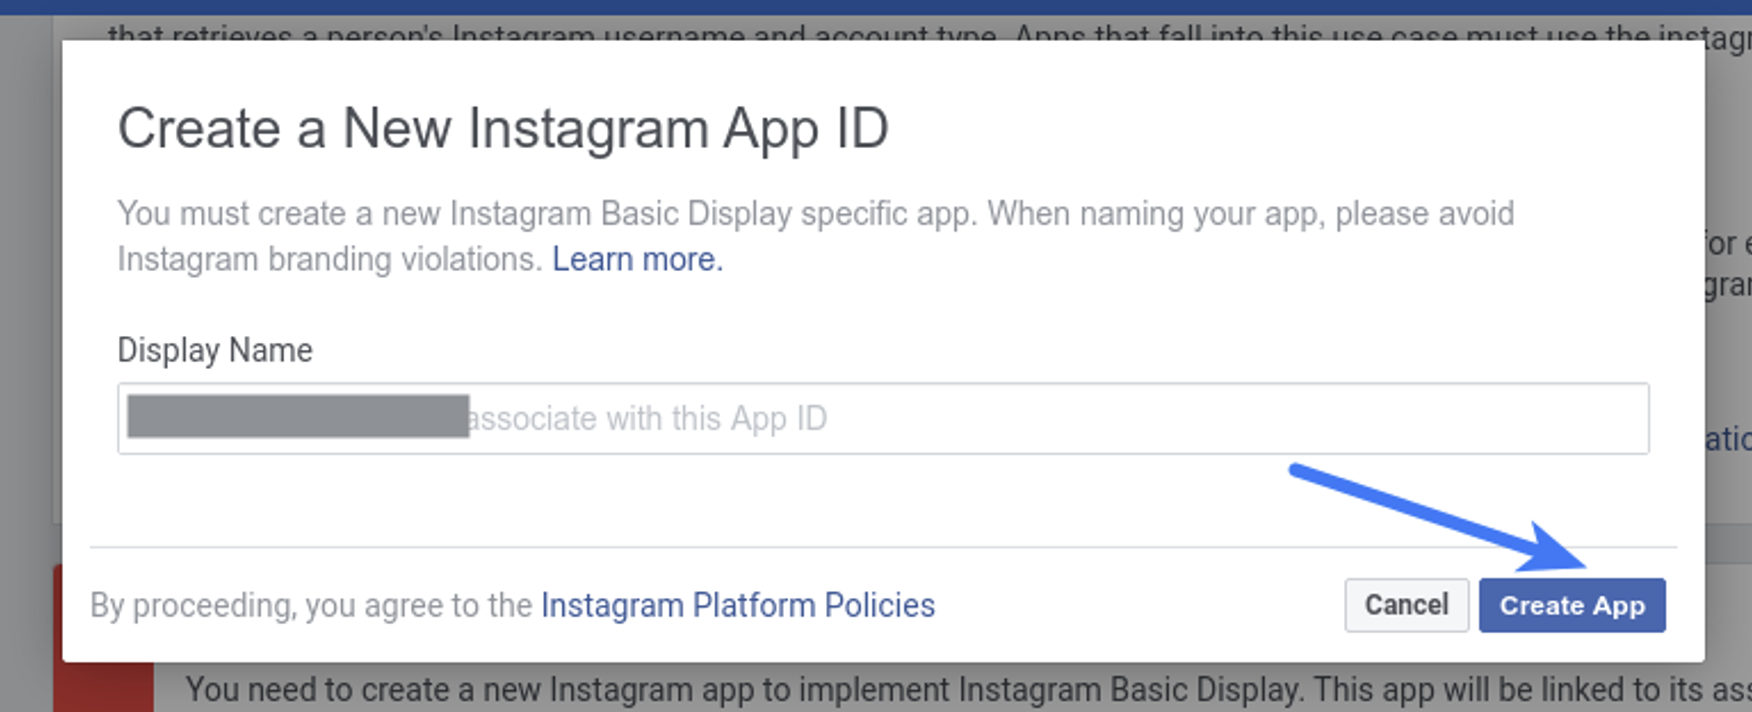
- Specify the display name of your Instagram app and click Create App button
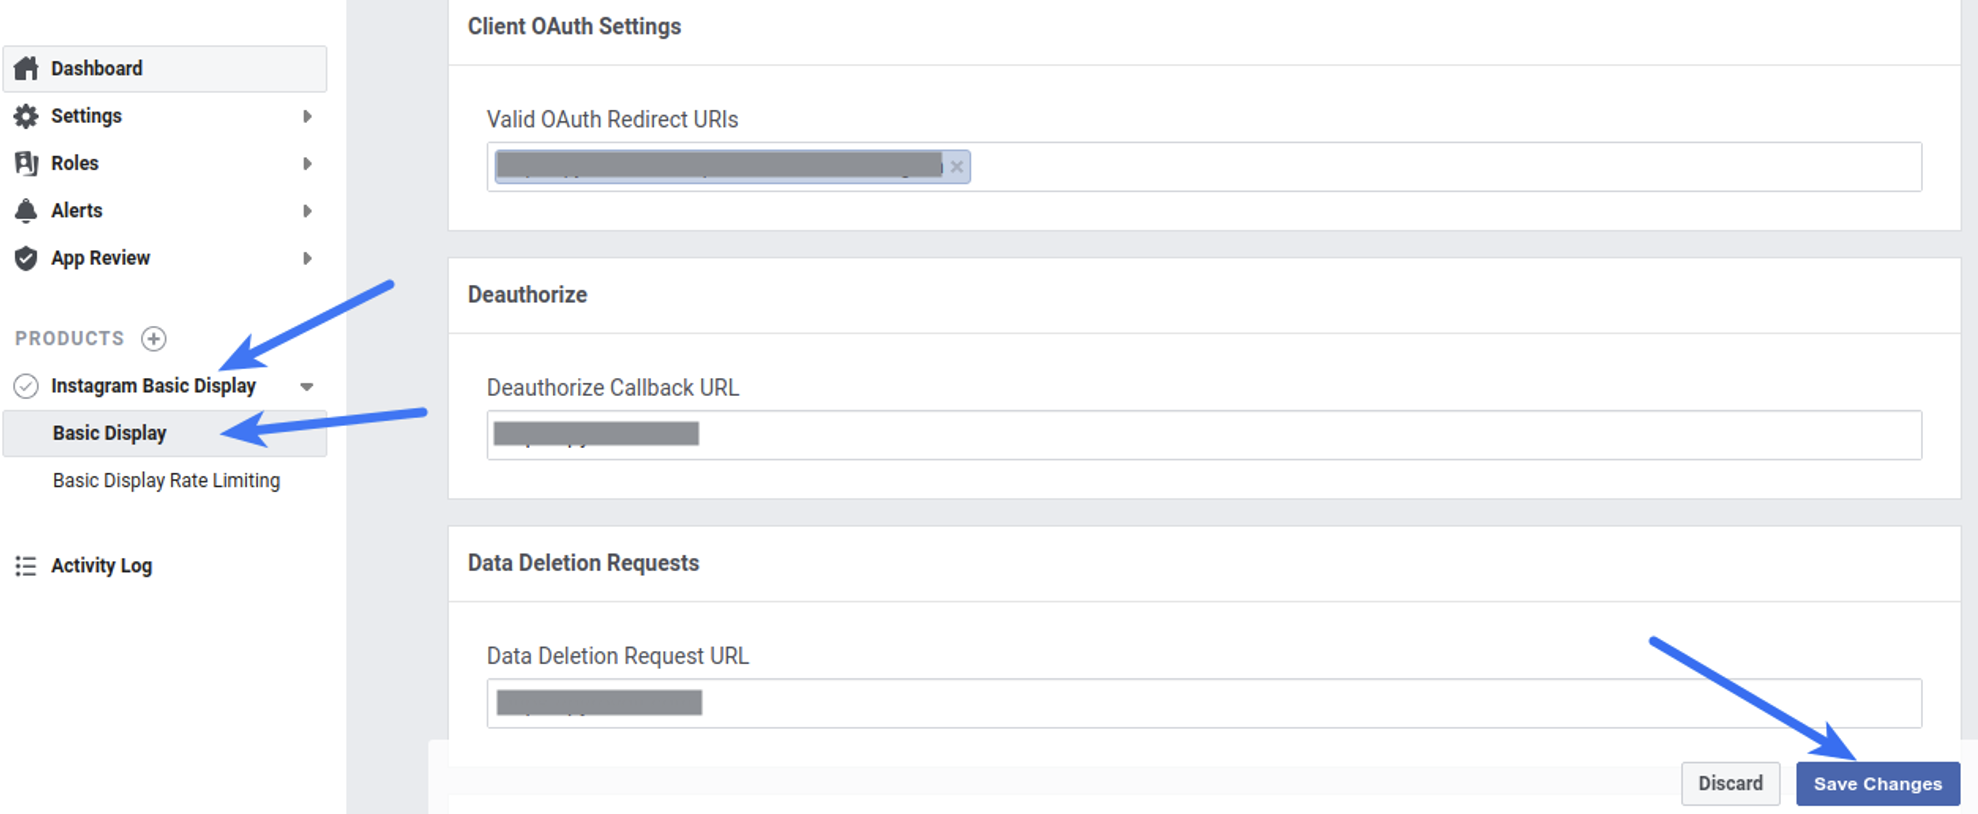
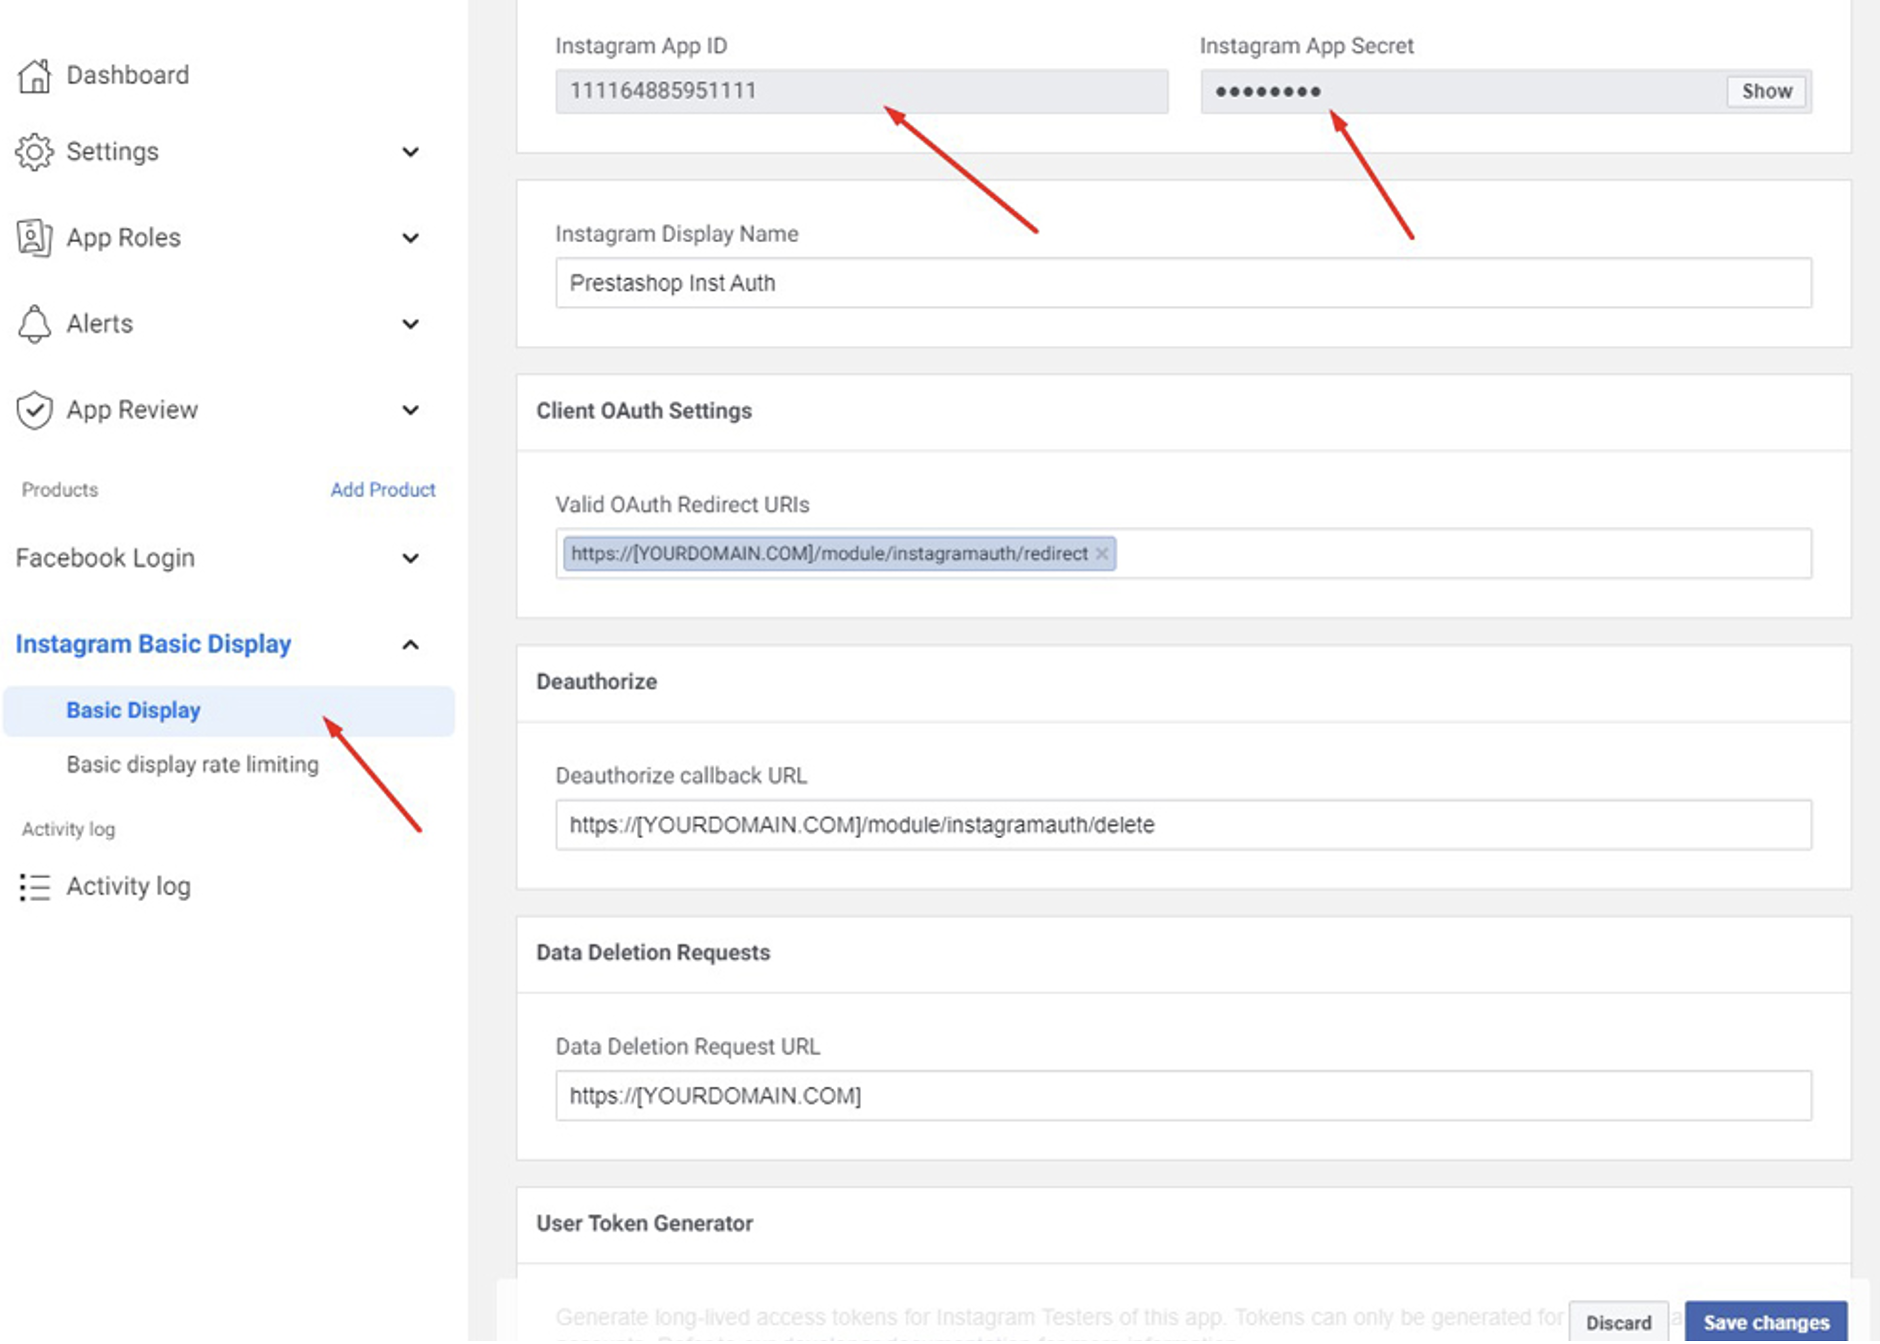
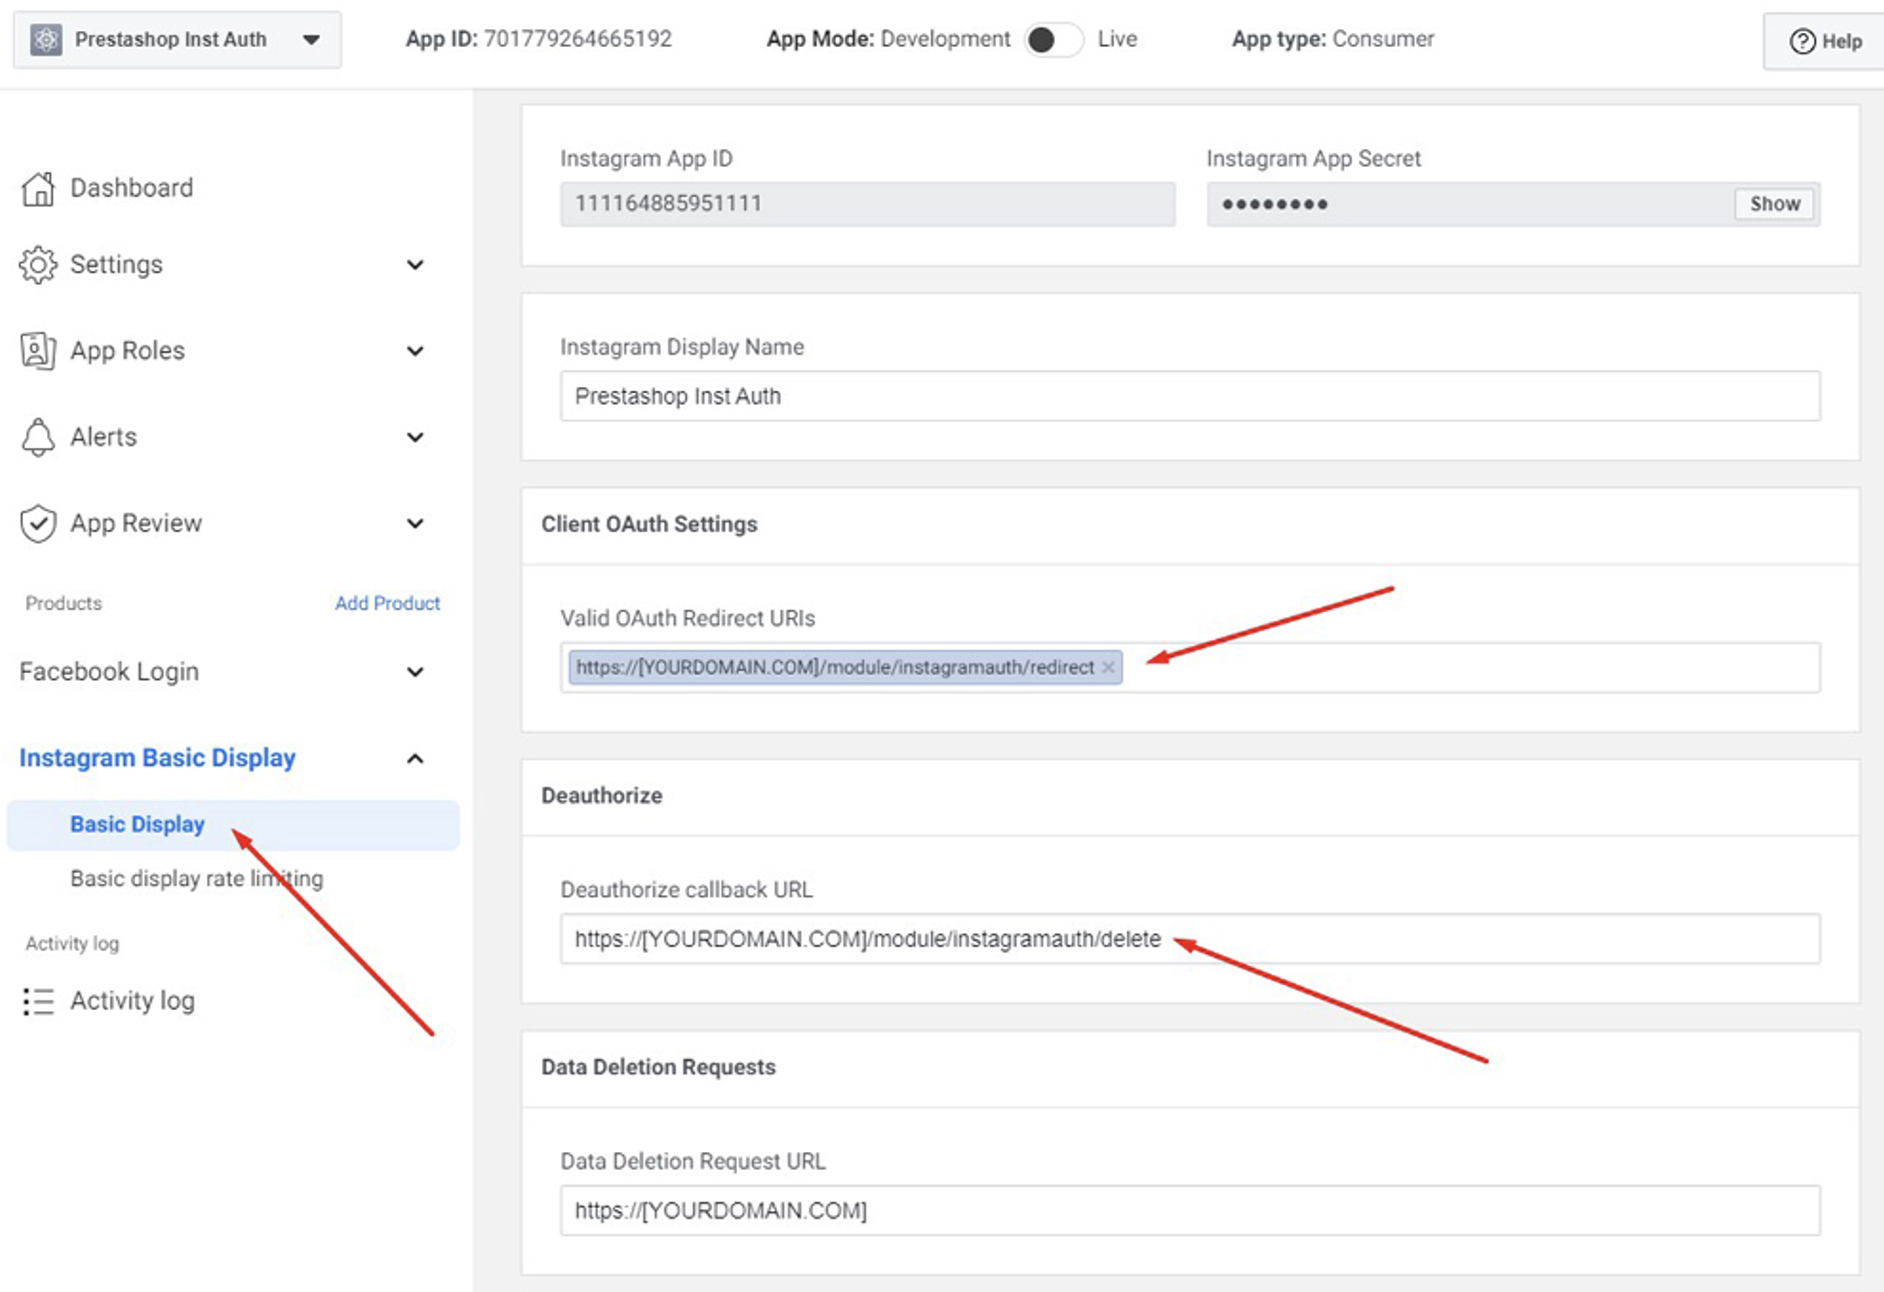
- Navigate to the Basic Display in the Instagram Basic Display section from the left sidebar
- Enter the following details:Valid OAuth Redirect URIs: HOME_PAGE_URL/module/instagramauth/redirect
where: HOME_PAGE_URL is the URL of the home page of your website.Deauthorize Callback URL: URL of the home page of your website
Data Deletion Request URL: Save the URL of the privacy policy page of your website. Click Save Changes - Click the slider button in the App Mode option and make the Instagram app Live
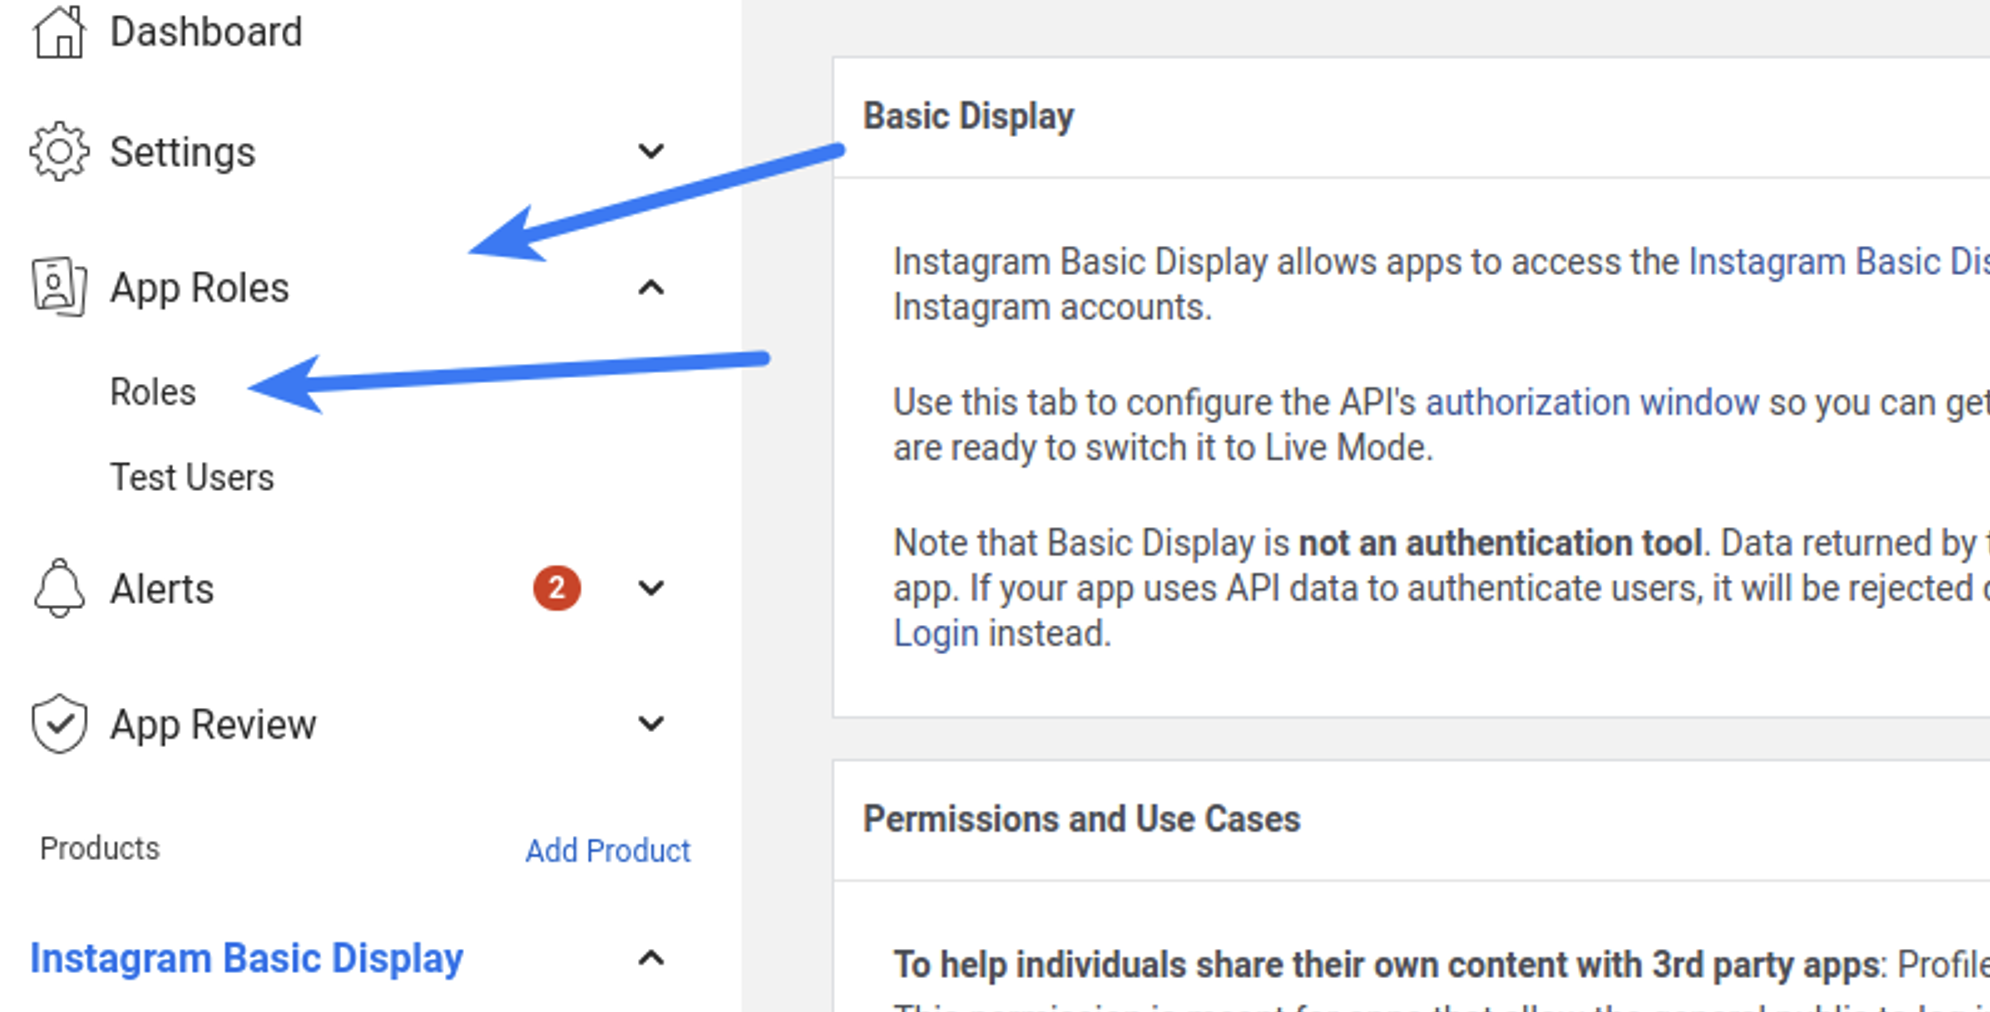
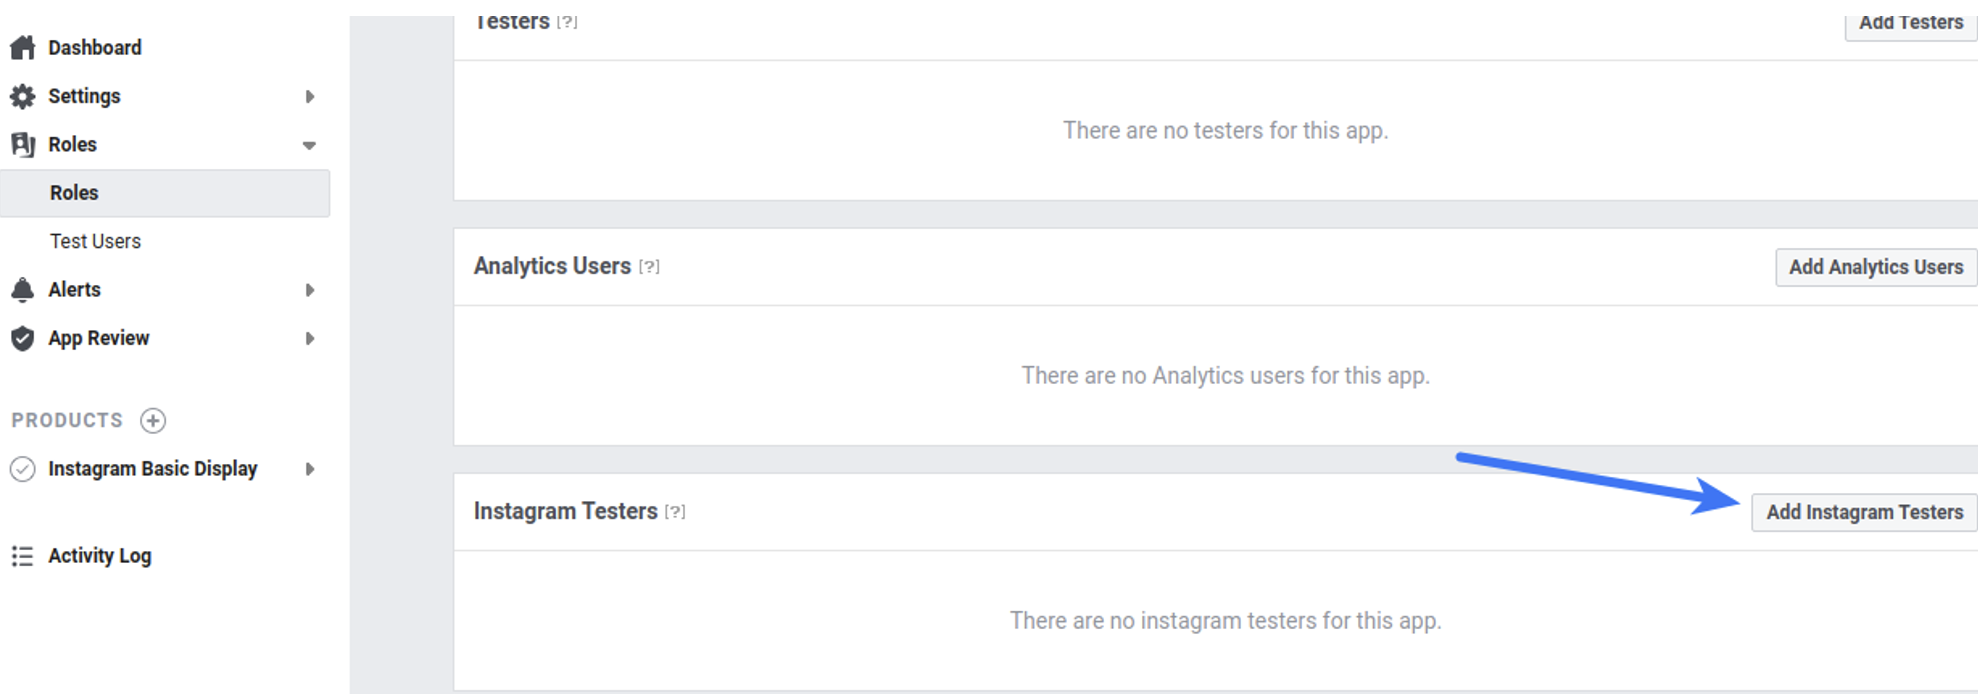
- Navigate to the App Roles > Roles section and scroll down to the Instagram Testers section
- Click Add Instagram Testers and enter your Instagram account’s username and send the invitation
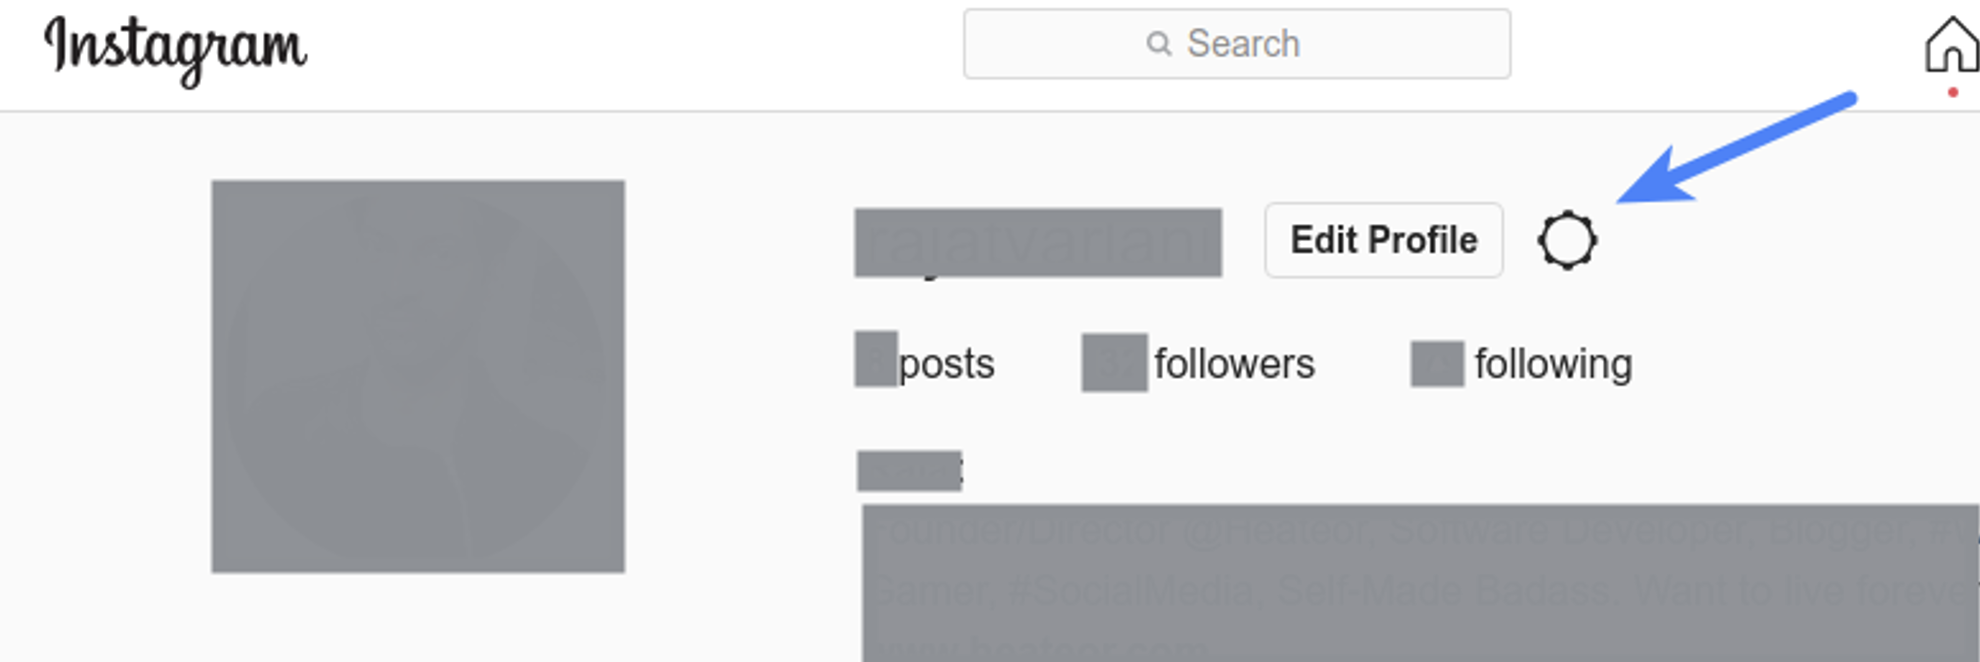
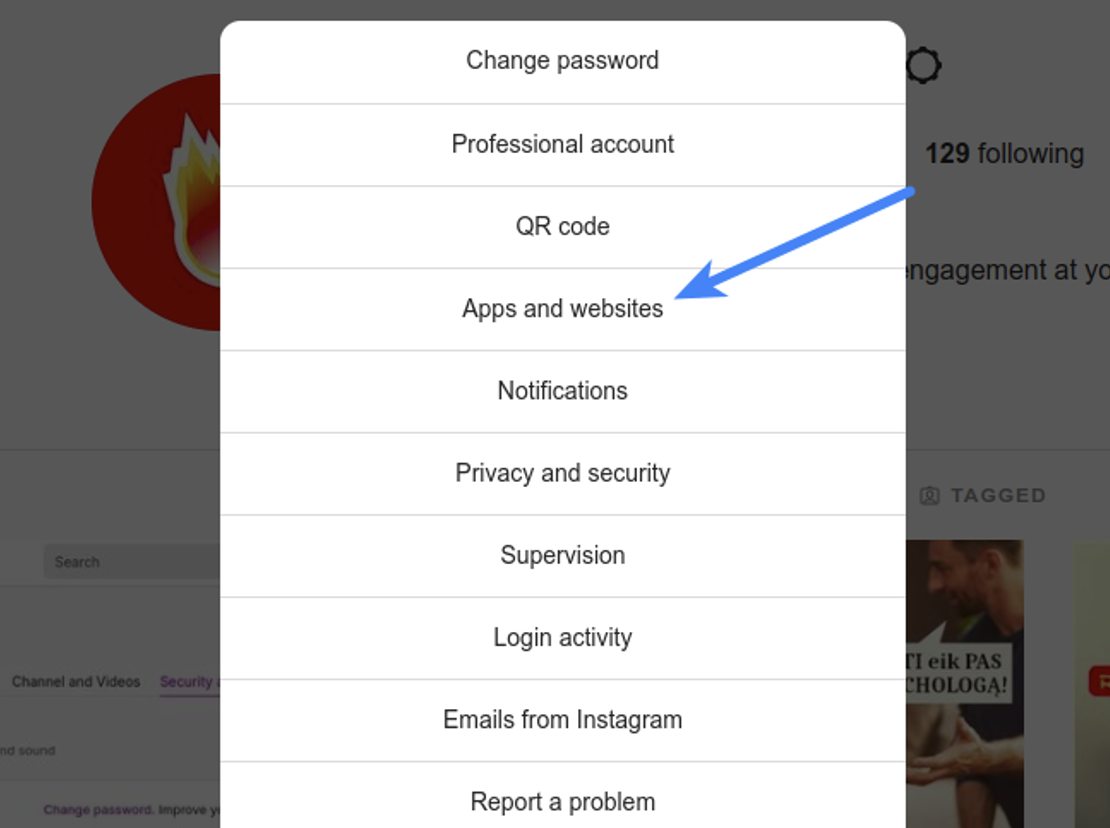
- Login to the Instagram account you invited in the previous step in another browser tab, click the Instagram name above the profile picture. Click on the settings icon, click on Apps and websites. In the Tester Invitations section, accept the invitation you’ve sent before. You will be able to use this Instagram account only until you get the permissions approved for your Instagram app (see step 23 below).
- Navigate back to the browser tab where you were configuring the Instagram app. Navigate to the Basic Display page in the Instagram Basic Displaysection from the left sidebar. Copy the Instagram App ID and Instagram App Secret (after clicking on the Show button right in front of it) and paste it in the Instagram App ID and Instagram App Secret options at the module configuration page in the admin area.
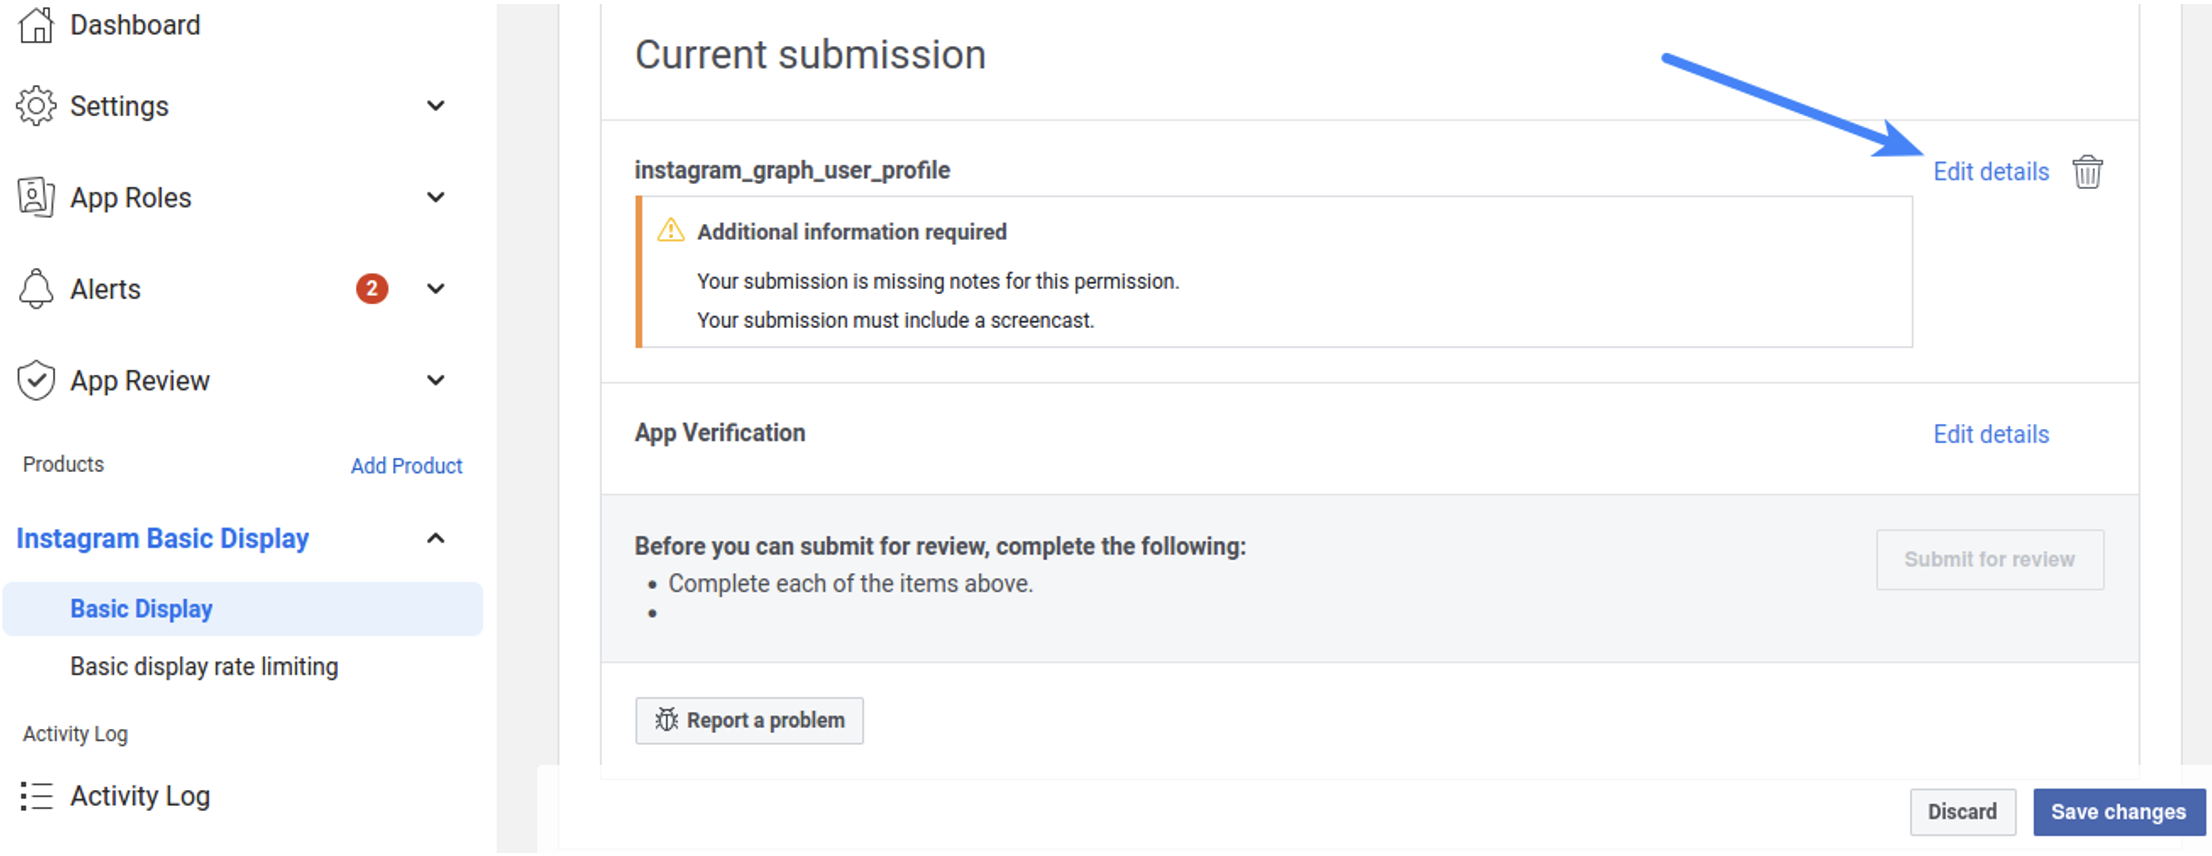
- Scroll down to the App Review for Instagram Basic Display section at the bottom of the page and click on Add to submission right in front of the instagram_graph_user_profile
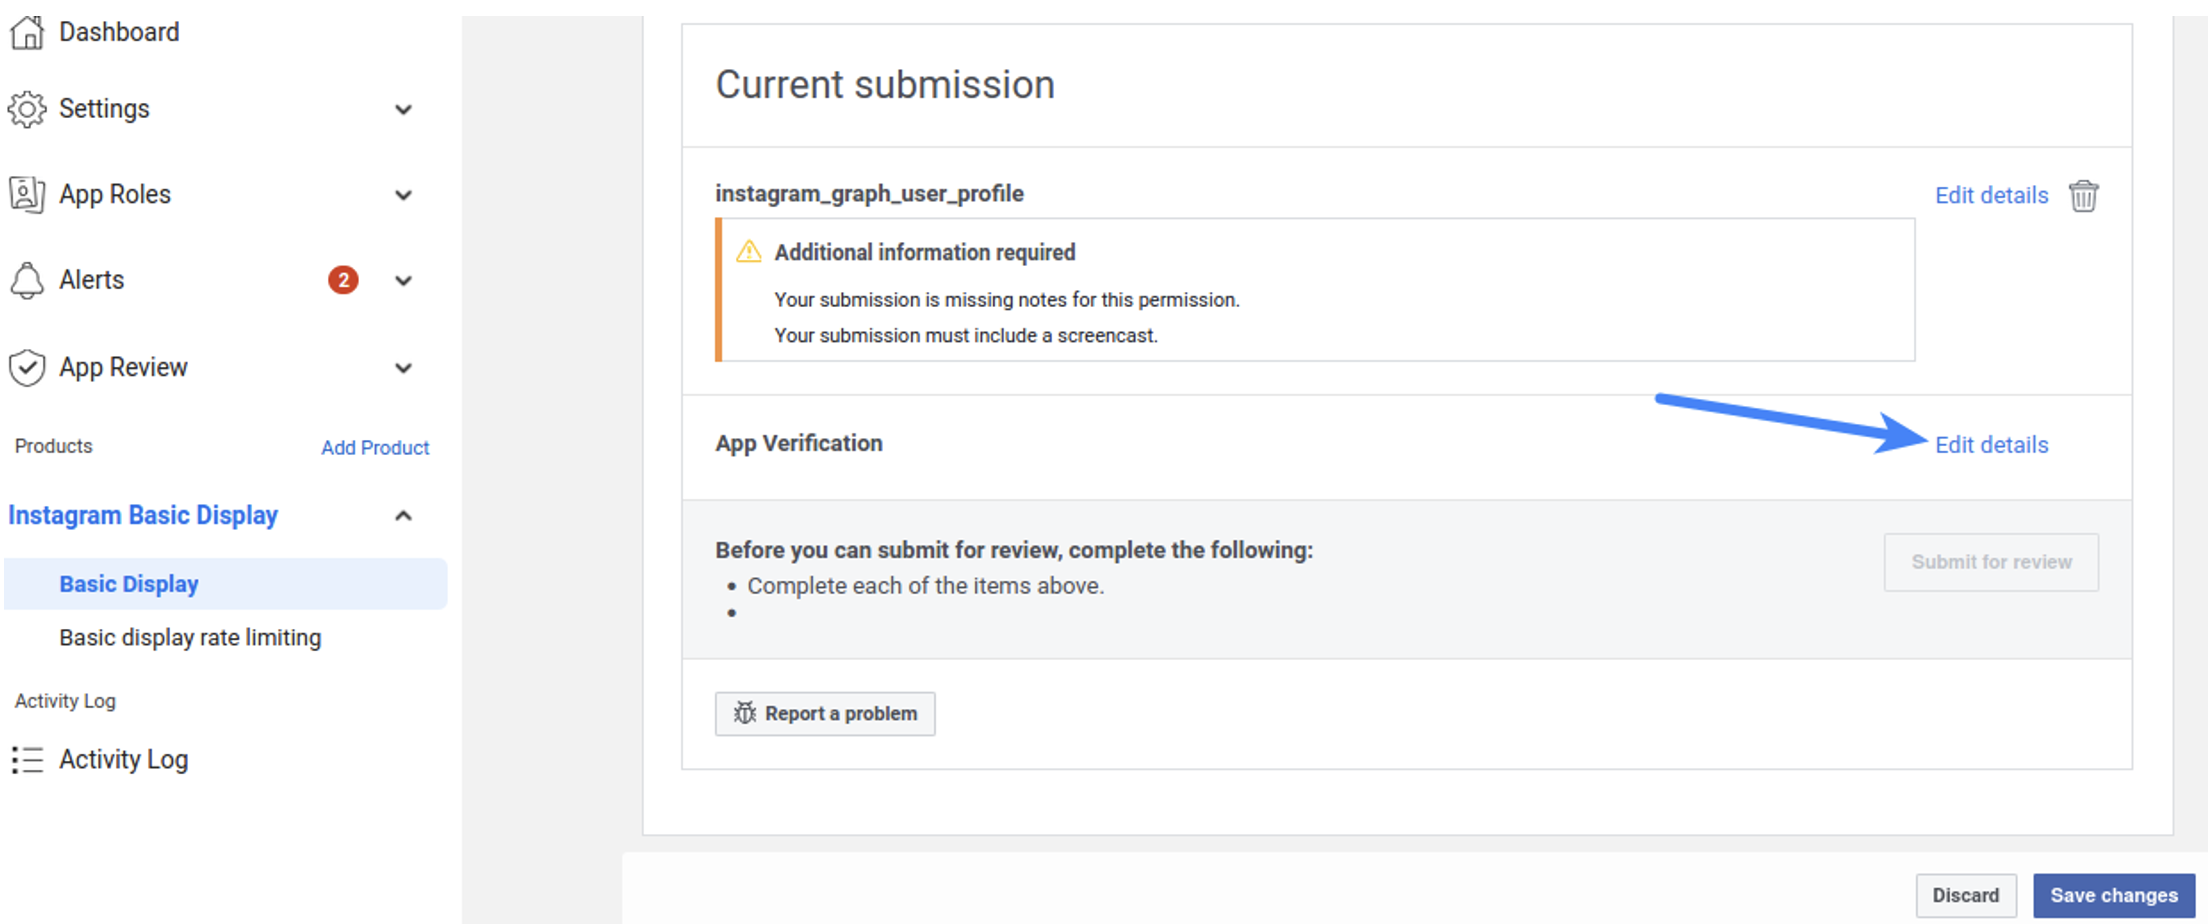
- Click Edit details in front of instagram_graph_user_profile in the Current submission section
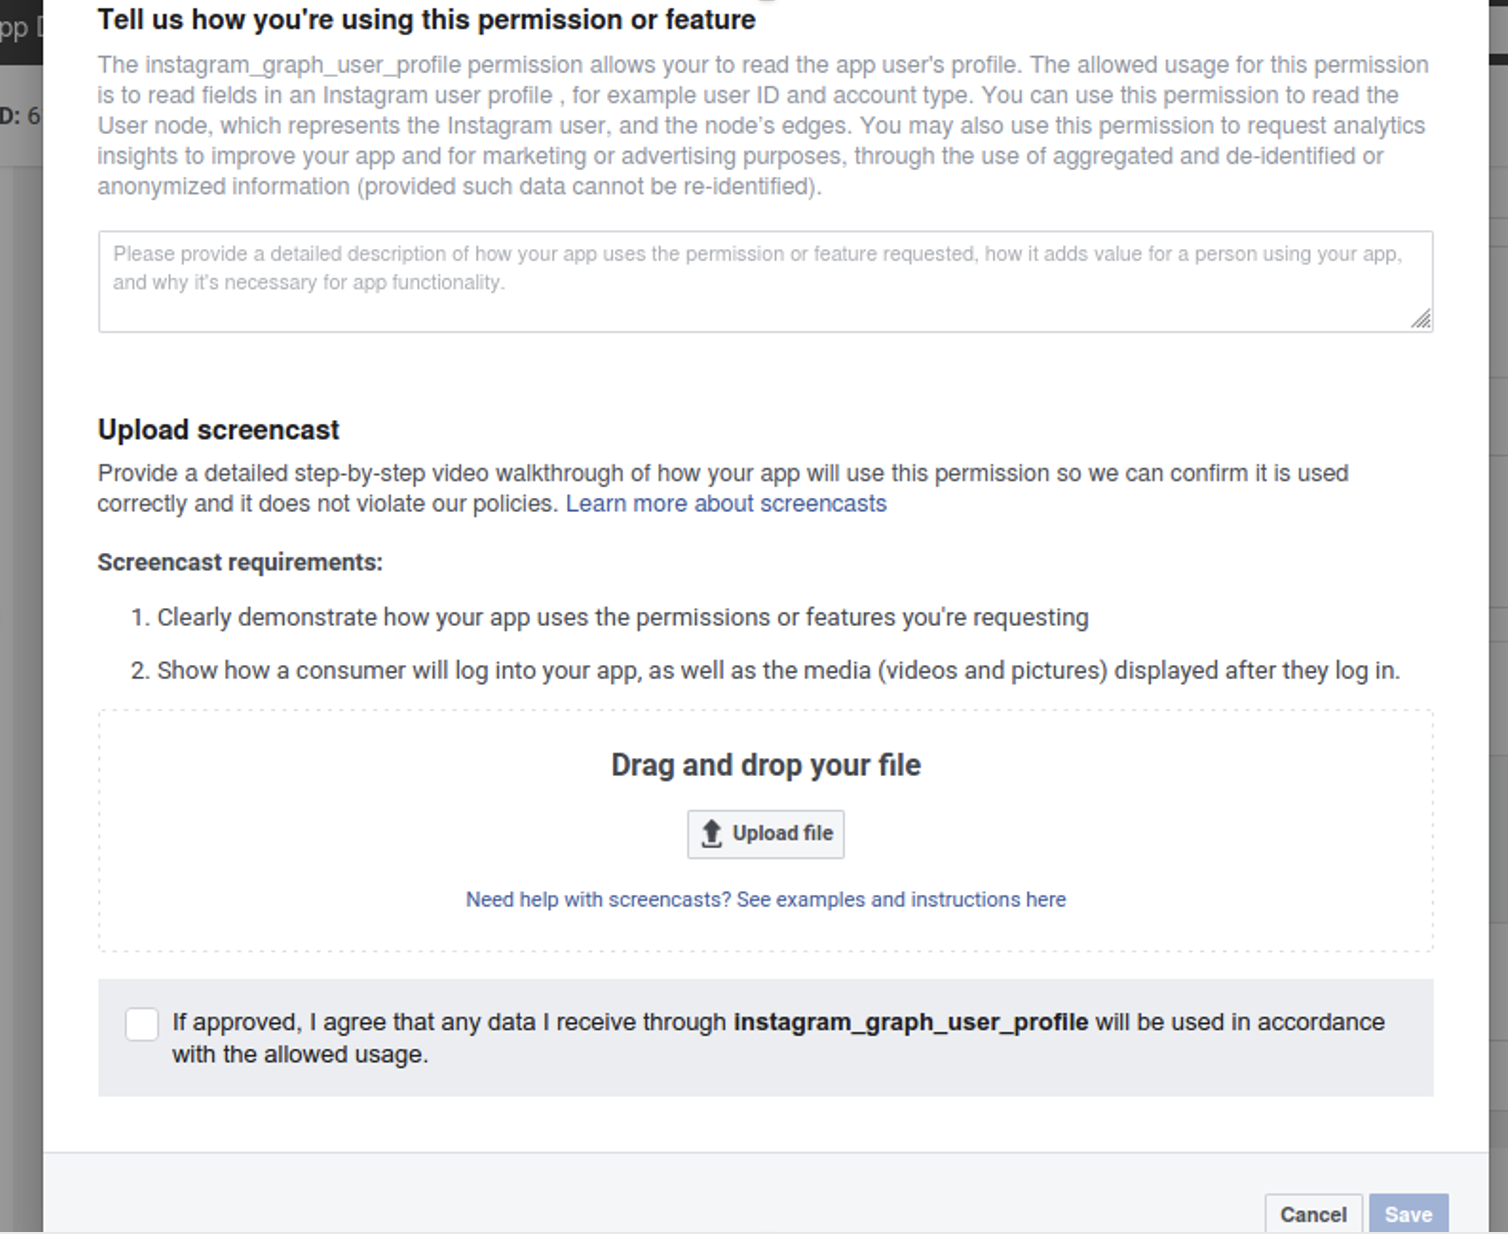
- In the option Tell us how you’re using this permission or feature, you can specify exactly the following:
This app integrates the Instagram icon at the user-profile page of our website which allows end-users to connect their Instagram profile with their pre-existing user-account.
Note: As Instagram does not allow login/authentication to be used with any of their scopes according to their developer docs, you can describe the mechanism your website uses the Instagram icon in Social Account Linking section at the user profile page to allow your users to link their Instagram accounts to their existing accounts at your website. Just keep social login icons disabled at the login, register pages of your website before Instagram approves your submission.
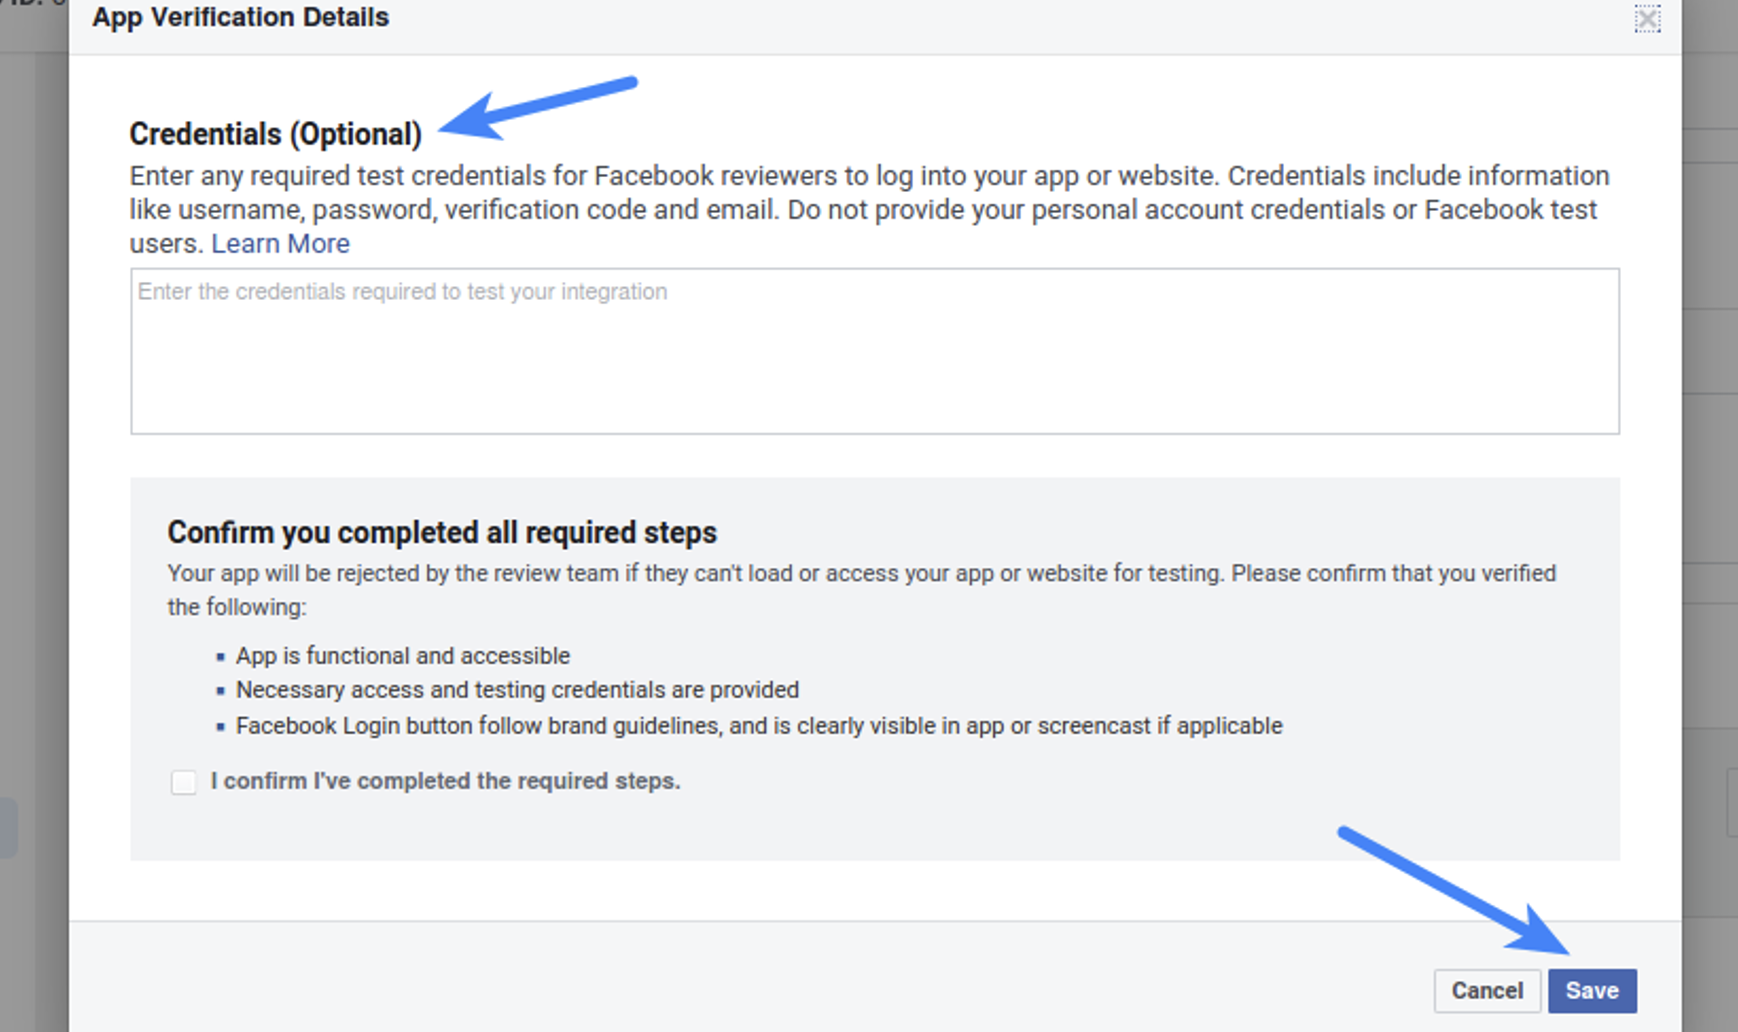
Upload a screenshot showing the same, agree to the data usage policy and save changes. - Click Edit details in front of the App verification
- Here you can specify such details as – Login page of your website where the reviewers can log in and see the Instagram icon at the profile page, username-password of the user-account you have created for them at your website etc.
Customization Options
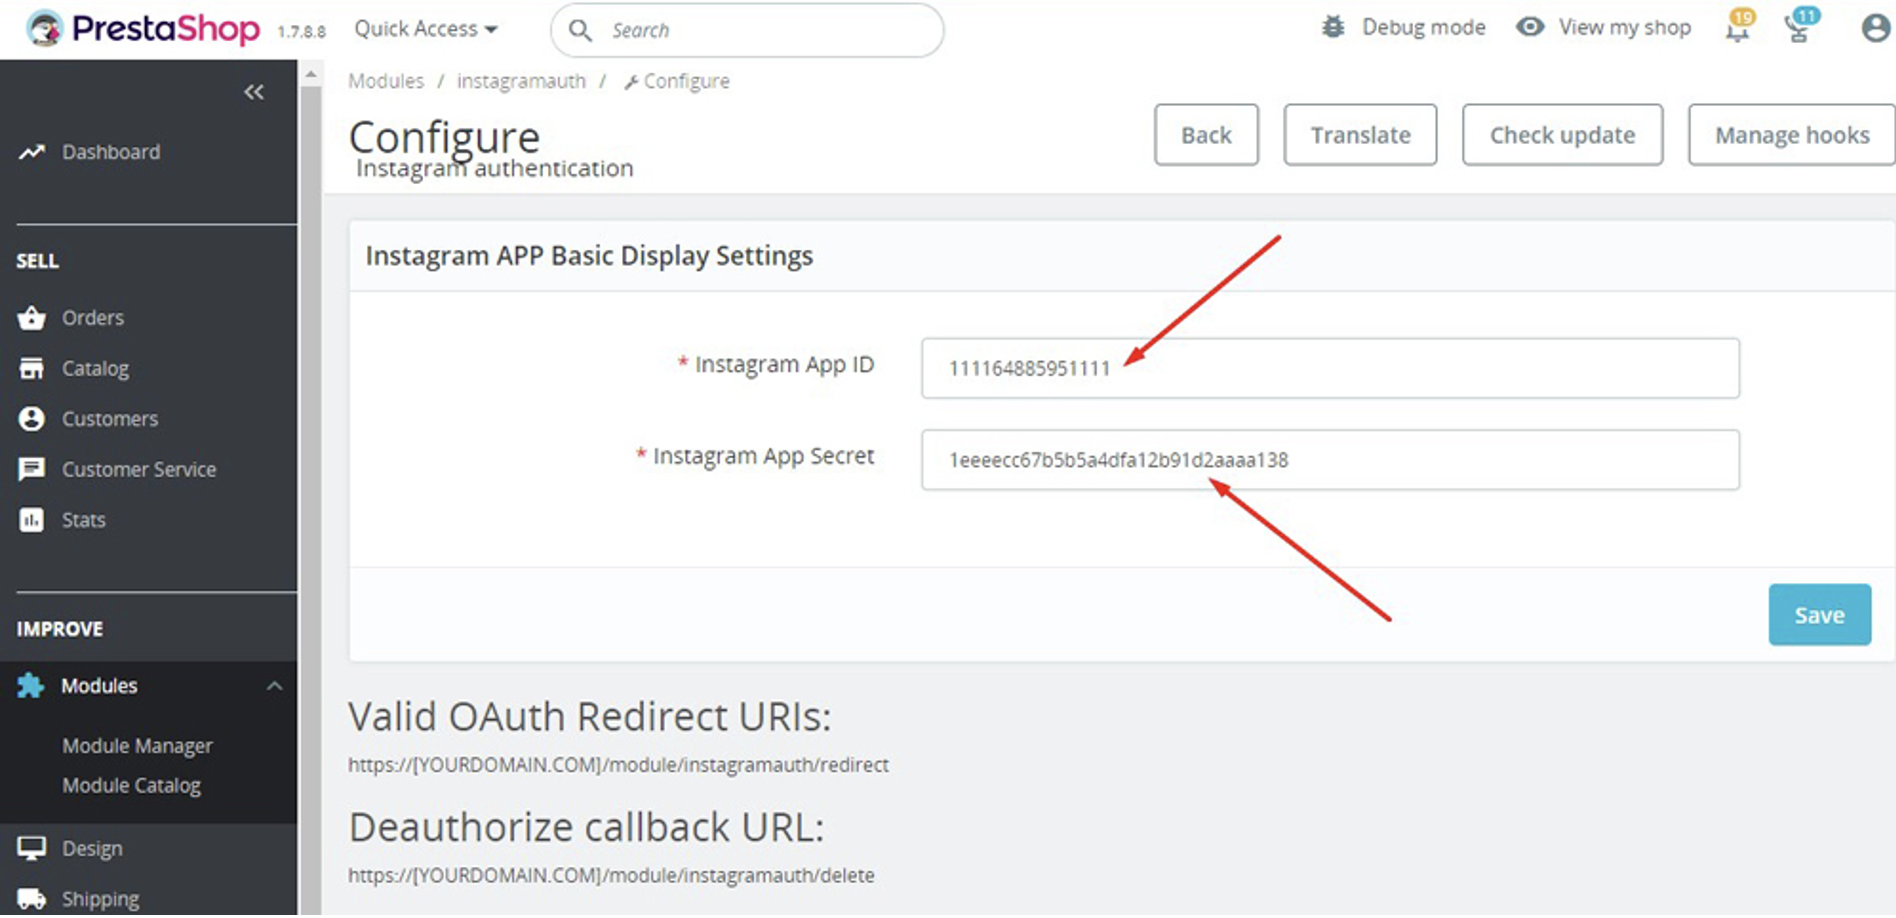
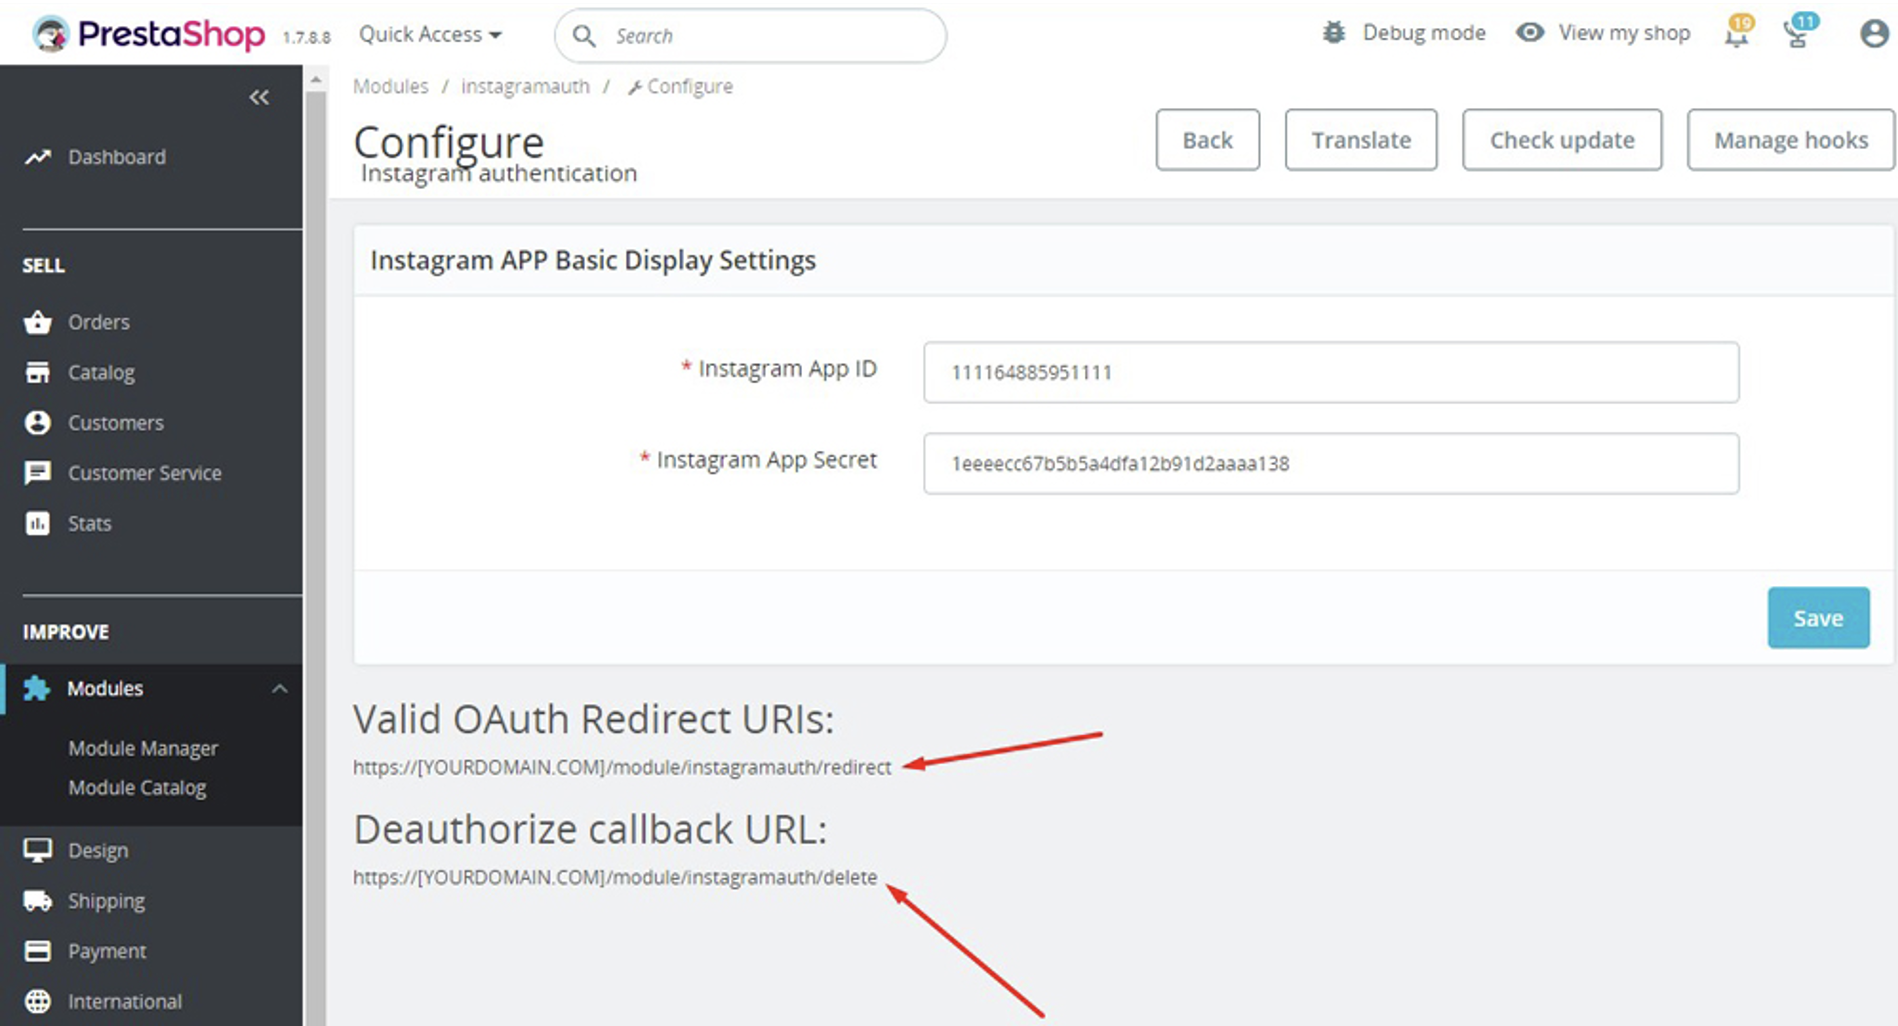
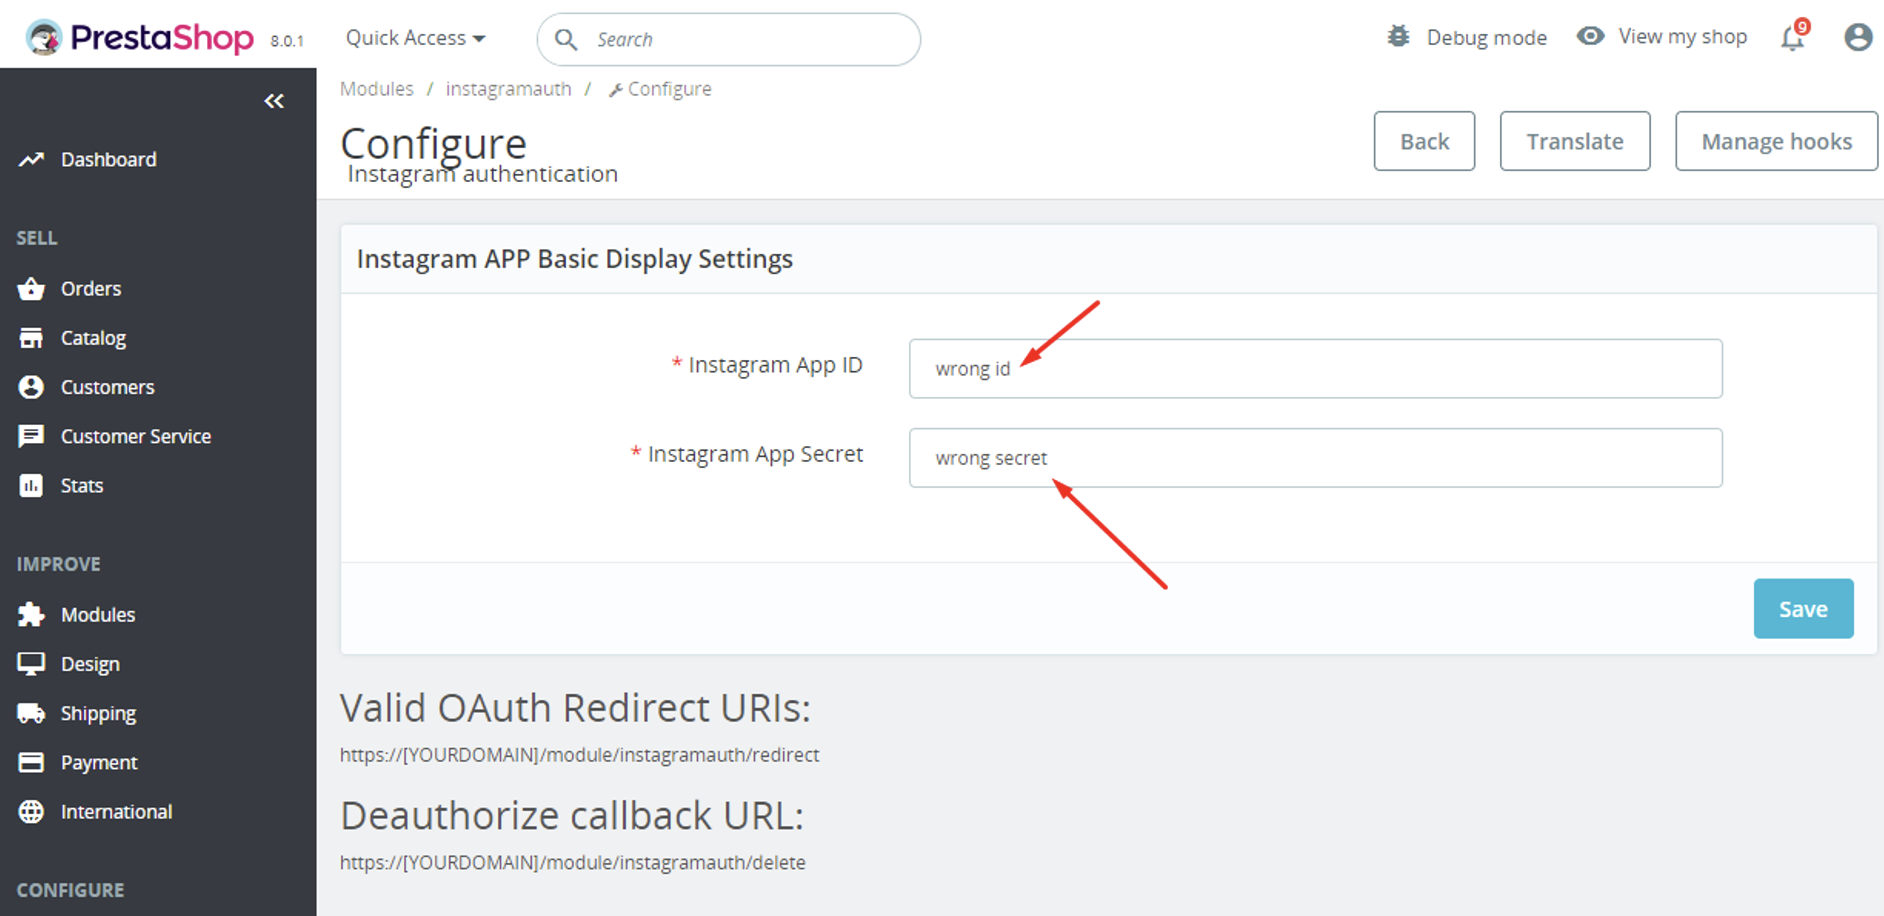
- Retrieve the Instagram App ID and Instagram App Secret, then insert them into the corresponding fields on the setup page of the module:
- Copy the links for Valid OAuth Redirect URIs and Deauthorize callback URL from the module’s configuration page and paste them into the respective fields of the Instagram application:
Valid OAuth Redirect URIs
Deauthorize callback URL
Installation Process:
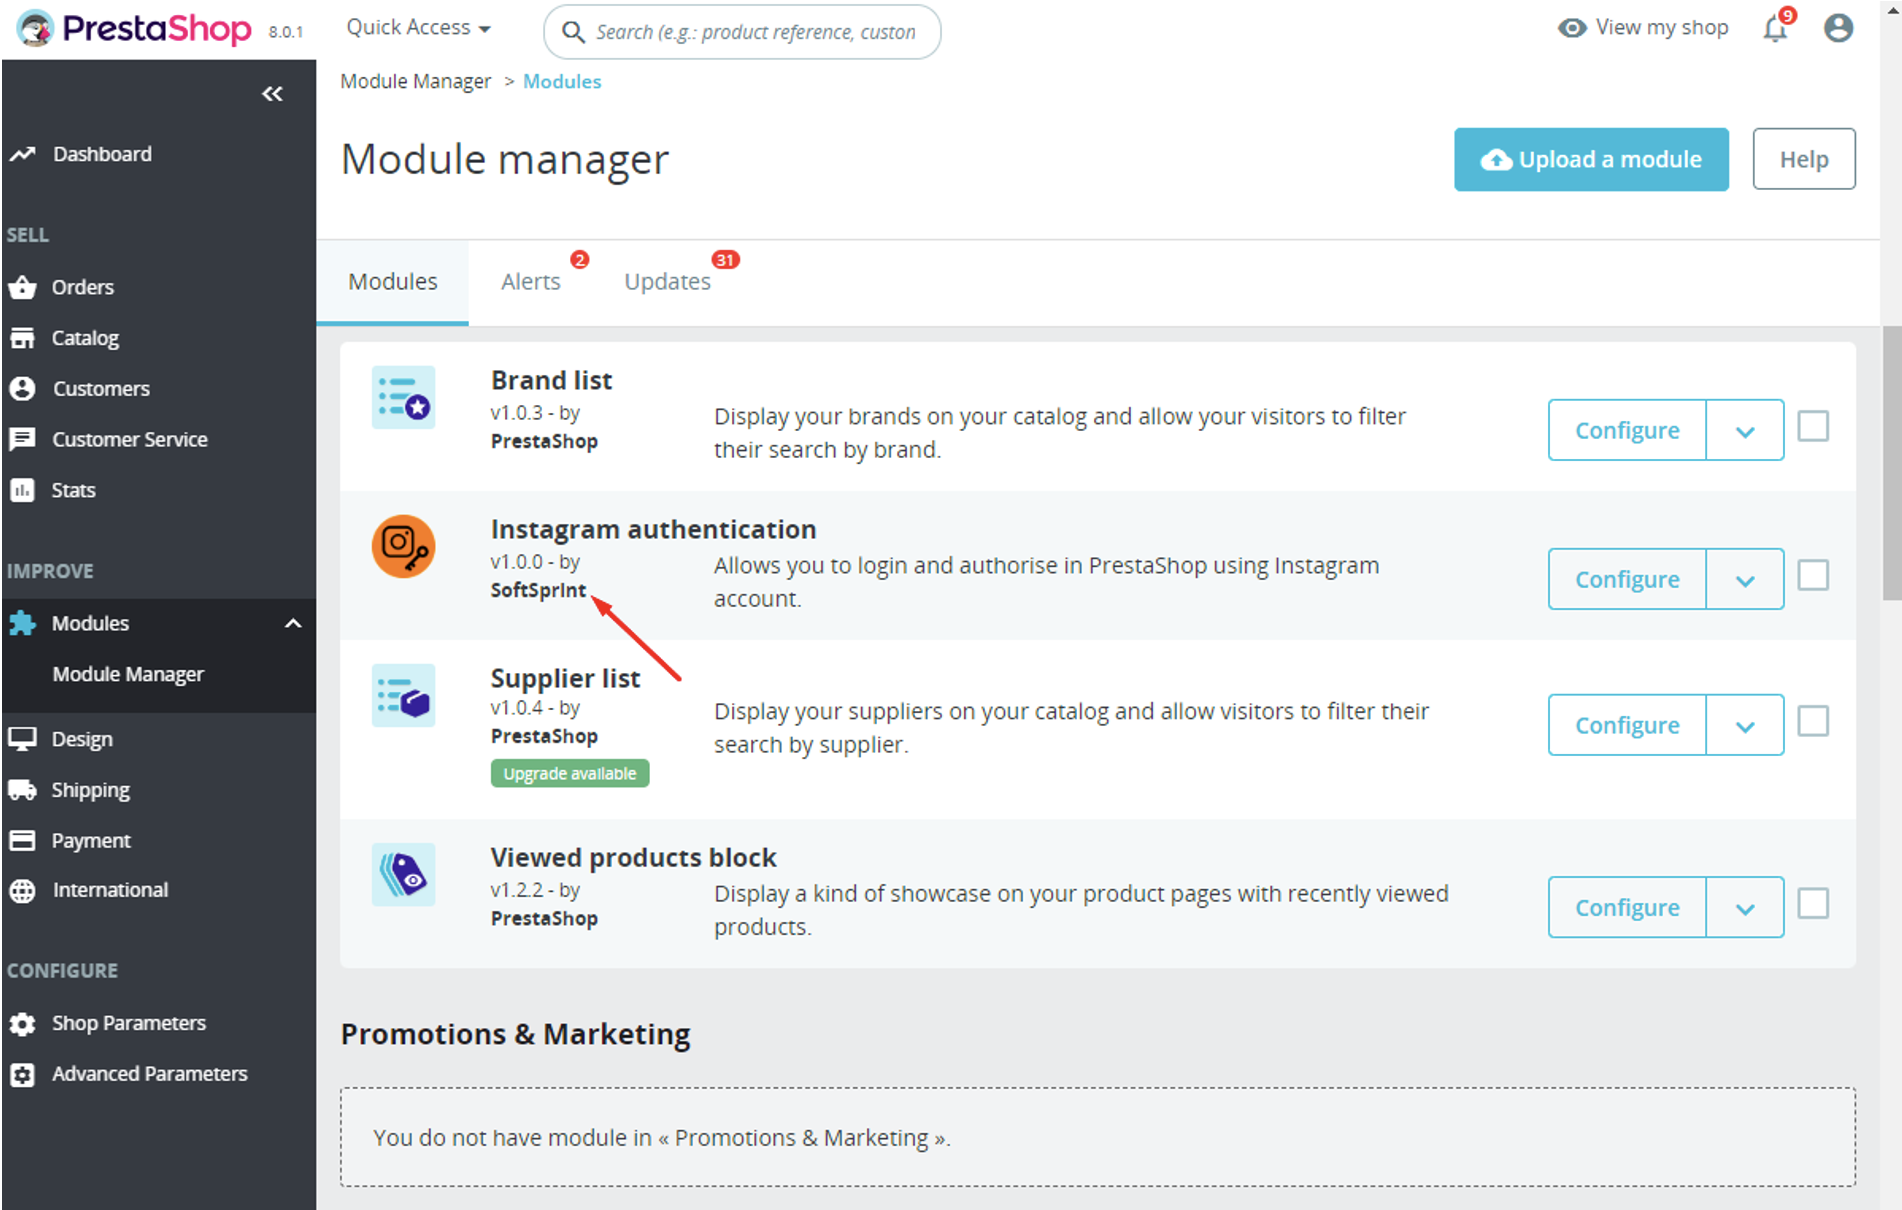
- Upload the module via the Backoffice (Modules > Add New Module) or leverage an FTP-client
- Initiate the installation and input the required configurations
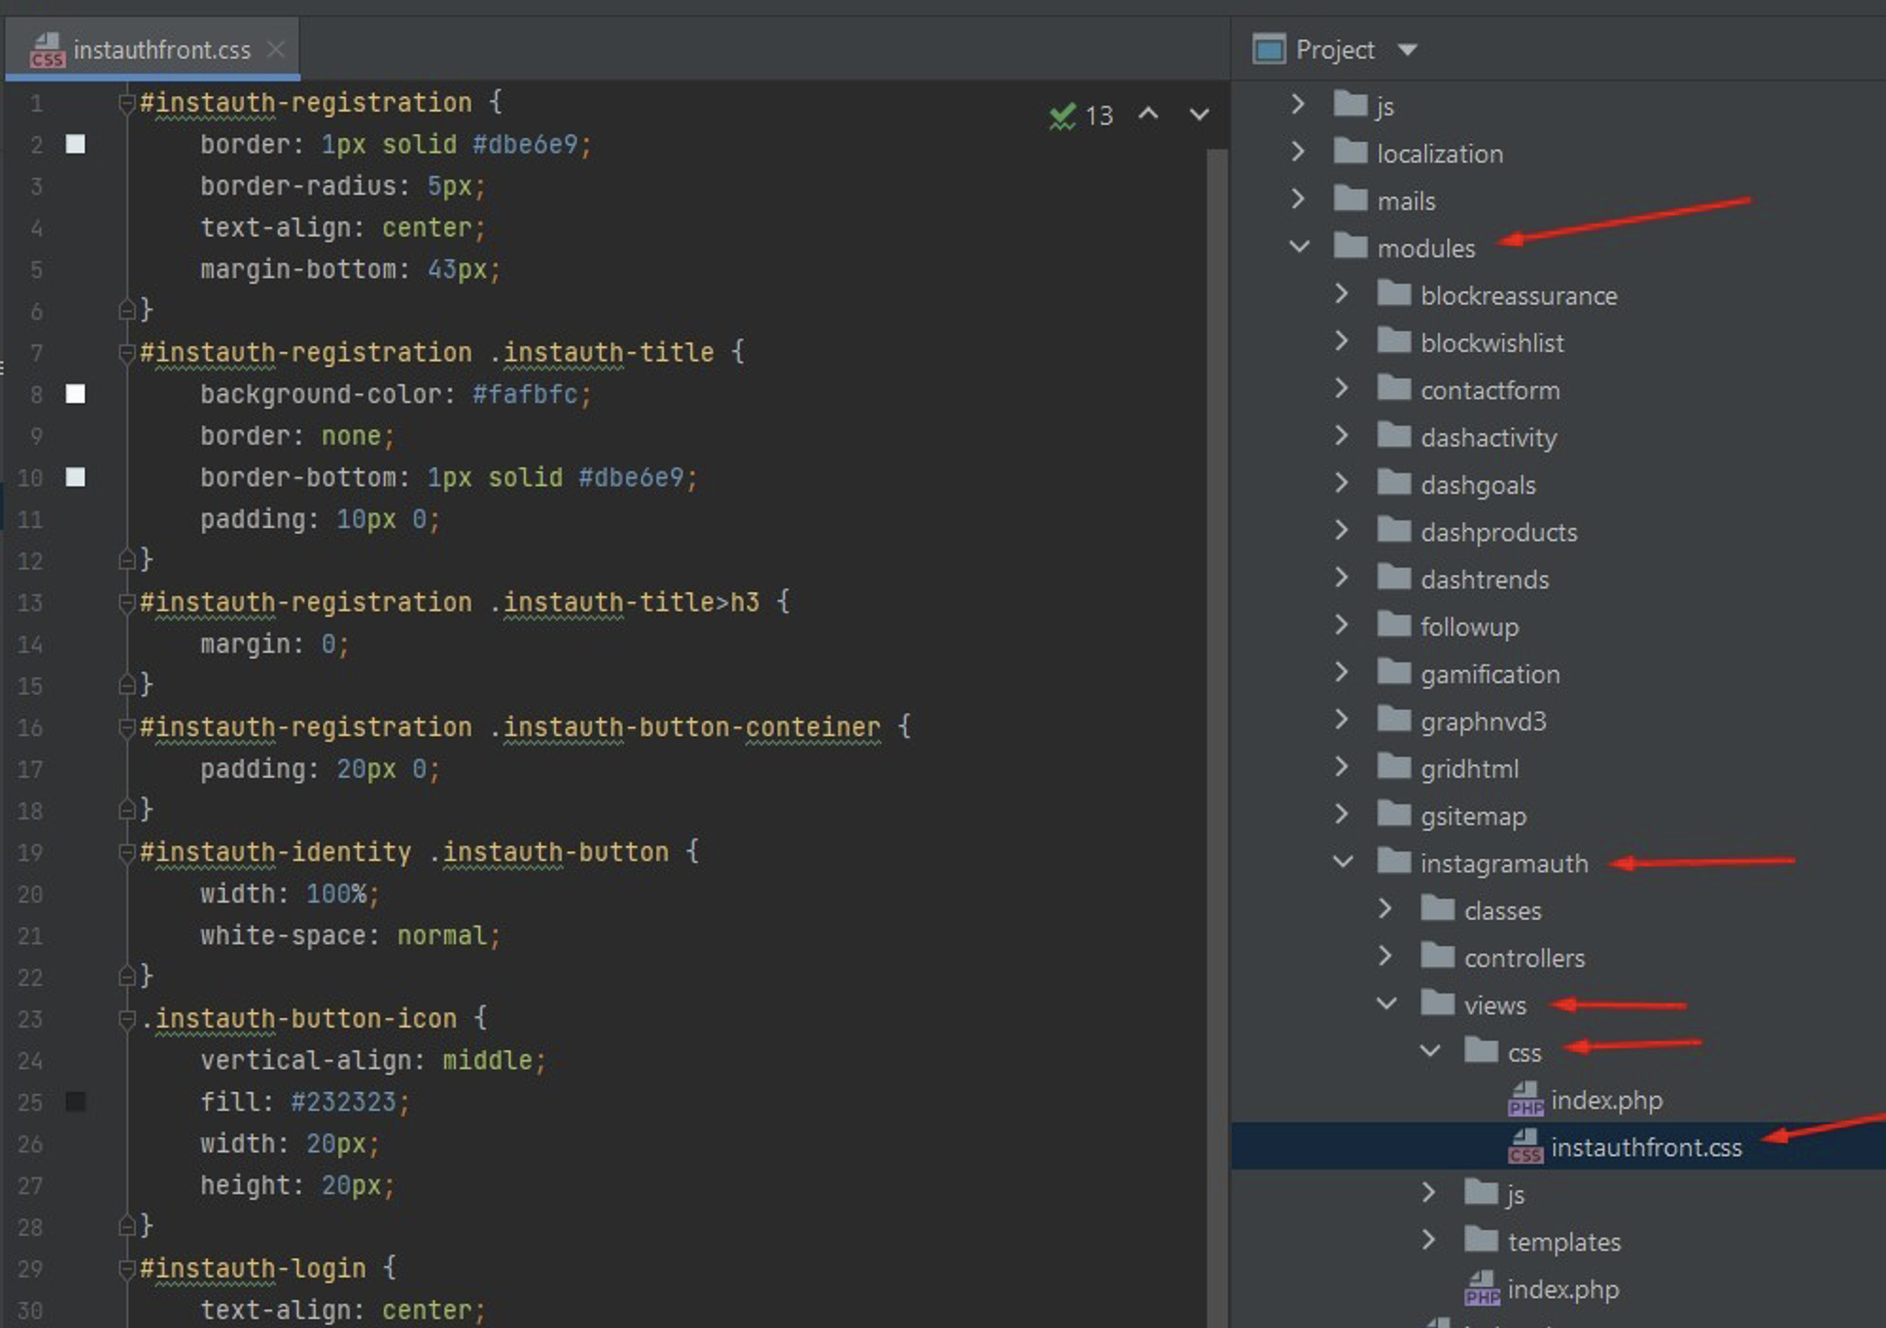
Customizing CSS Styles for the Button:
- Locate the style file at:
/modules/instagramauth/views/css/instauthfront.css
Module Workflow Scenarios:
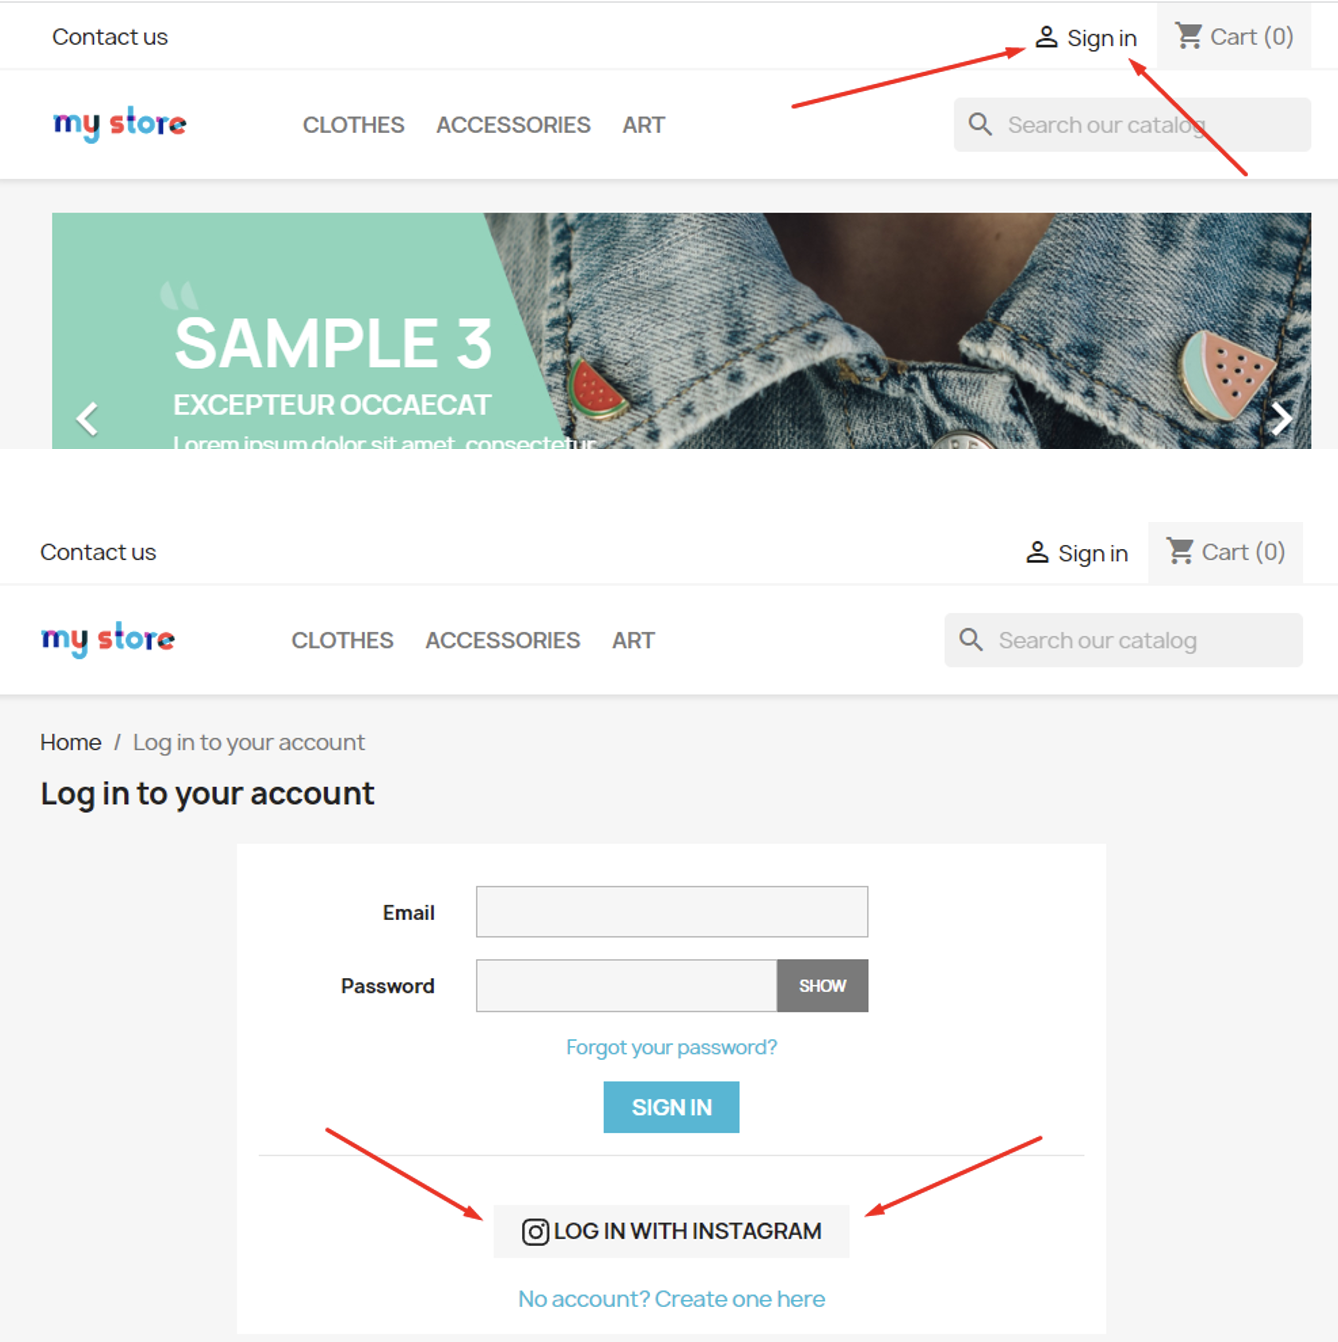
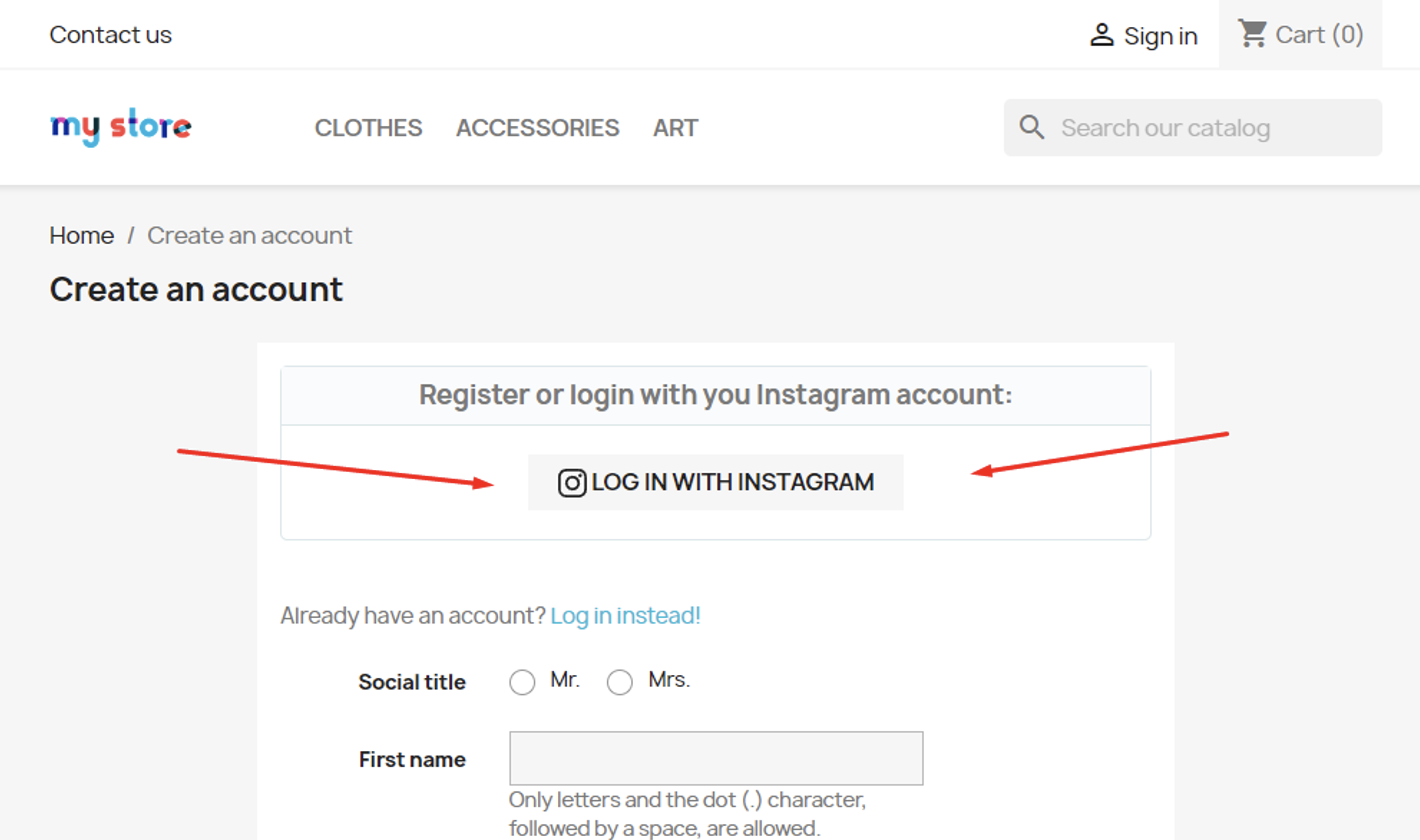
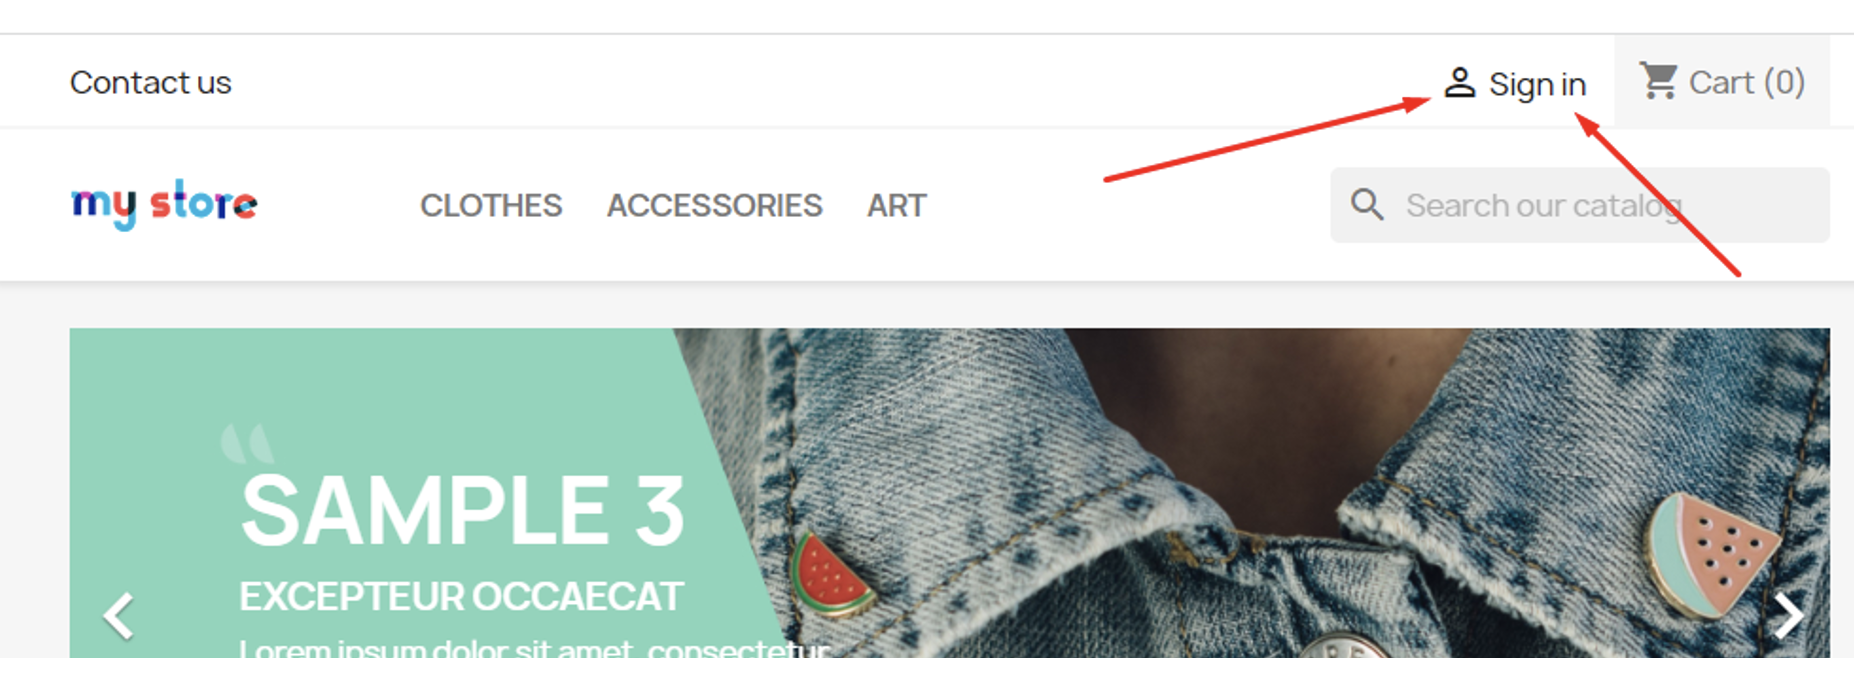
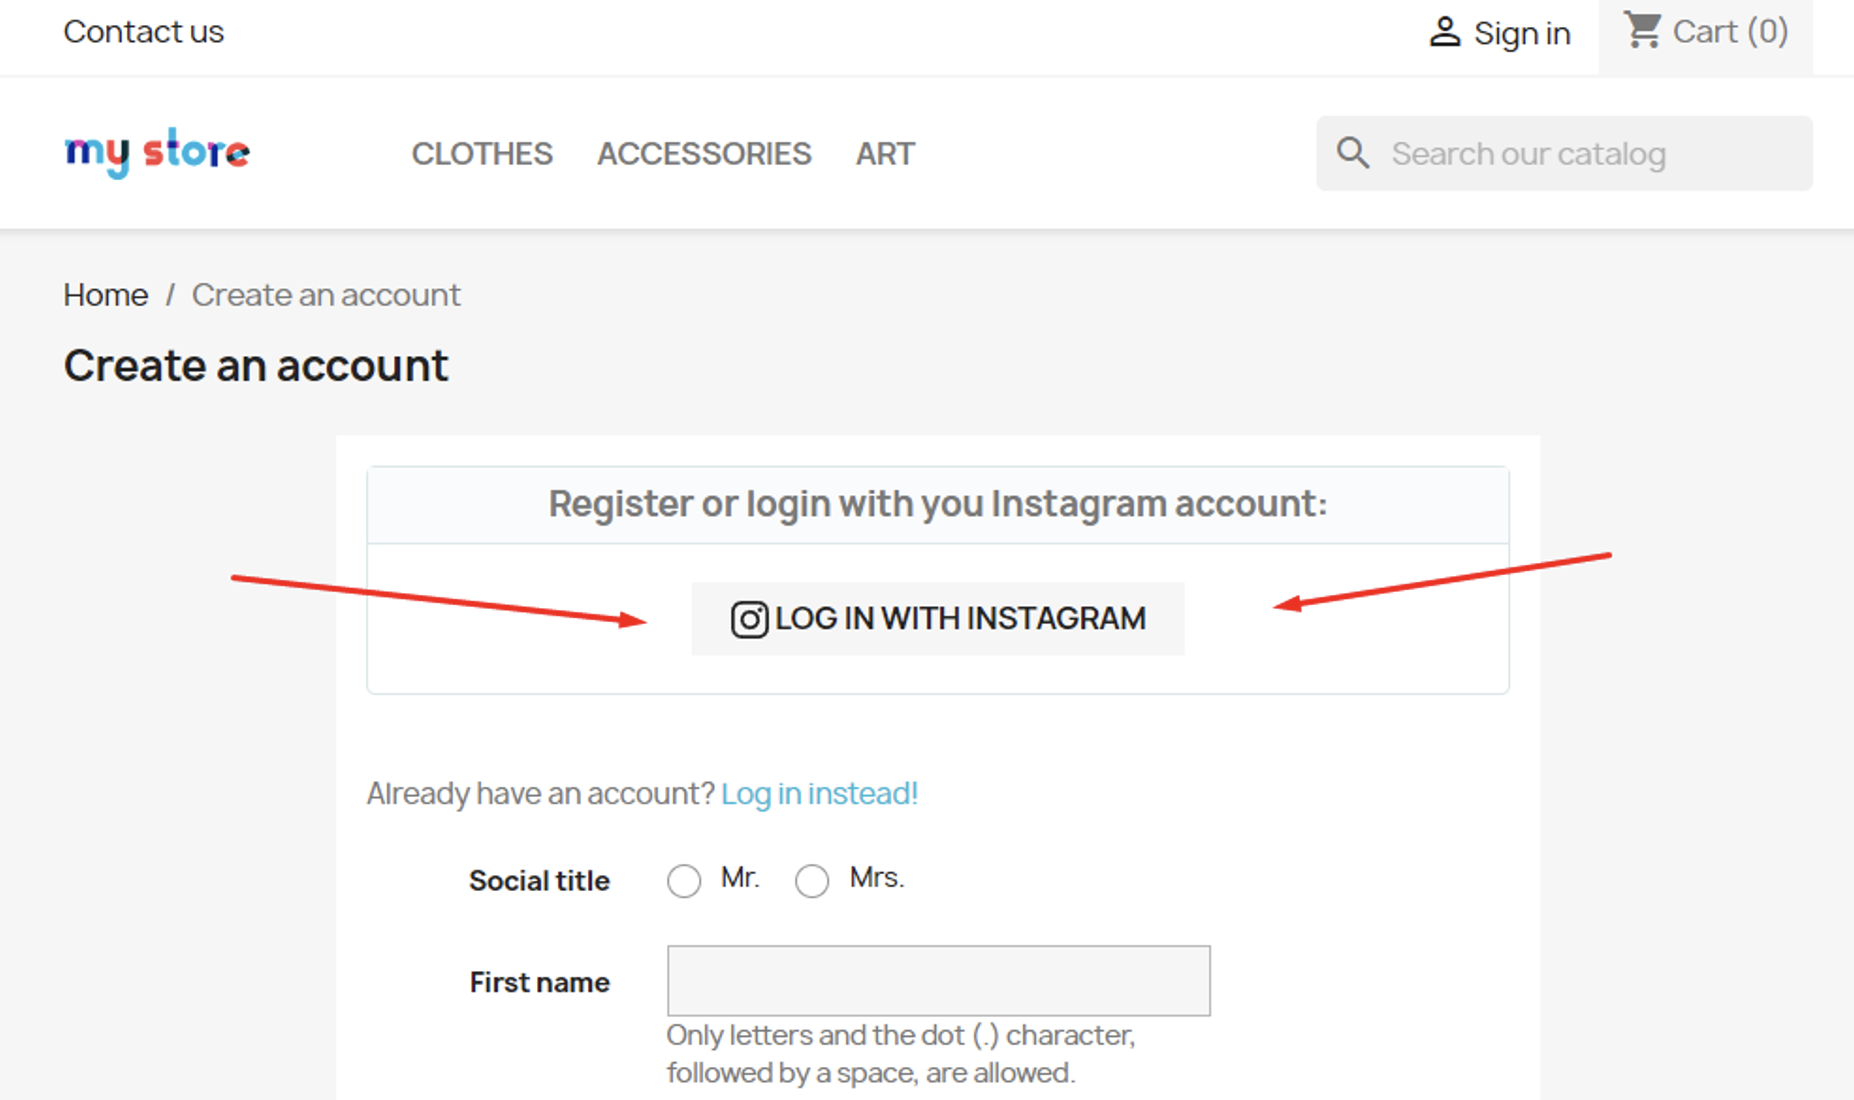
1. User’s First-time Login or Registration with Instagram:
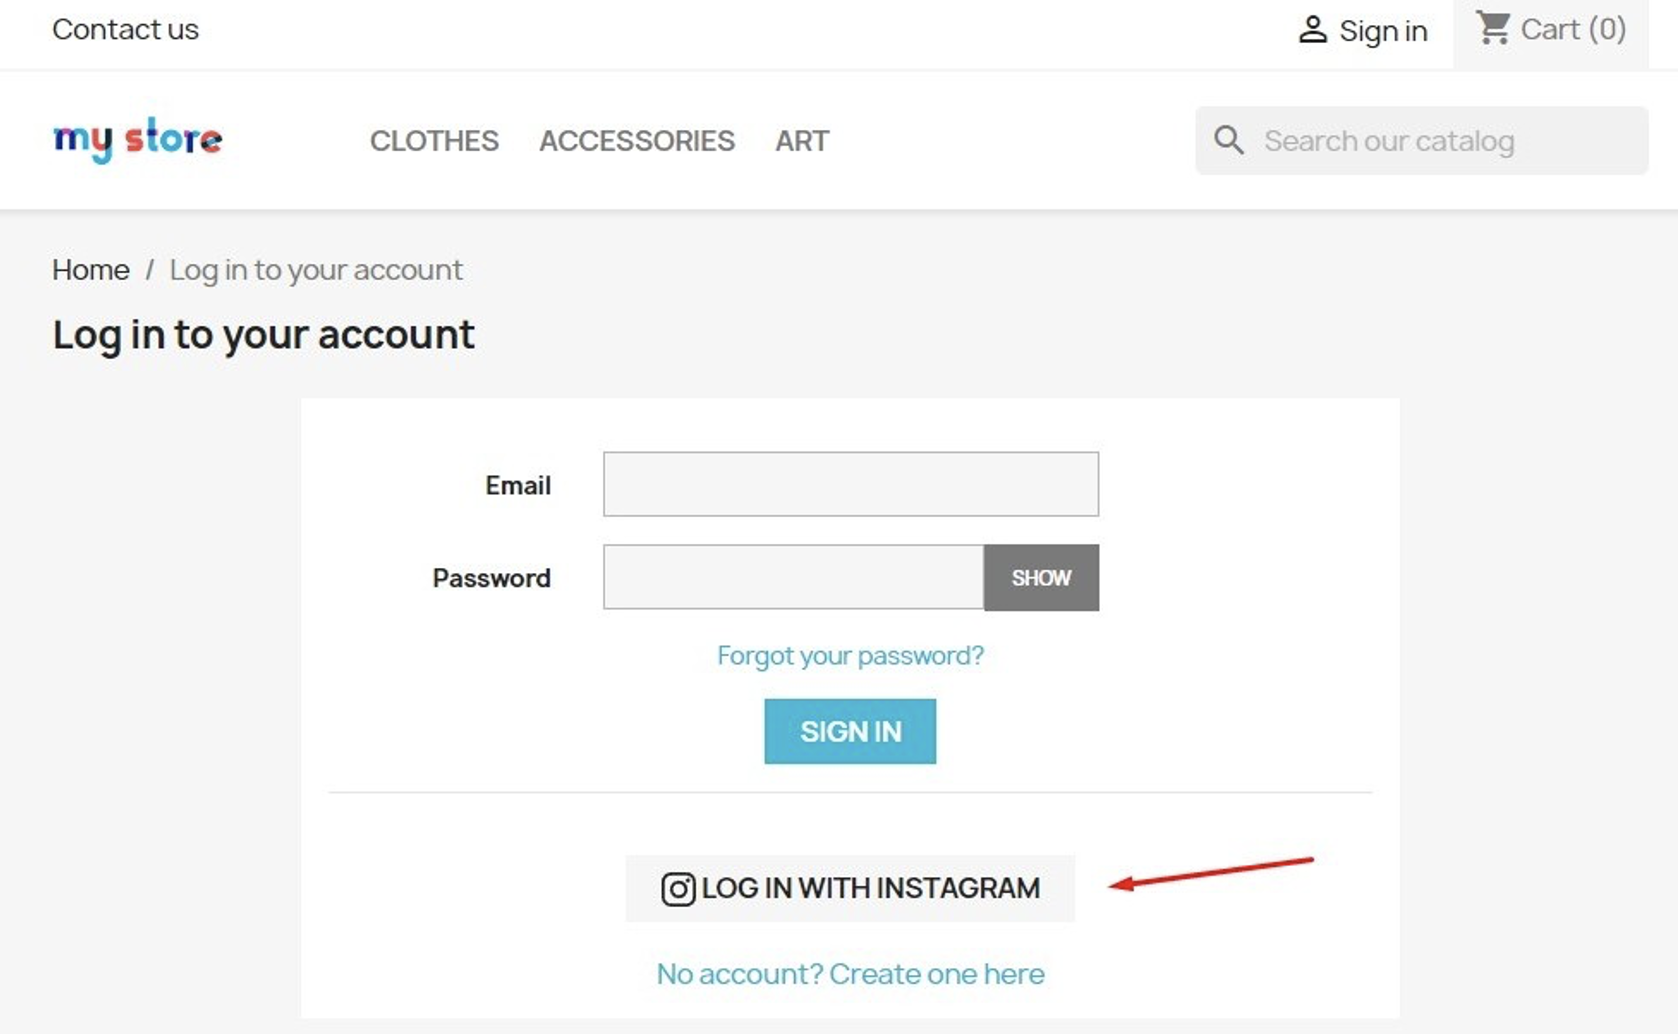
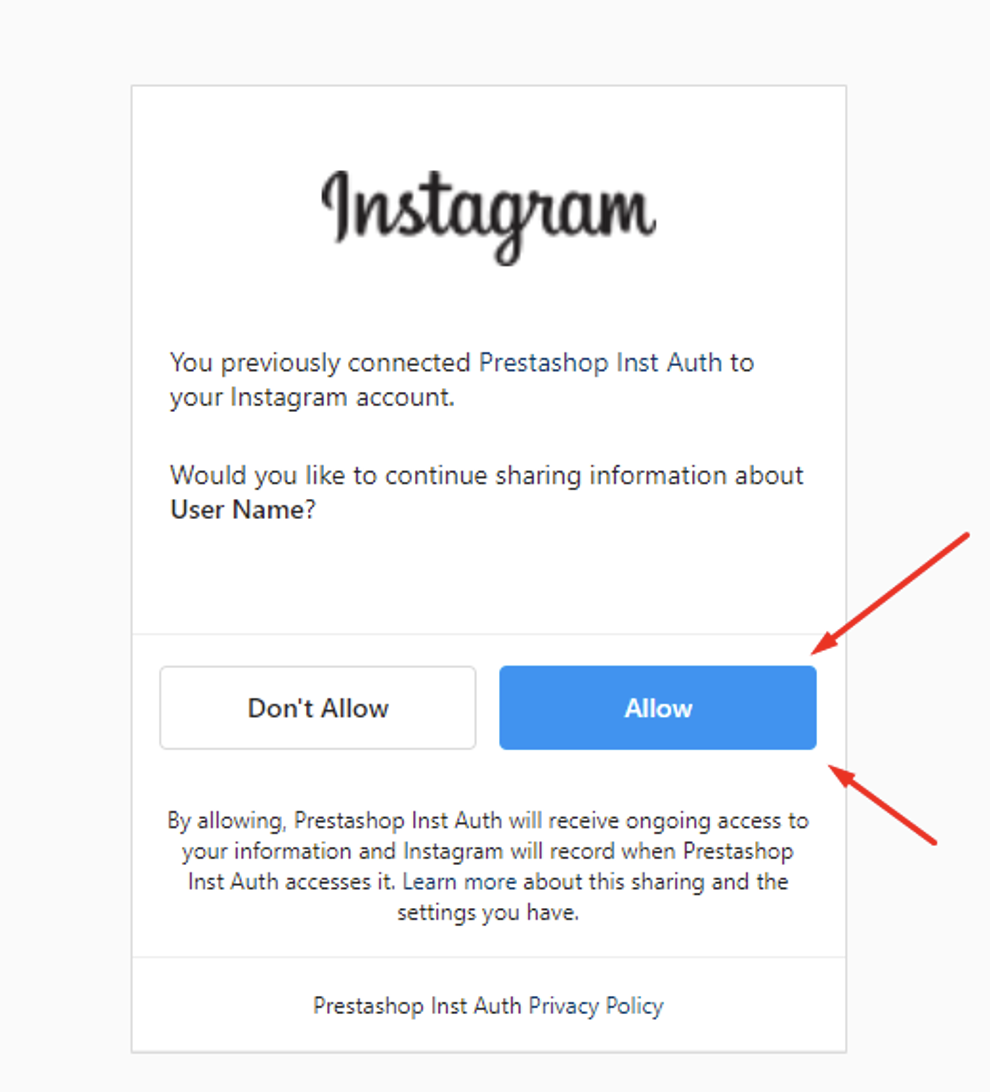
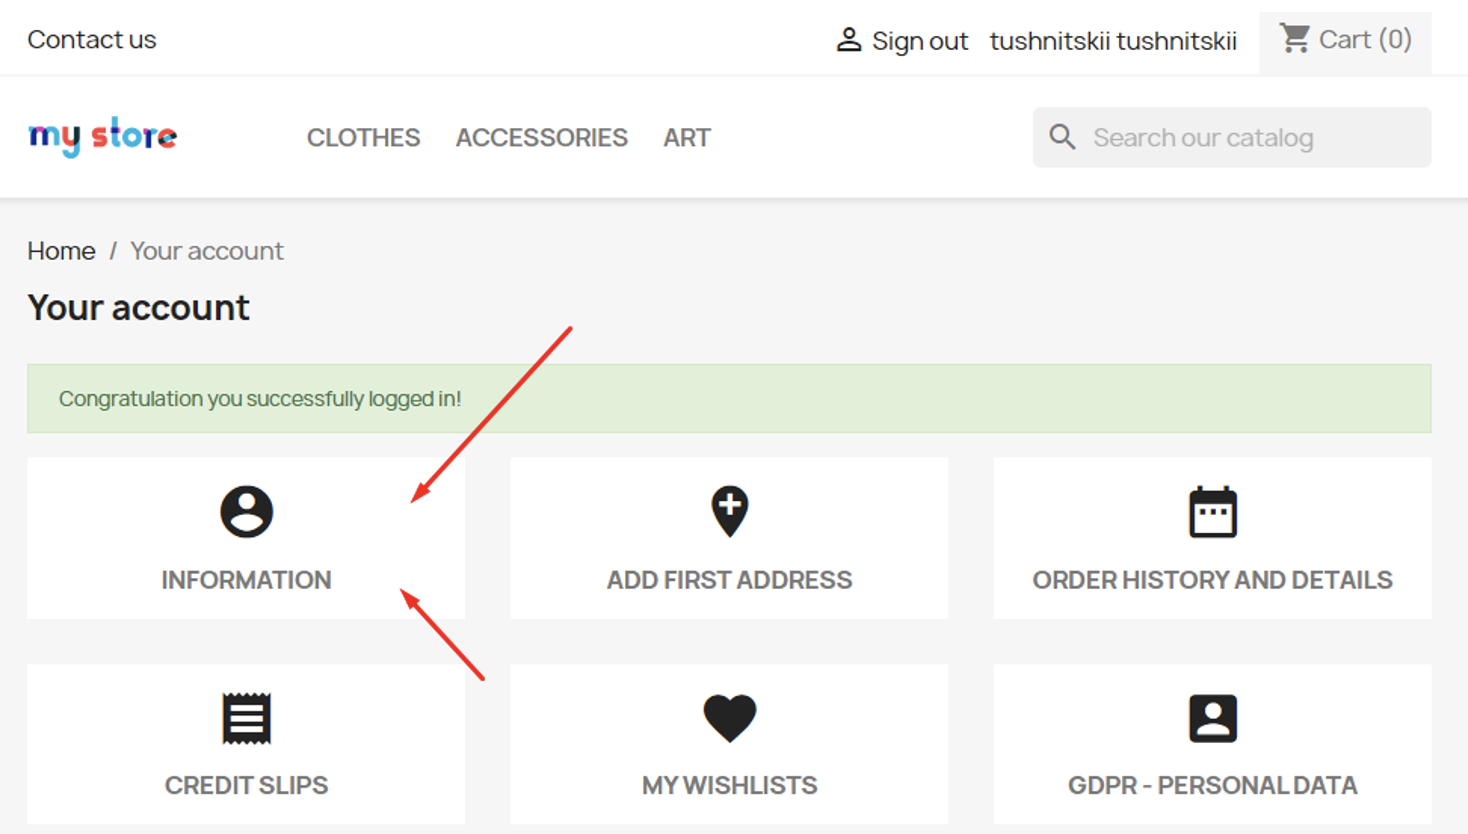
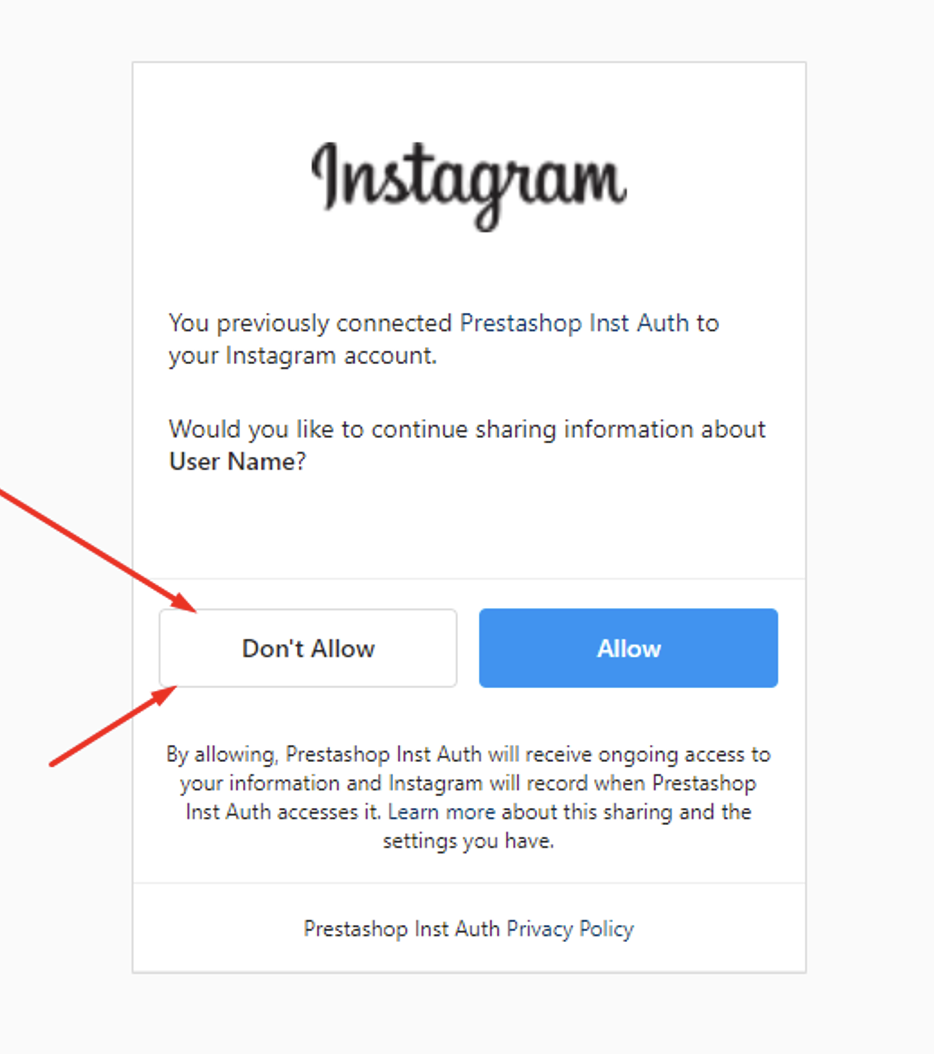
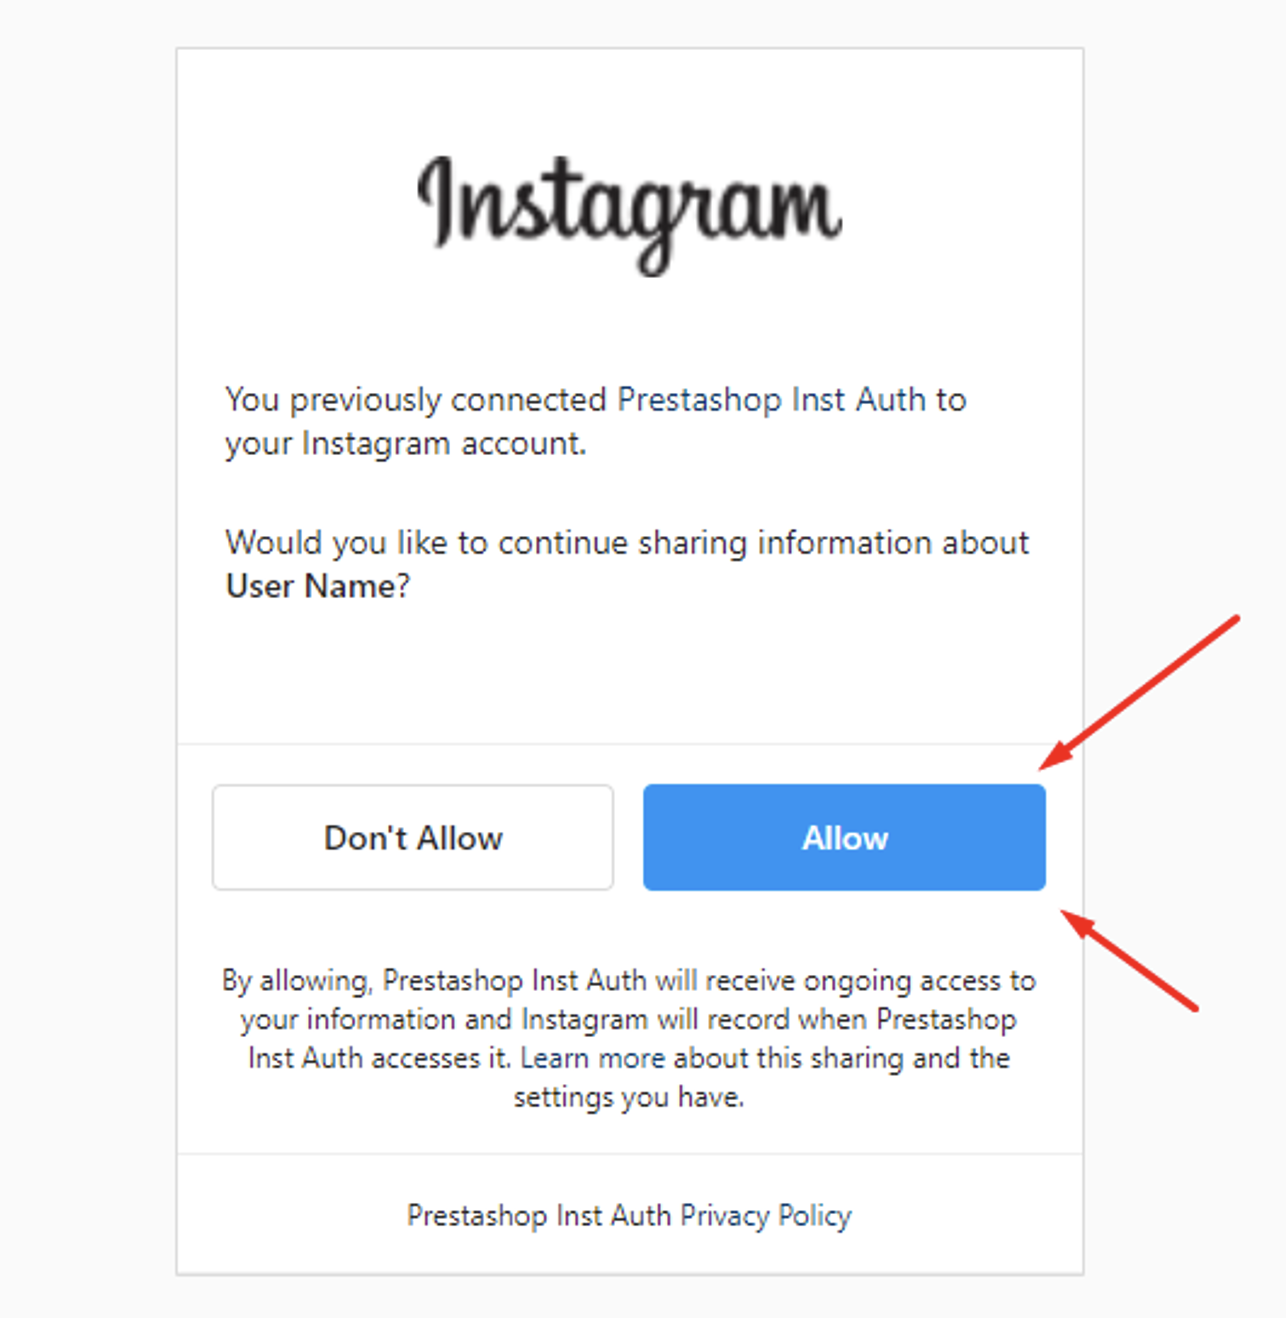
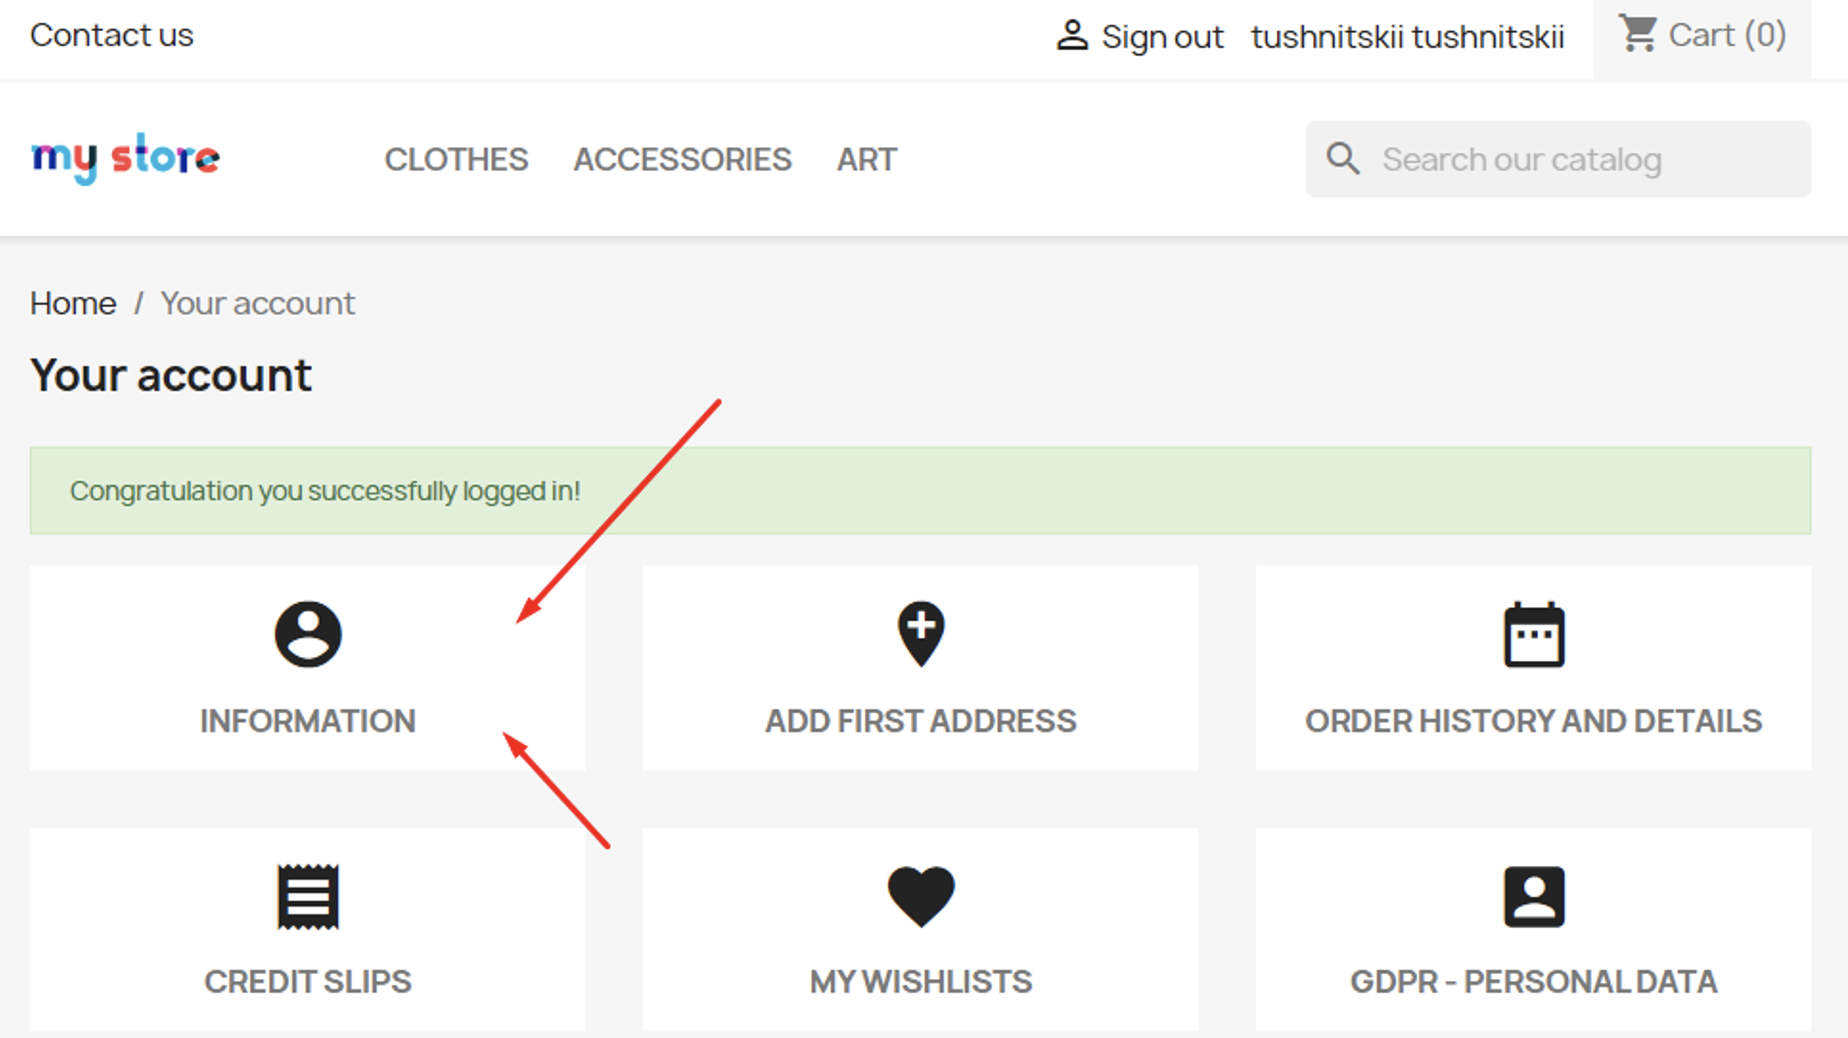
– Upon clicking “Log in with Instagram,” the user is redirected to Instagram to confirm data consent. After confirmation, they are redirected to their user account on your website.
– A new customer account is created:
– The user’s Instagram account is linked to the created customer account.
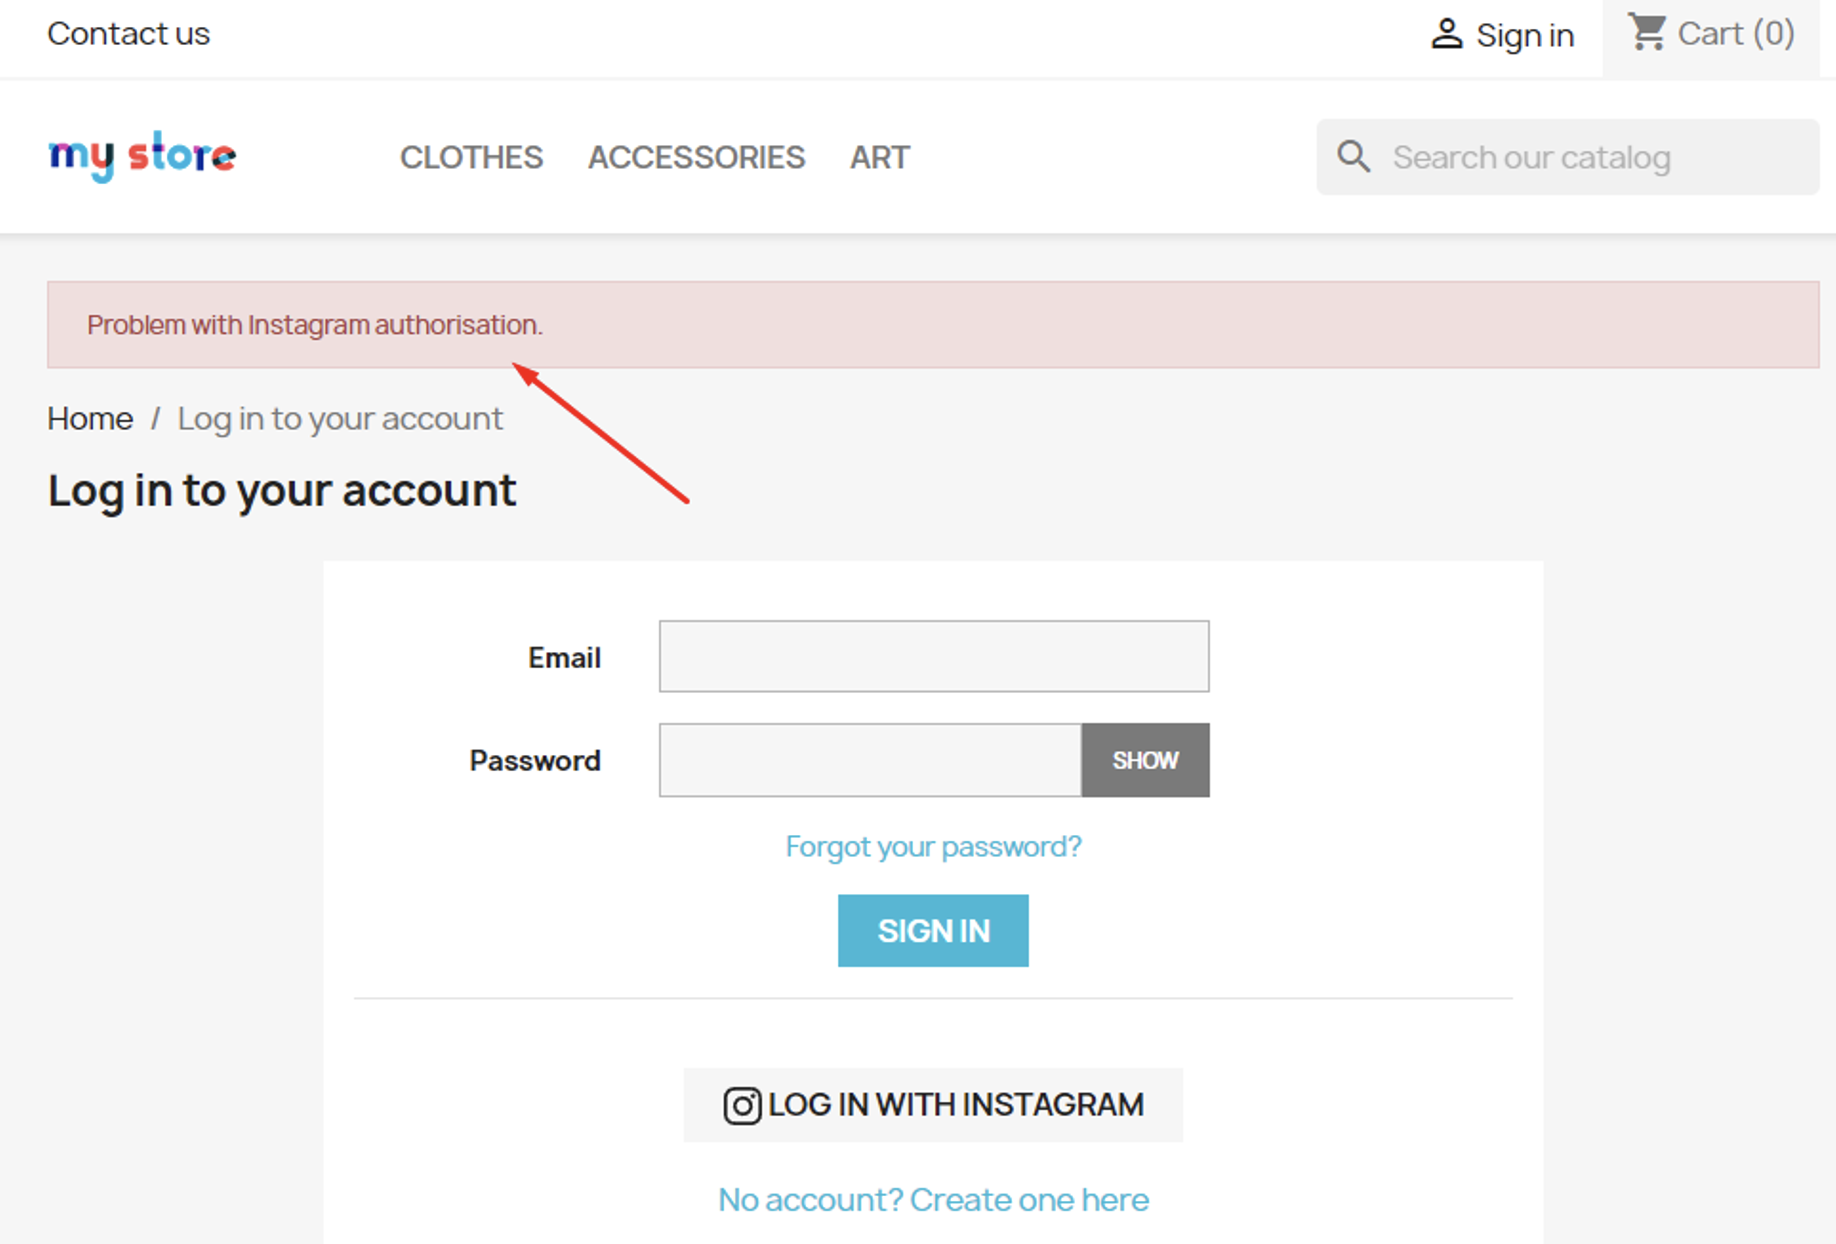
– If the user cancels the data transfer on the Instagram page, they return to your site and see an authorization error message.
2. User with Previous Instagram Registration:
– Clicking “Log in with Instagram” redirects the user to Instagram for data consent. After confirmation, they are transferred to their user account.
3. Logged-in User:
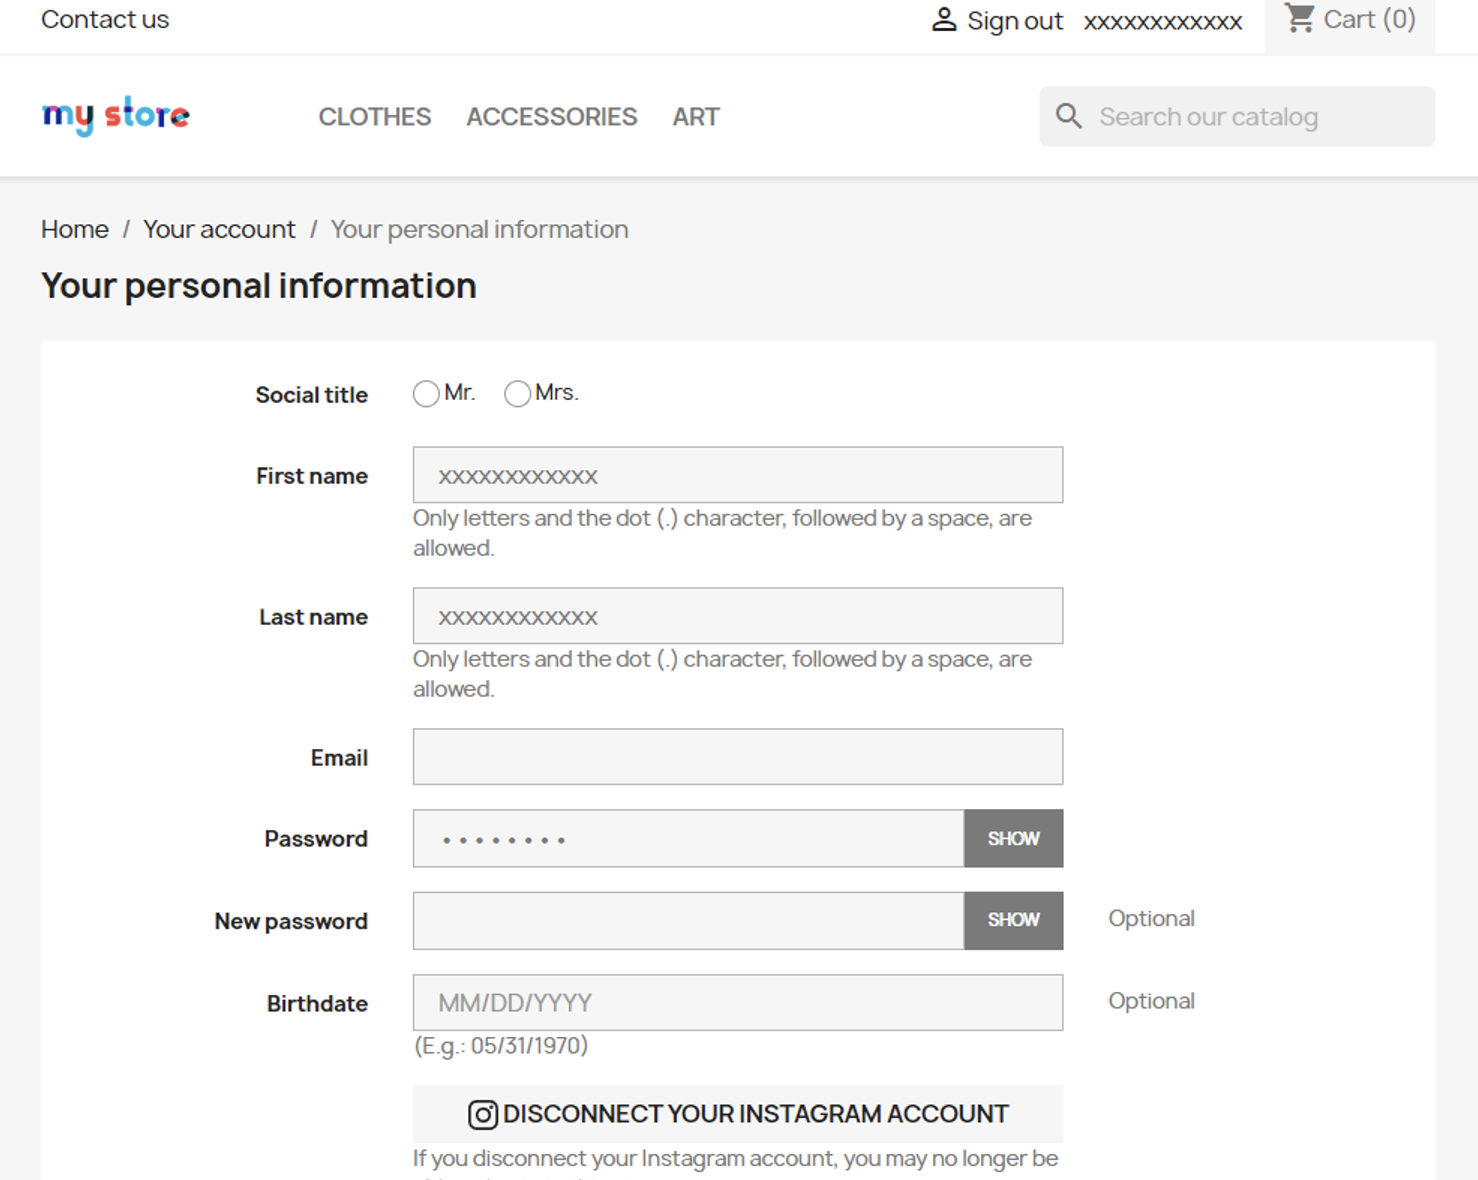
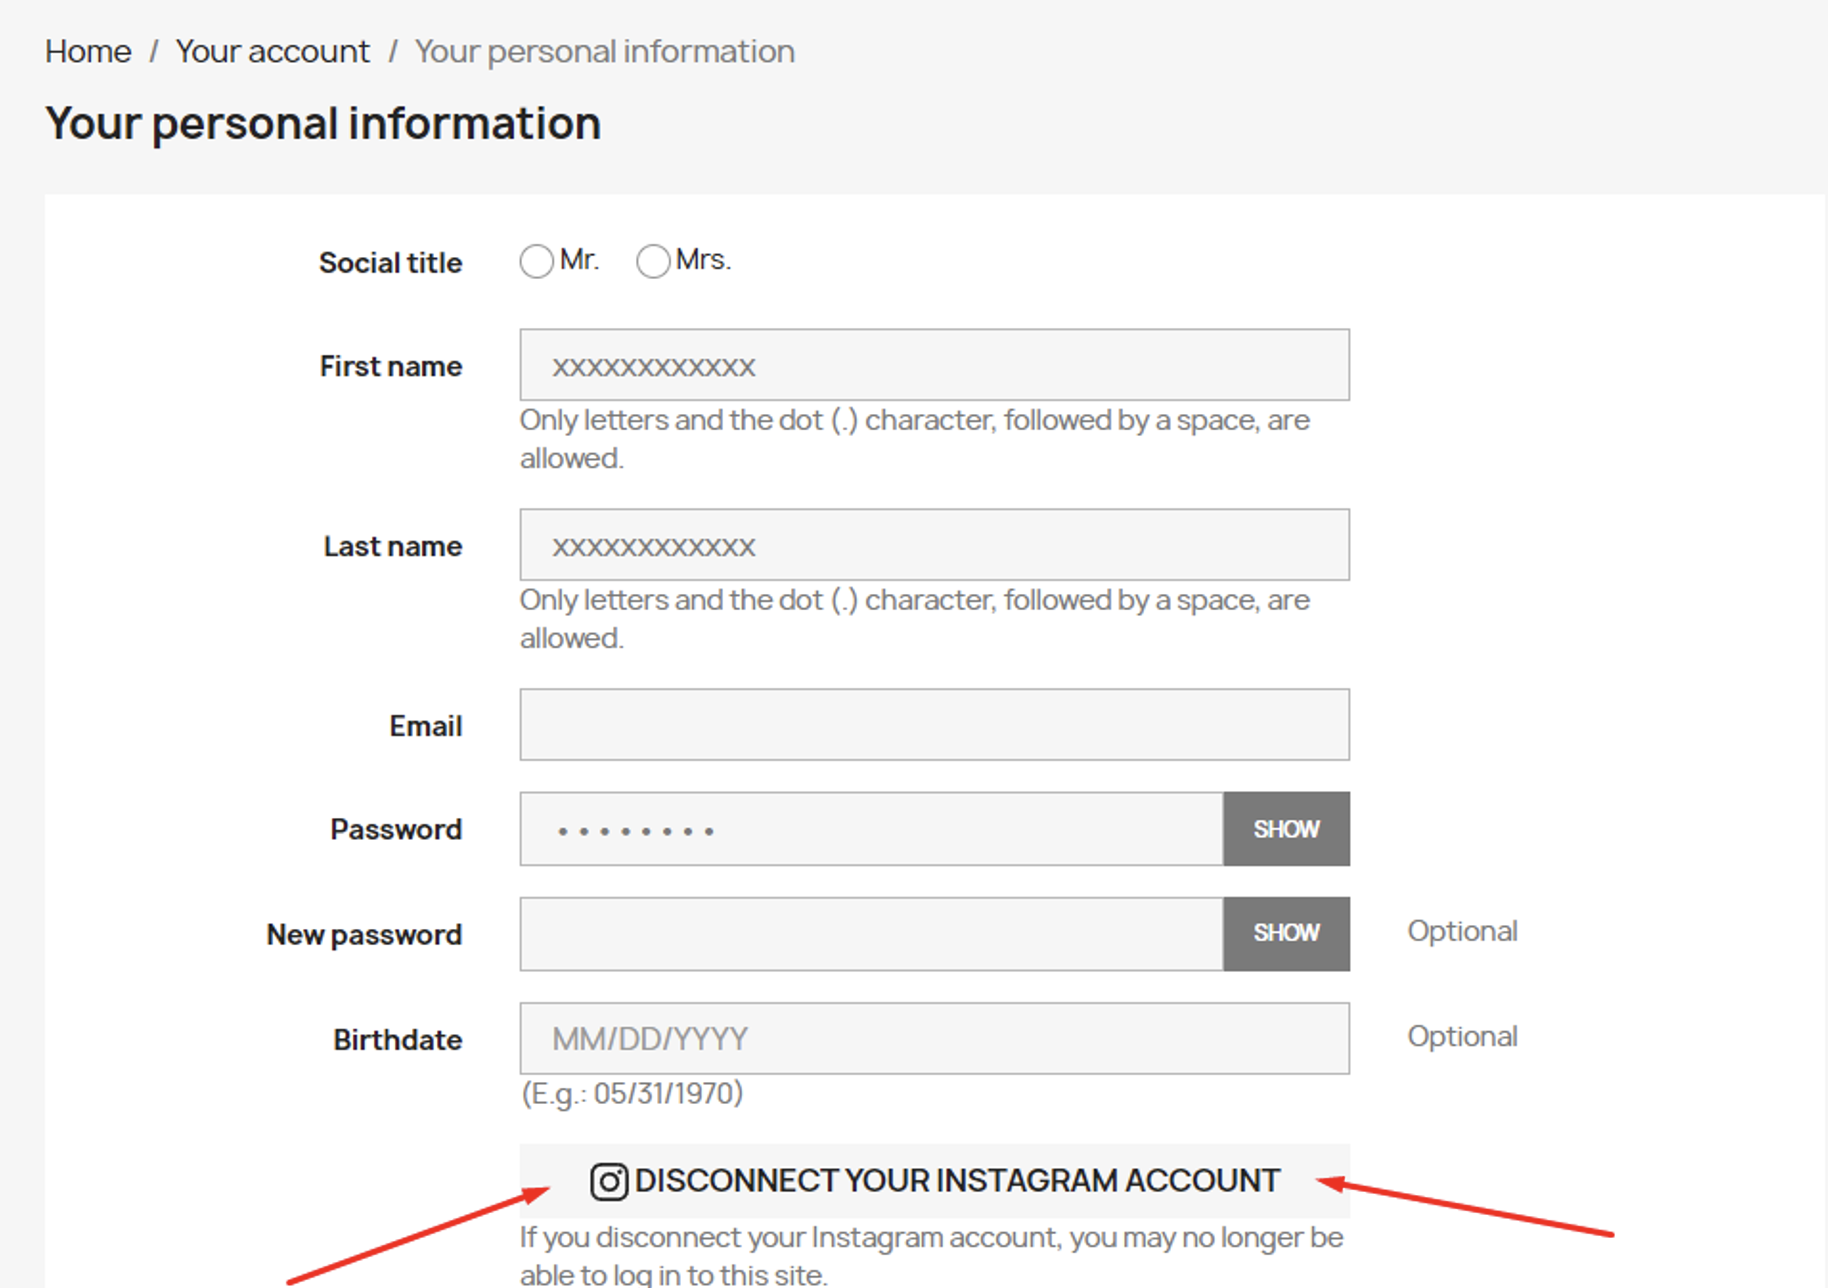
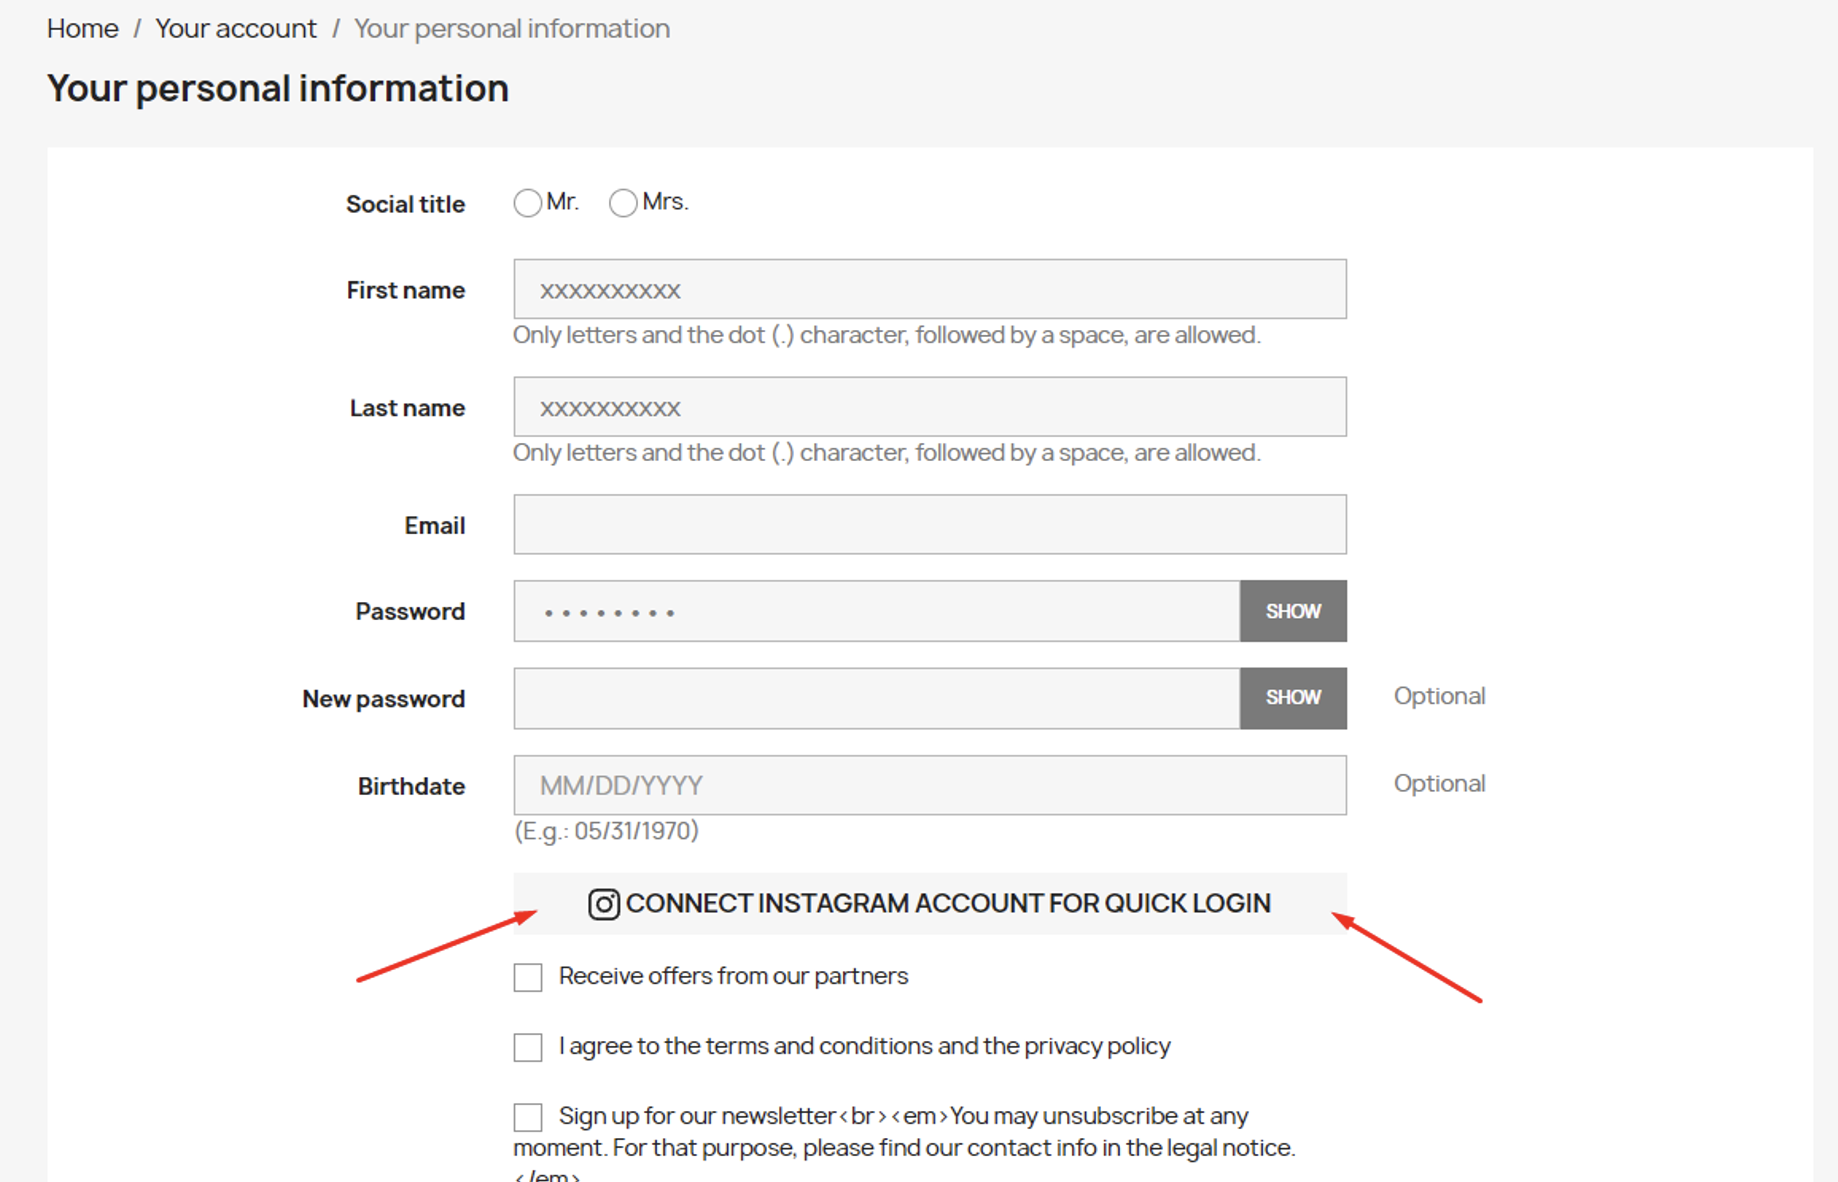
– Users can link or unlink their Instagram account on the “Your personal information” page:
4. User Unlinked Instagram Account:
– If the user logs in using Instagram again, the Instagram connection to the existing customer account will be restored.
– If the user creates a new customer account using the standard method and links their Instagram account, the previous customer’s account will be deleted if it lacks an email. If the previous account has an email, both accounts will remain active.
5. Customer Account Deletion:
– Deleting a customer account in Prestoshop removes the Instagram account connection from the database.
6. Module Settings Change:
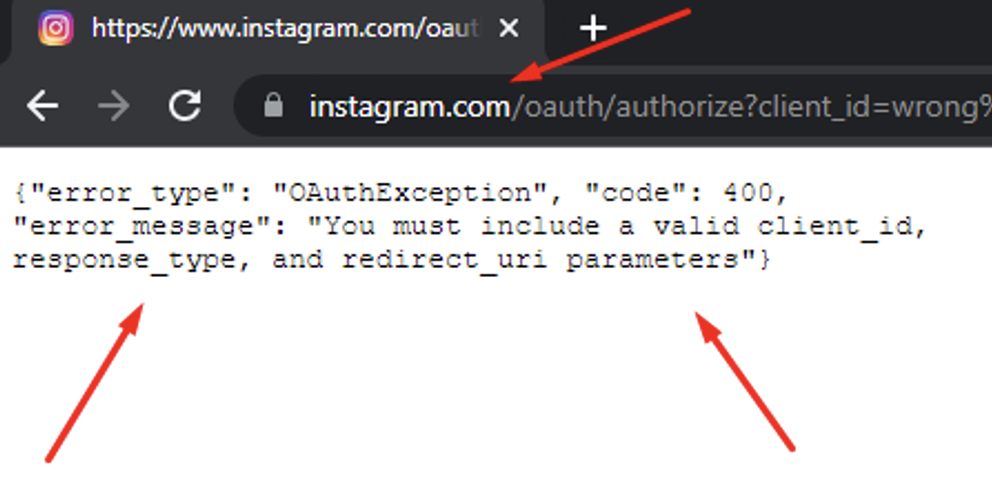
– Changing Instagram App ID or Instagram App Secret to new values results in the loss of all customer account bindings to Instagram.
– Incorrect entries or misconfigured Instagram application settings redirect users to Instagram with an error:
35$ Buy it now!

